http://www.youtube.com/watch?v=Ahtwle-S9pY
The verisimilitude of our photomontages depends directly on the integration of the elements that make up our composition. Especially in the construction of realistic cut images, this idea is essential. For this, Photoshop provides us with several tools such as layer blending modes, layer masks, contrast-lighting curves, and variations parameters. Learning to master all these types of adjustments will help us create visually coherent images.
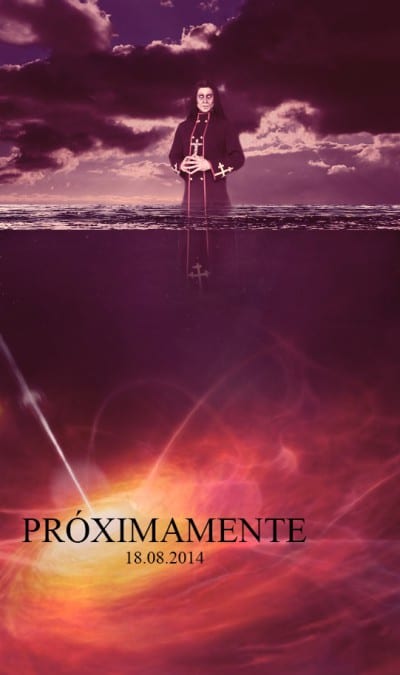
To work this technique, I bring you this simple Photoshop CC video tutorial. In it, I will explain how to create a promotional poster using mainly layer masks. We will work on spatial integration (inserting objects under water), chromatic and light through the effect of variations (unifying the composition). The basic steps to carry out the project are:
- We create a new project with dimensions of 544 × 914 pixels, with 72 pixels per inch, RGB color, 8 bits and transparent background.
- We import the sea image and distort it using the tool transformation (Ctrl + T), to create depth.
- We cut out the main character using the tool Magic wand and we place it under the sea layer.
- We press Ctrl and click on the character's layer to select his figure.
- We go to the "Sea" layer and create a layer mask. Next we double click on our layer mask and click on invert.
- We use the black brush tool with a 100% opacity and a width similar to the Sea layer to superimpose the sea surface on our character.
- We import the image of the seabed and place it under the rest of the layers. We transform it until we cover the lower part of the composition.
- We create a layer mask on the character layer, we choose black brush with 35% opacity and we proceed to give the protagonist a marine hue.
- We duplicate the sea layer and apply the effect of Gaussian blur with a 5 pixel setting.
- We fill the layer mask of this copy with black by pressing Shift + F5. Then, we choose a small white brush to go over the edge that separates the seabed and the surface.
- We import the sky image. We cut out the cloud area and transform the image with Ctrl + T.
- We press again Ctrl and click on the character's layer to select his figure.
- We create a layer mask in the sky layer and double click on it and then click "to invest".
- We select a white brush and proceed to erase that halo around the character.
- We import, transform and place the "fireball" image. We create a layer mask and select a brush with a 35% opacity to merge this image with the seabed.
- We select all the layers, press the right button and click on "combine layers".
- Let's go to Variations (Image> Adjustments> Variations) and we apply the desired tones in the highlights, midtones and highlights sections.
And we have already created our poster! Do you dare to do it?

For the white border that stays around the character, isn't it much cleaner, more efficient and at the same time it would serve to deepen a little more in the options offered by the masks, use «refine - Mask border», inside the panel of masks?
It is a mere observation of mine :) A hug and a good tutorial.!