
Work with rulers in Photoshop In a professional way, it is essential to achieve a good graphic result when printing a document and even its digital version, correctly placing the security areas in the correct way to avoid errors in reading and finishing.
Photoshop allows us to place the rules in a fairly automated way, this process being a fundamental part of the design process since a graphic project must meet some fundamental technical parameters. Learn to work with Photoshop professionally in a simple and practical way.
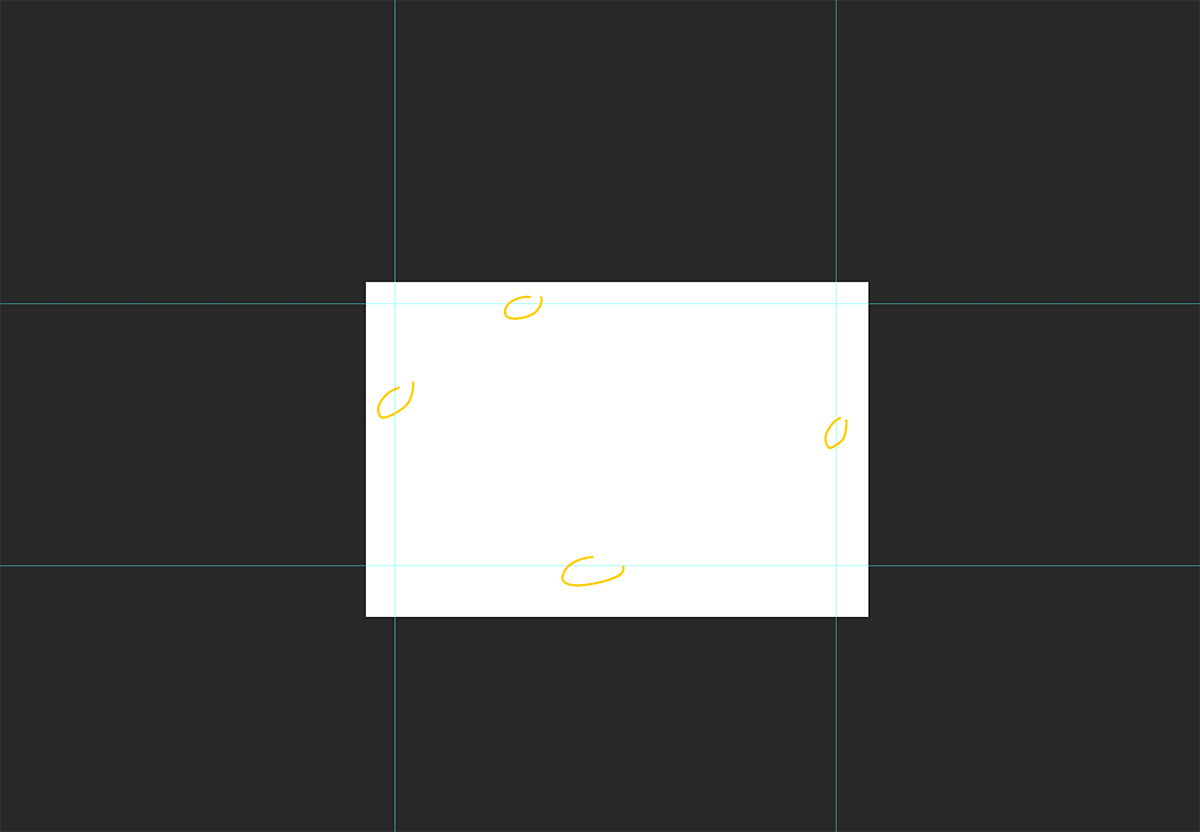
When starting a graphic project the first thing to do is create the document with its format (size) determined, after this we must mark the bleeding zone (cut) and the security zone for texts, this part is essential to avoid losses in the guillotining (cutting) process.
With this in mind, the first thing we should do define the value of our rules in Photoshop, It is not the same to work with pixels for a digital design than to work with cm for a printed design.
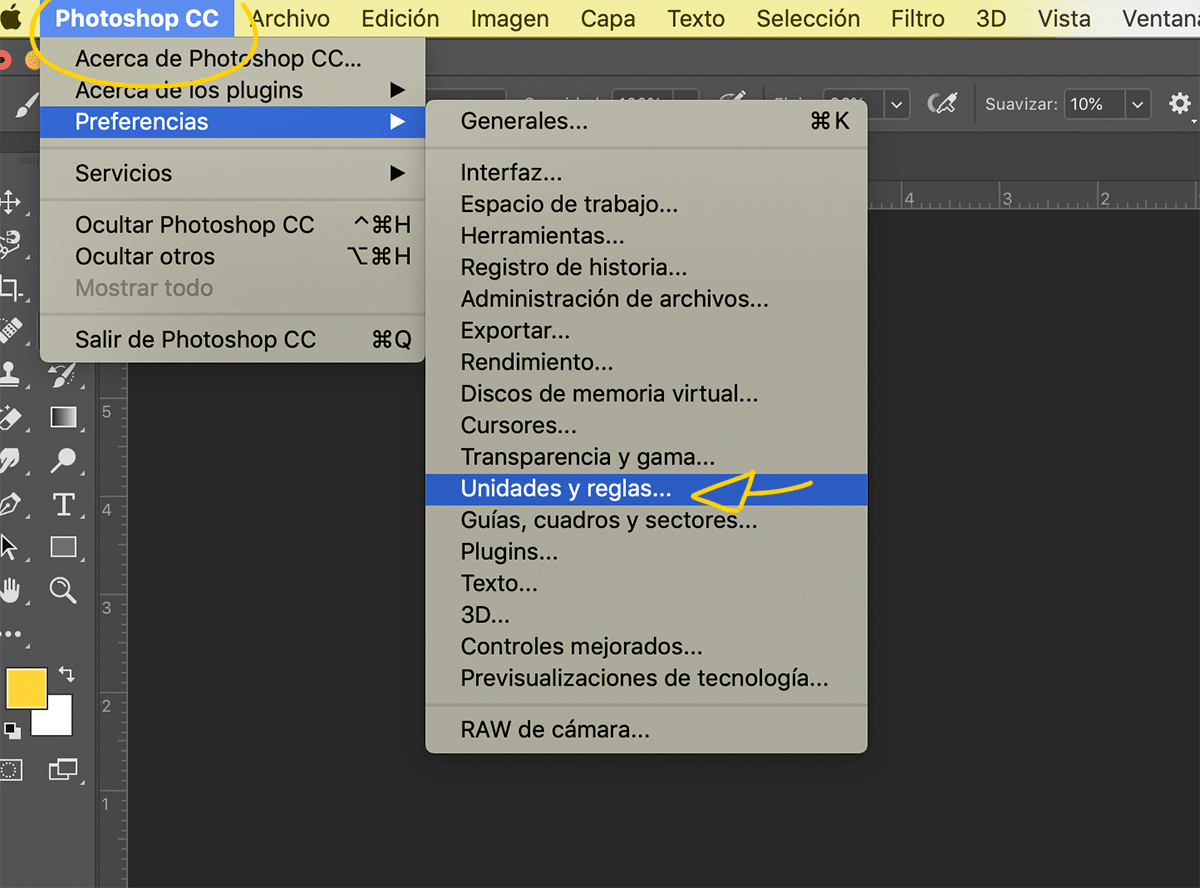
To access this menu what we have to do is click on the upper part of Photoshop and look for the option "Preferences / Units and Rules."
The next thing we have to do is choose metric unit we are interested in our project, the ideal is to use the unit in pixels in digital projects and in the printed projects the unit in mm or cm.

Once we have defined the metric value of our rules, the next thing we have to do is start to take out the rules, we can do this in two ways: manually or in an automated way.
If we want to do it manual way all we have to do is drag the rules by pressing on them, when we do this we can see the distance and define it at our choice. It is possible that our rules are hidden, to be able to remove them we press the shortcut: control + R (PC) or command + R (MAC).

There is a more precise way when it comes to work with guides, being able to insert the measurements manually to avoid possible errors that may occur manually.
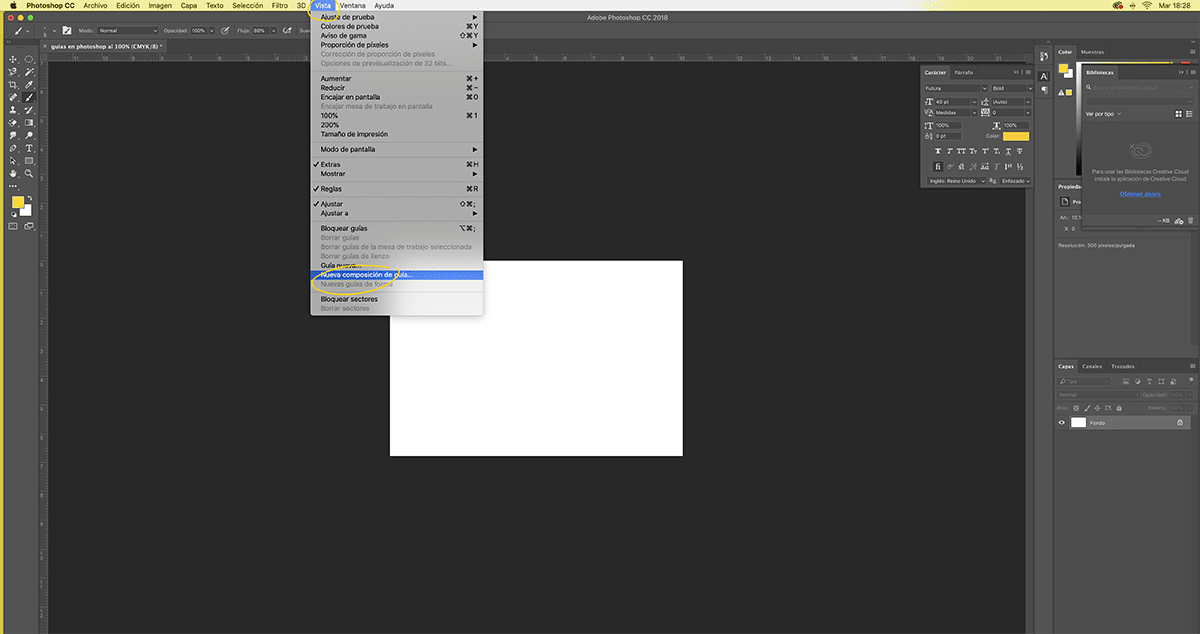
To place the guides in this second way, what we must do is click on the menu top view / new guide. Once we click on this option, a new window will open where we can place the measures of the rules by writing the numerical value horizontally or vertically.

There is an even faster way to work with rulers in Photoshop. This last form allows us to place multiple rules together. This system is ideal for placing margins throughout the document and security areas to avoid losses in the cutting process.
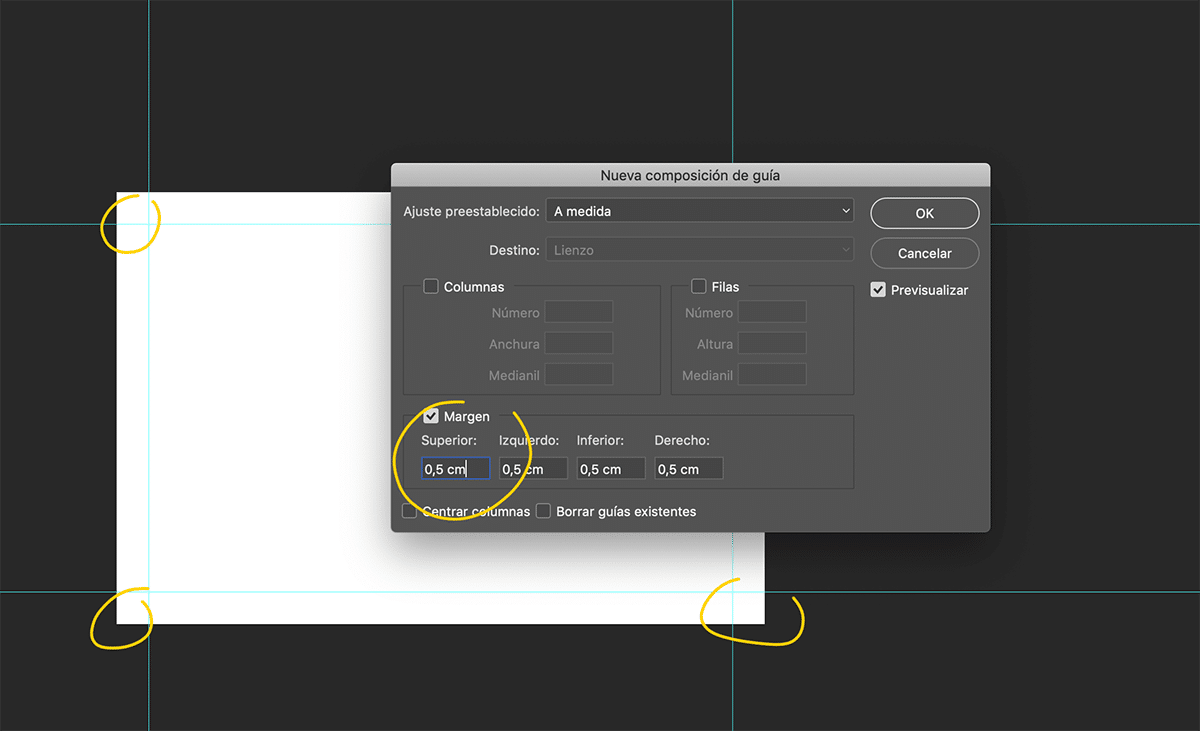
To get these rules we have to click on the option "New guide composition", followed by this a new window will open where we can place the values of the guides according to our needs.
If we look closely at the new window our shows a part for the document margin, This part is essential to place the cutting and safety margins in a fast and automated way because we will put them all at the same time and not one by one as in the other ways we have seen previously.
Once we have placed all the guides, we have the document ready to start designing in a safe and professional way, respecting the safety zones that will ensure that our design does not have any loss in the cutting process.
It is necessary to know the safety margins when designing, these margins may change depending on the design that we are going to make. The most common and standardized is to use for the small format such as cards, flyers, diptychs ... etc 5mm of blood for the cut and 4mm more for the safety zone of the text. Therefore we must leave 9mm of margin to avoid losses in the cut.