The bokeh effect it has become in these years in which some manufacturers of telephones boast when they show their news for the mobile phone market. There are many apps and those same phones that include this effect as standard so that we can share our photographs on social networks and the network of networks.
Although we always have our Adobe Photoshop to be able to clarify and create a bokeh effect with a better finish than some apps suggest. That is why we are going to teach you how to add the bokeh effect to an image in this program of such magnitude, just like we did with this tutorial, and that has been able to change the spectrum of design, illustration and retouching in these past decades.
How to add the bokeh effect to an image
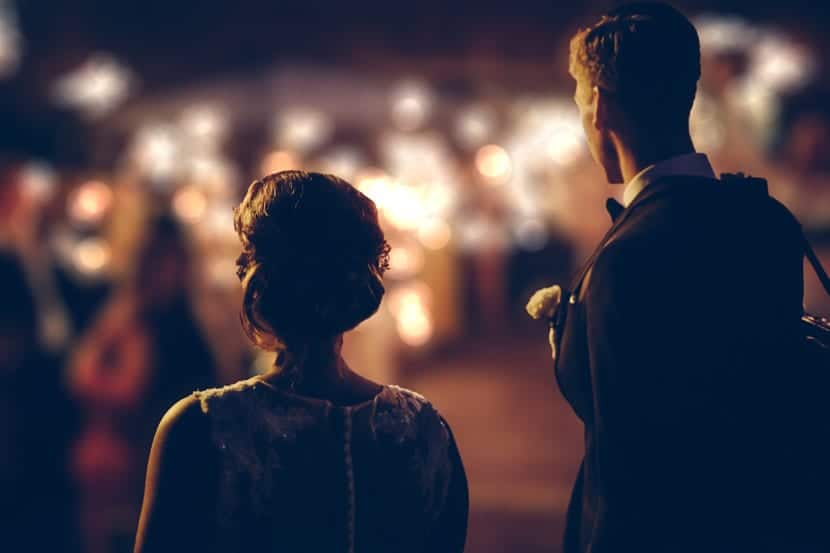
First we are going to share the image that you can download and use to follow the tutorial and so fiddle with some of the values:

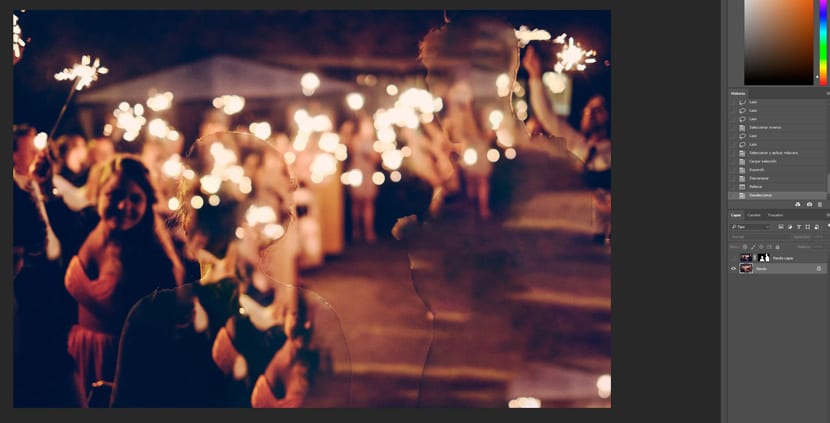
- The first thing is to select the quick selection tool with the W key.
- We repeatedly click on the background of the image while holding down the shift key.

- If we go over the selection, when we adjust it more for the figure of the couple, we can use alt plus mouse click to delete some section.
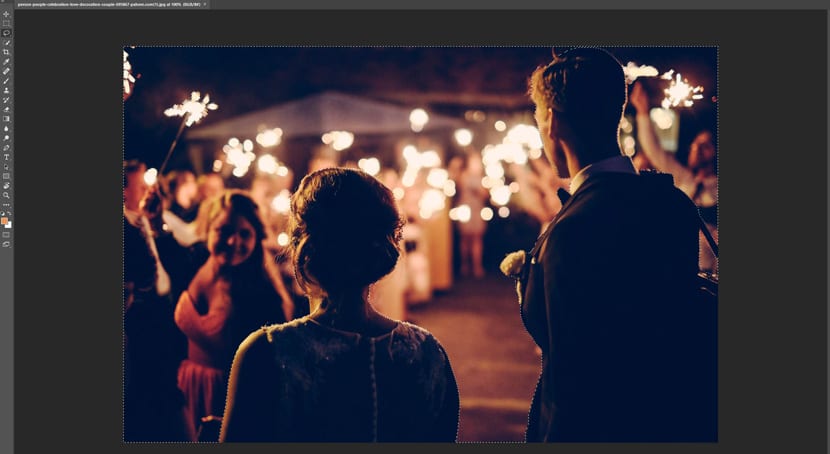
- Once the background is selected, we invert the selection with control + uppercase + I.
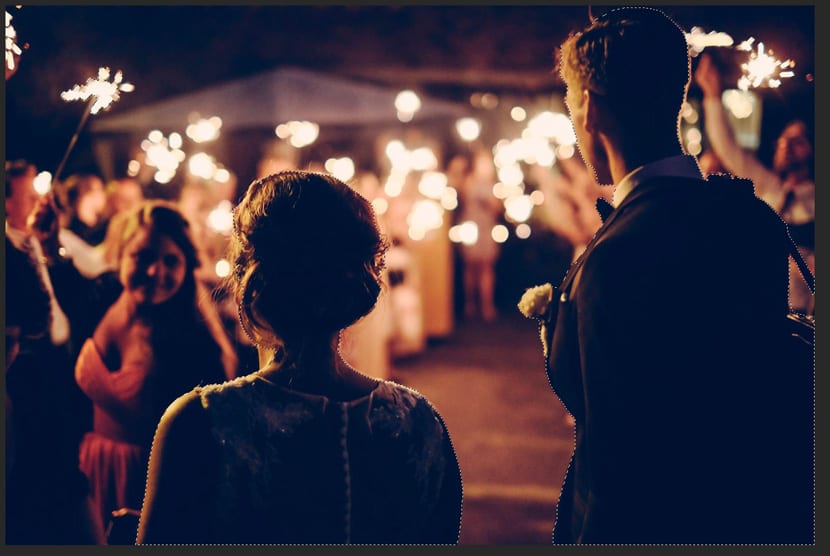
- Now we press the W key again, and press on the top button «Select and apply ...».
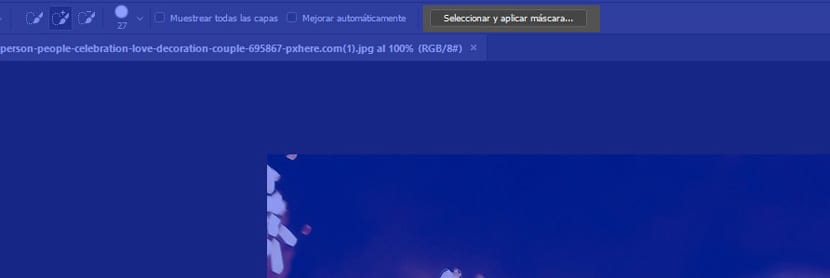
- In the pop-up window we apply a 4px radius.
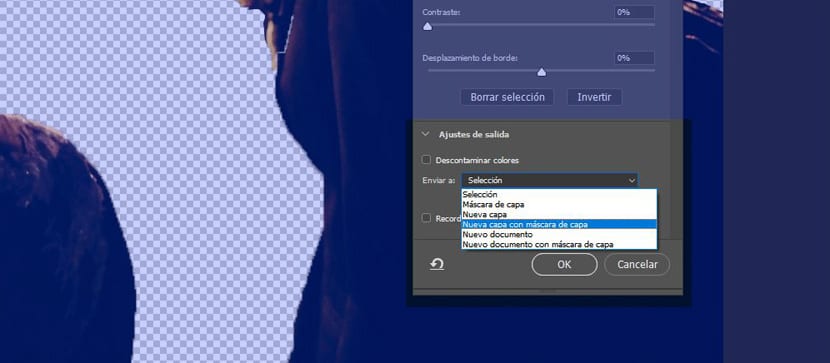
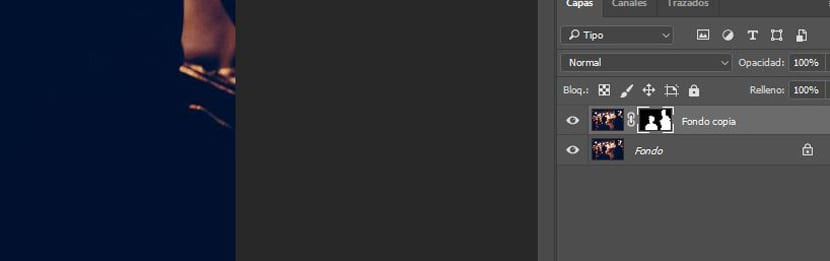
- Further down in the window, we extend "Output settings" and in Send to, we choose "New layer with layer mask".
- Now control + click on the mask created on the layer to have the selection again and select the background.
- We now go to Selection> Modify> Expand> 1pixel.
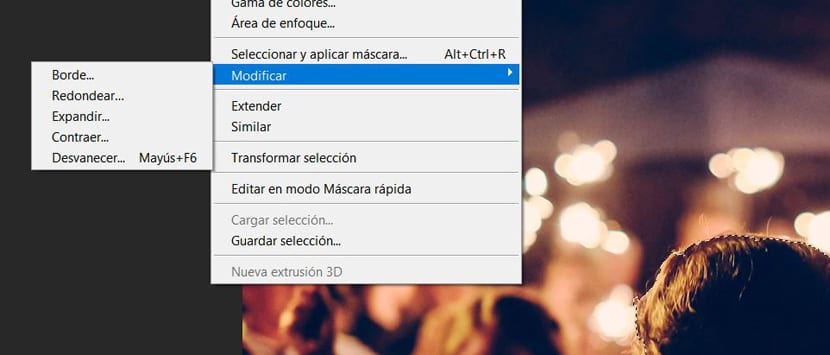
- Back to the same site, but we chose Fade> 1pixel.
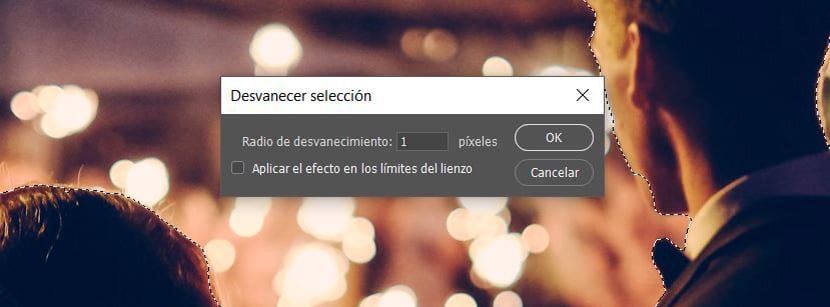
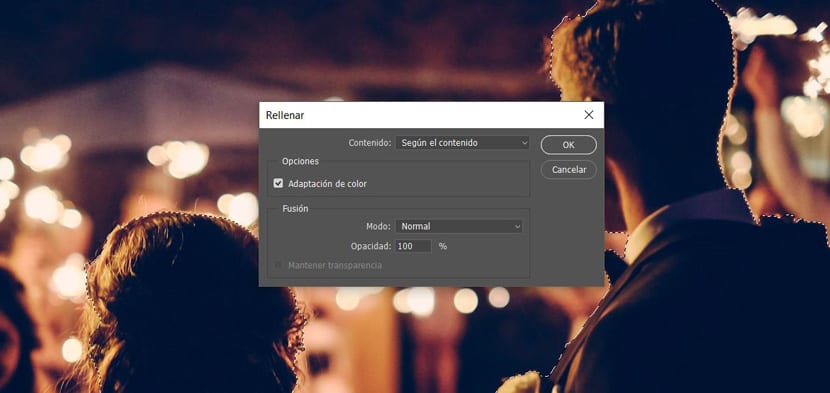
- Now we check the selection made with uppercase + backspace to fill.
- In the next window we choose in Content to According to the content and click OK.
- We remove the layer visibility to the mask, and we will have to see the figure well detailed when eliminating the selection with control + D.
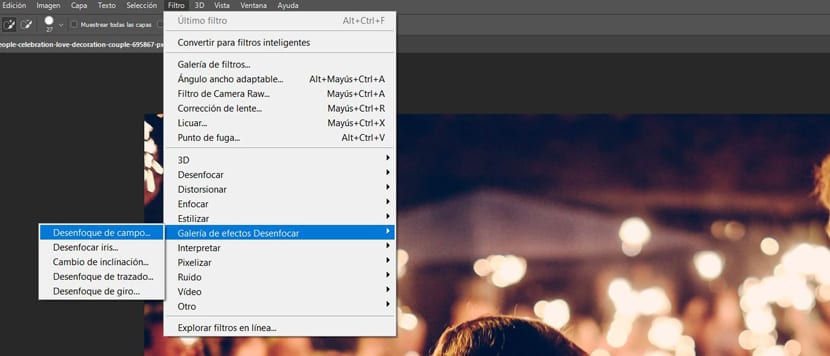
- Now in the background layer we choose Filters> Blur effect gallery> Field blur.
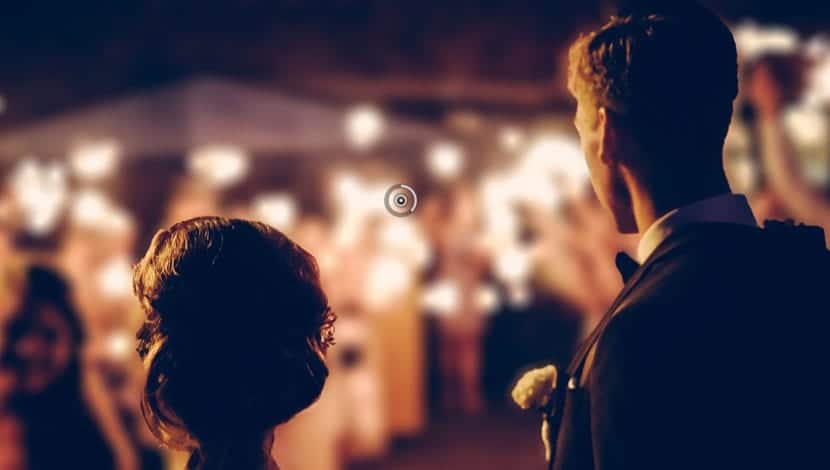
- We move the center a little up.
- Now we head to Soft Bokeh to move it up to 65%.
- In the light range we leave the two sliders on 195.
- And in Blur, about 32 pixels.
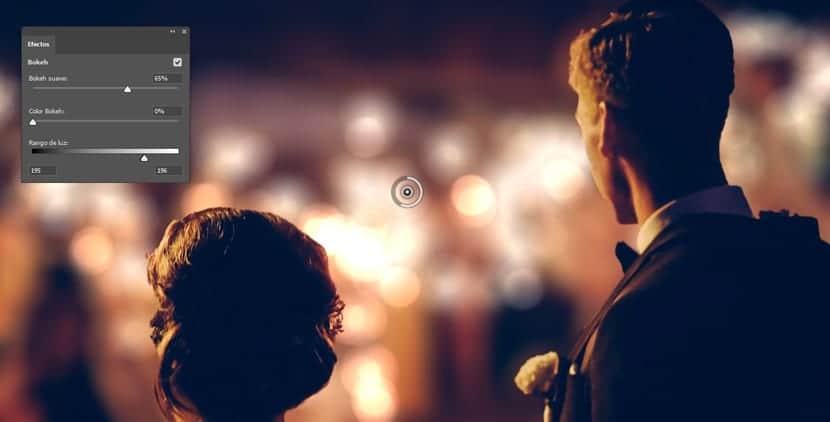
- We apply the blur in OK. This is the final result:
The bokeh effect it will depend on the photograph we have, so it's a matter of testing until you find the desired effect with those last three parameters.