El double exposure effect allows you to give an artistic touch and loaded with meaning to a photograph. We have been able to see it, for example, in the head of series as I am alive (RTVE) or T (HBO). It looks so good that you might think that it is super difficult to do it, but no, just be organized and pay attention to the order of the layers. In this post I explain, step by step, how to create images with double exposure effect in Photoshop Test it!
Select subject, correct selection and create background

Previous note: If you use a color image, lower the saturation to the maximum (you can do this by going to image tab > adjustments > desaturate).
The first thing we will do is select the girl. You can use the “select subject” tool, is the fastest. There is a trick, which is the one that I have applied here, that helps you make perfect selections (I leave it in this linkOnce the subject is selected, we will go to the selection tab, we will look for the option «Modify» and we will contract the selection by about 2 px to avoid that we are left with a halo.
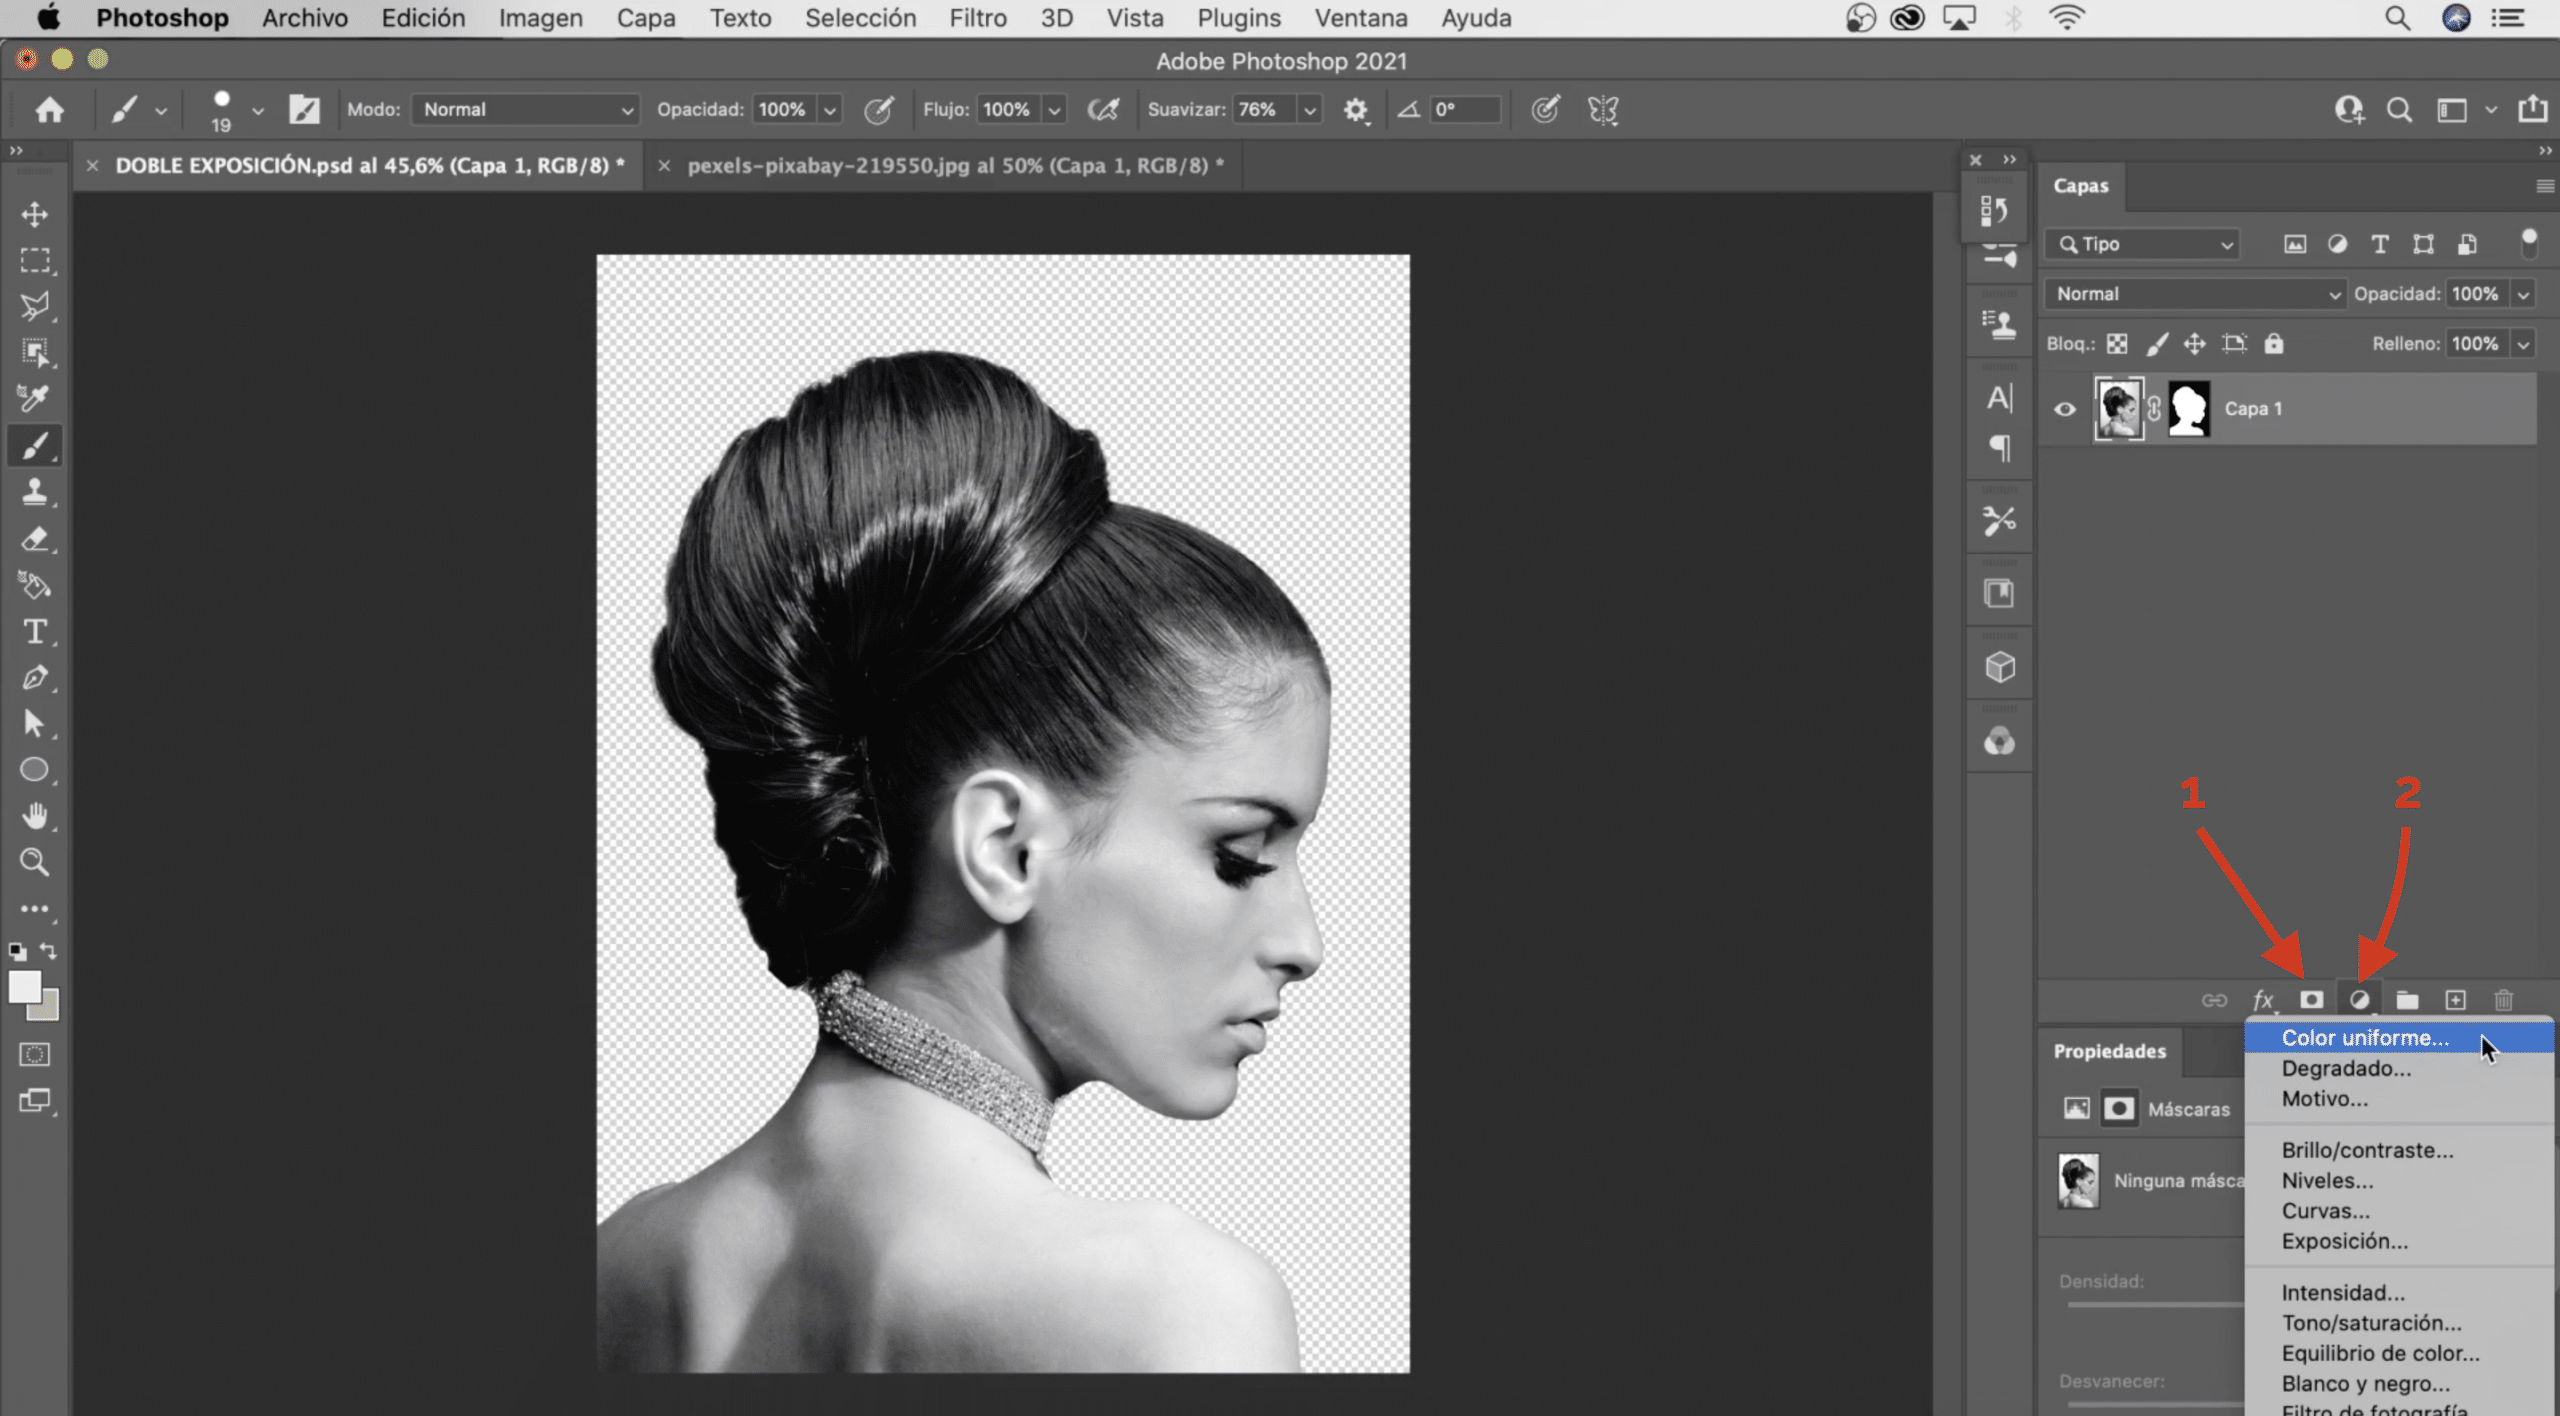
Now we need create a layer maskBy pressing the symbol that appears marked and indicated with the number «1» it will be created automatically. By clicking on the mask, with the brush, we will correct some flaws, for example the area of the nose, and we will eliminate details that do not add anything to the design we have in mind, such as the excess part of the necklace. Also removes the remains of hair that have been left above. Remember that with the black color we cover and with the white we leave the visible layer. Finally, press command + T (Mac) or control + T (Windows), to move the cape and avoid showing the dress of the girl. We will call this layer "layer 1".
Let create a background, you can give it the color you want, I have chosen to keep a white background. To create it, click on the sign that appears indicated in the image above with the number "2", select uniform color and a window will open for you to determine the color. We will call this layer "background".
Import second image, copy layer mask and change blending mode
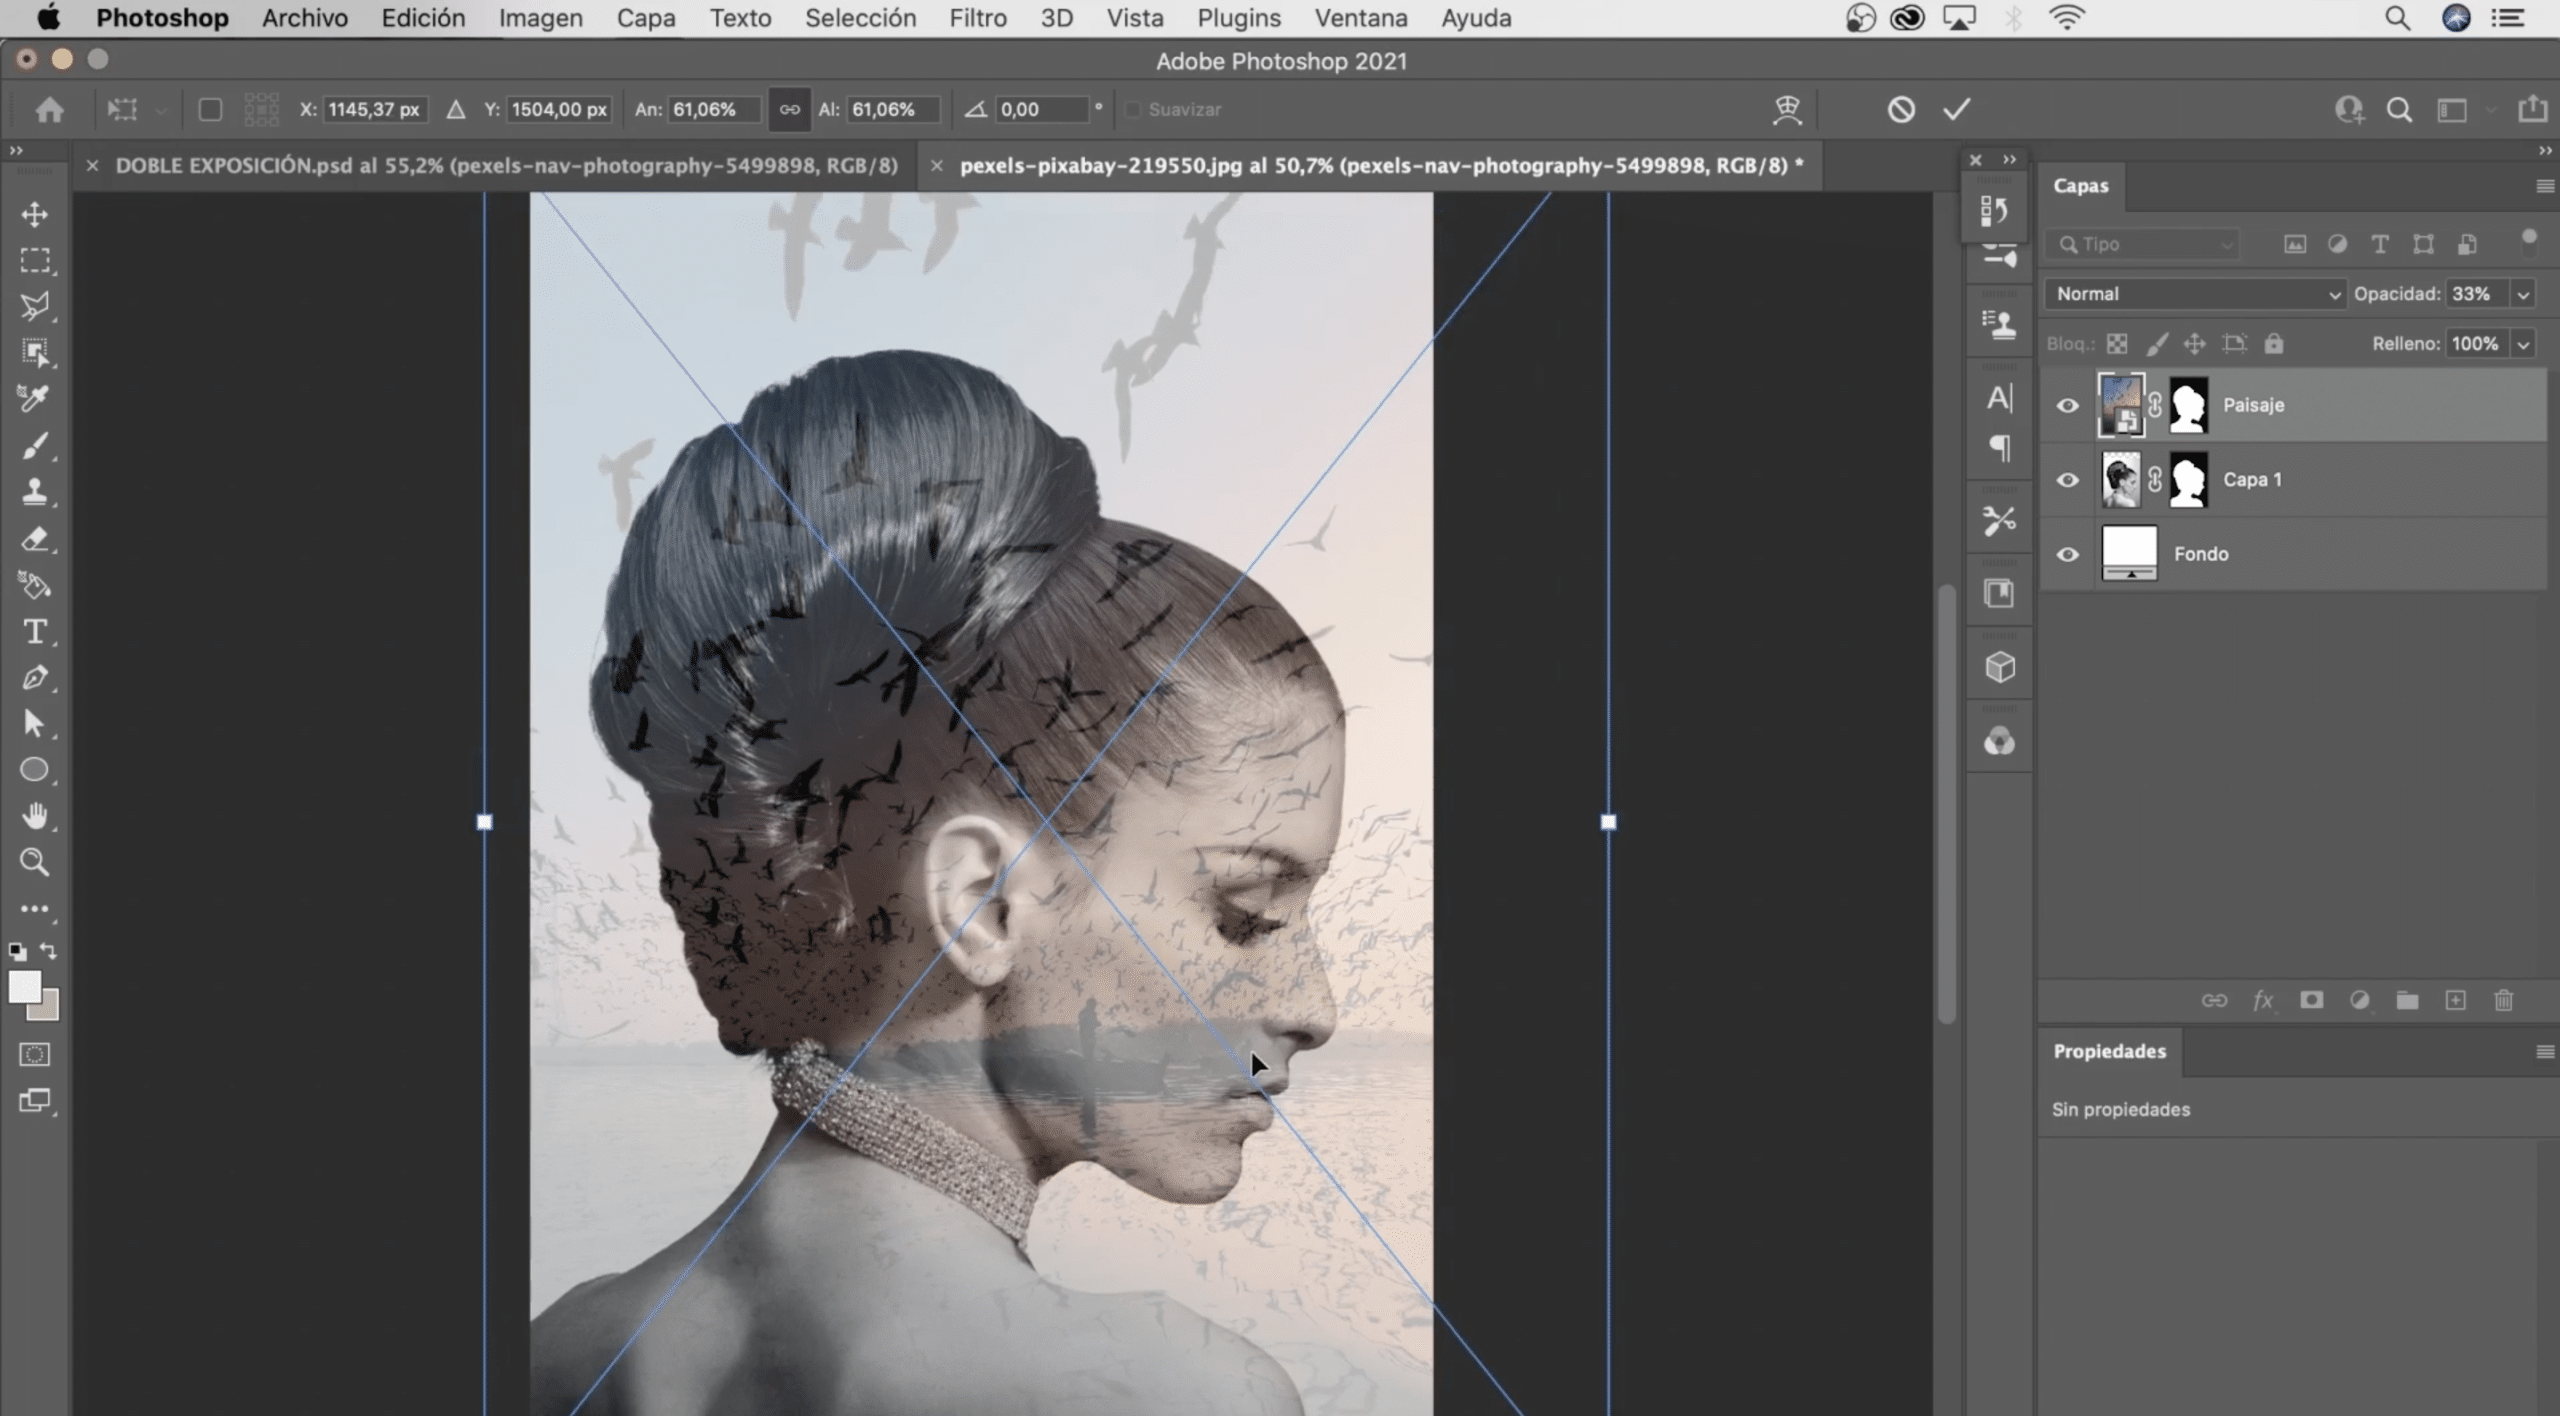
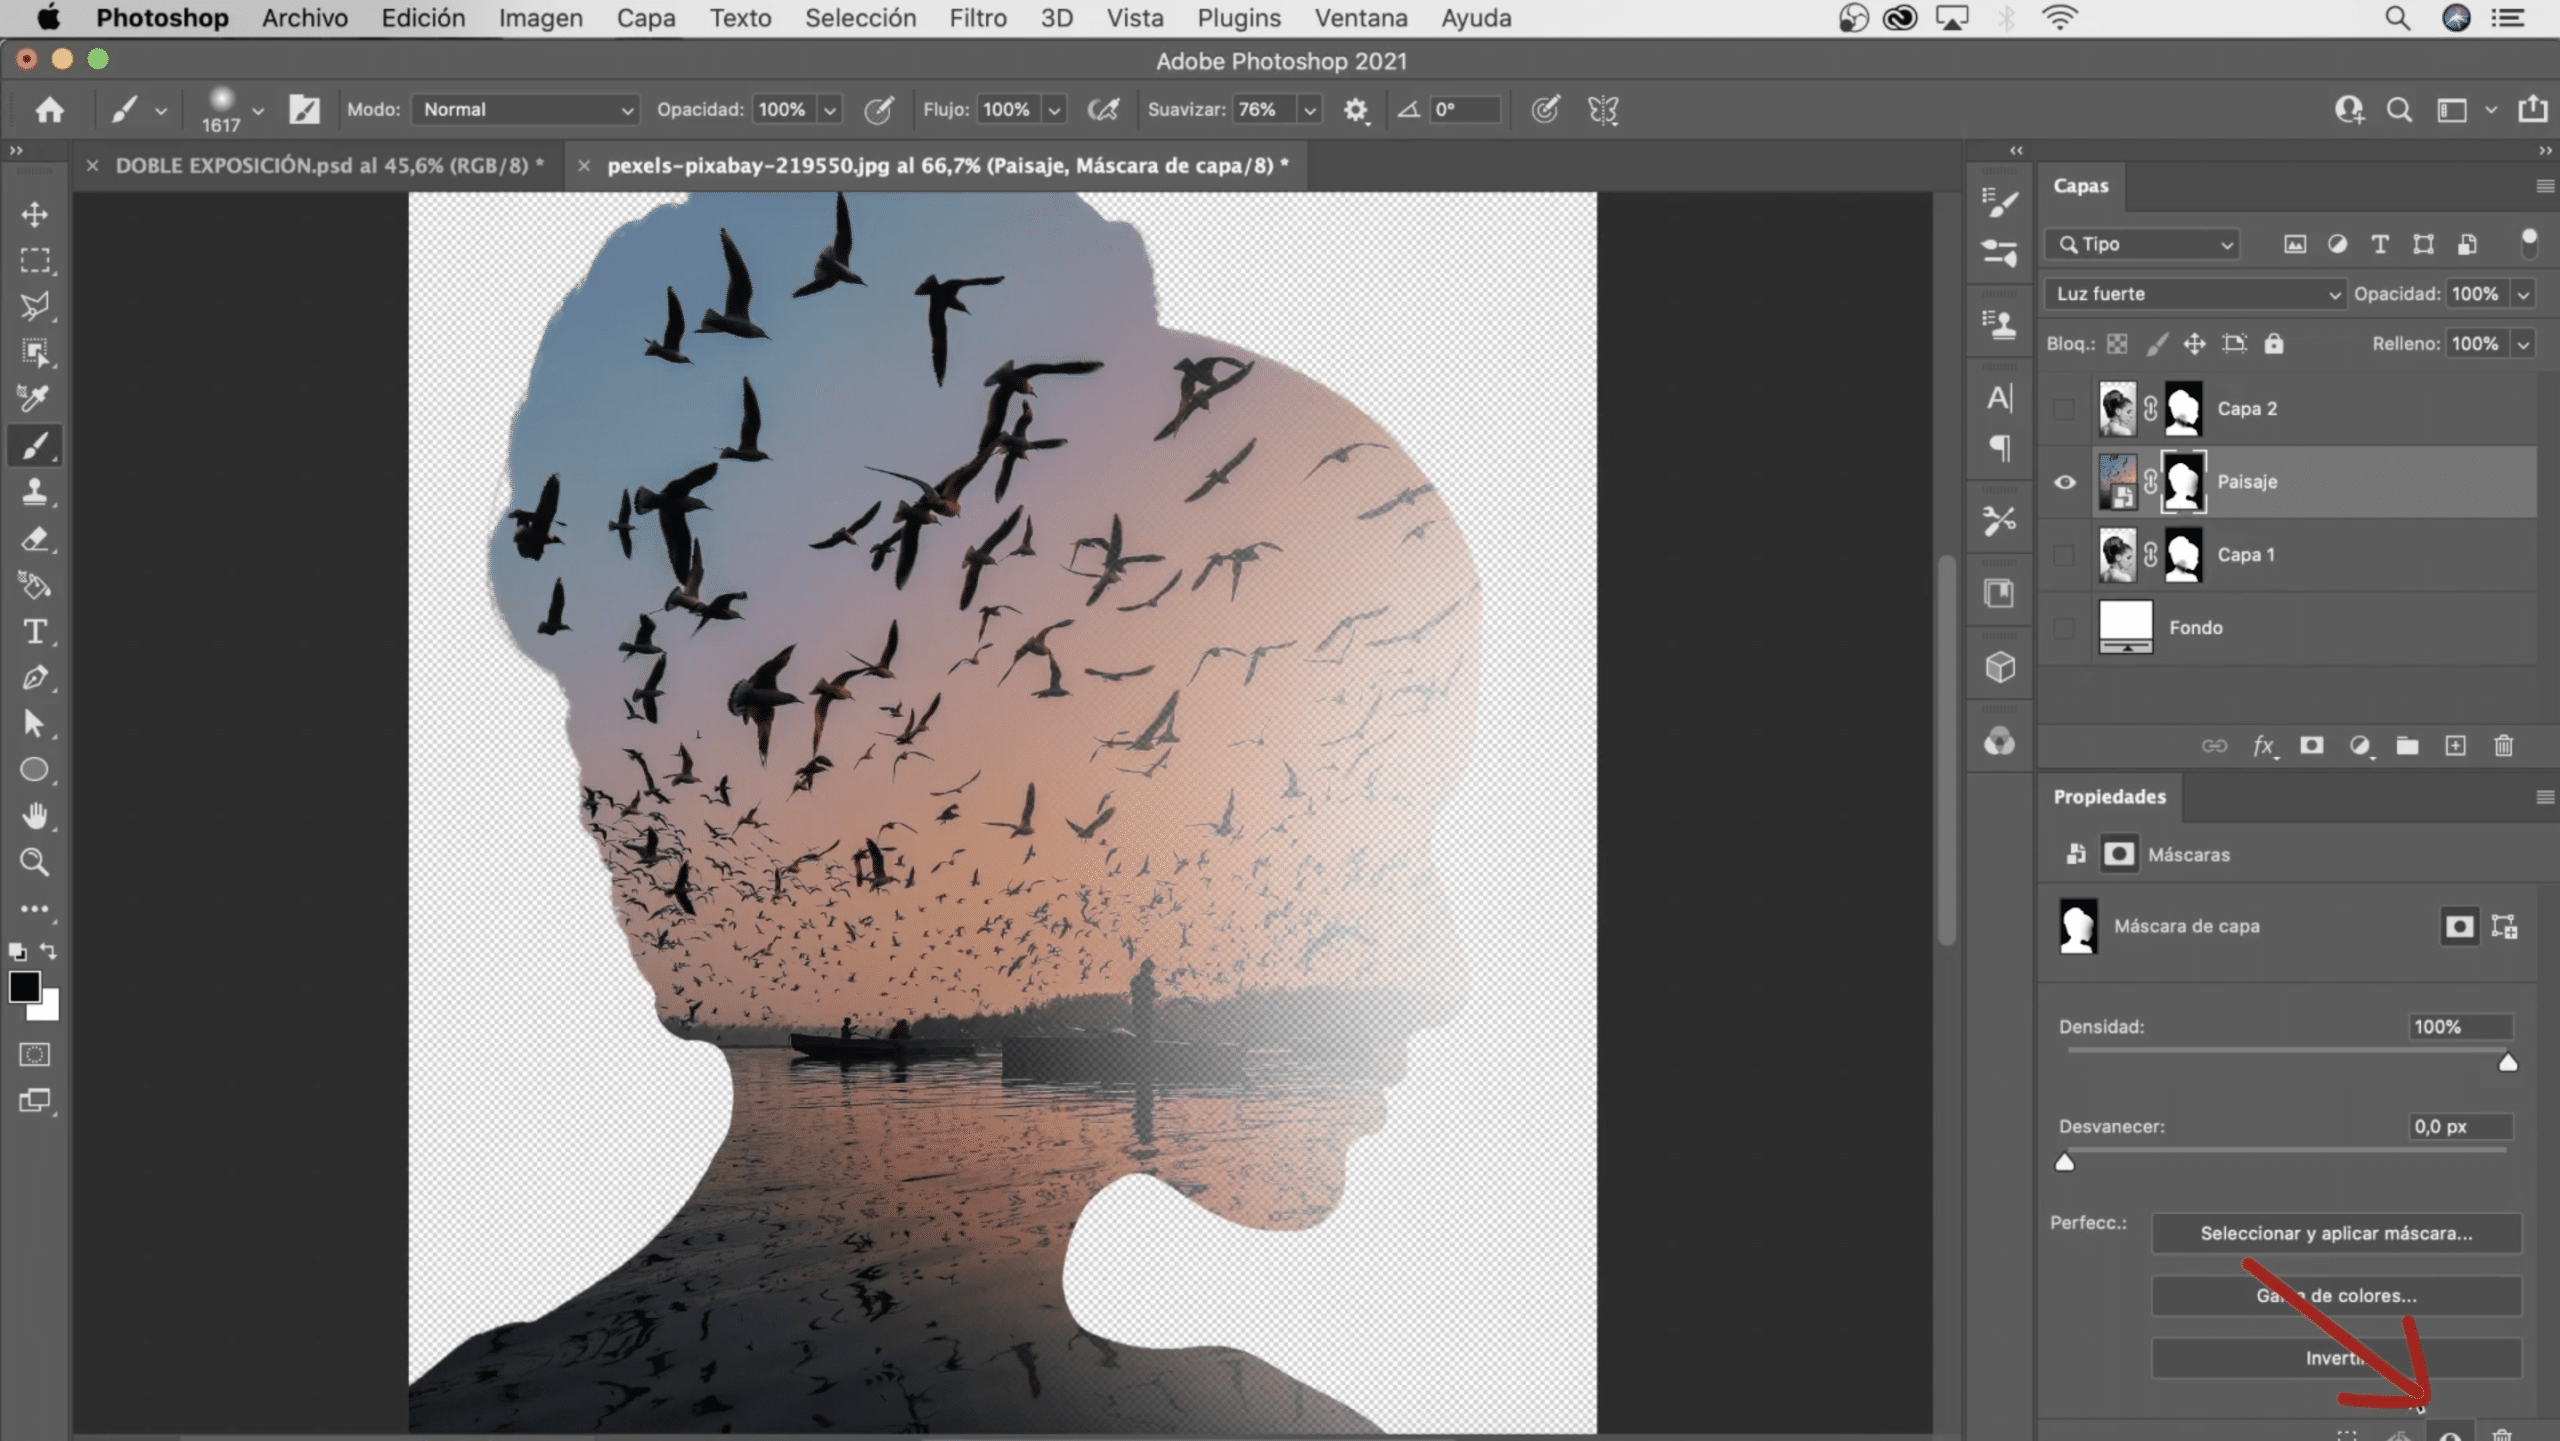
It's time import the image with which we are going to merge the photograph of the girl. I have chosen this landscape, normally with this type of designs the sunsets look very good. You can drag it directly and it will be added as a new layer, make sure it is above "layer 1" and name it "landscape«. Lower the opacity of the layer, to be able to see the «layer 1», and pressing command + T (Mac) or control + T (Windows), move it and change its dimensions so that it is to your liking (if you are going to enlarge or reduce its size, remember to press the option key, if you work on Mac, or alt, if you are with Windows, to avoid deforming).

Ah Orale We will return its original opacity (100%) and apply a copy of the layer mask over it that we had created in the «layer 1», you will only have to click on it and, holding down the option (Mac) or alt (Windows) key, drag it to the «landscape layer». Too we will modify the blending mode. Choose the one you prefer, it depends on the style you want to achieve, I recommend: soft light, strong light or superimpose. I have opted for strong light because I would like the colors of the sunset to be preserved.
Eliminate minor flaws and duplicate "layer 1"
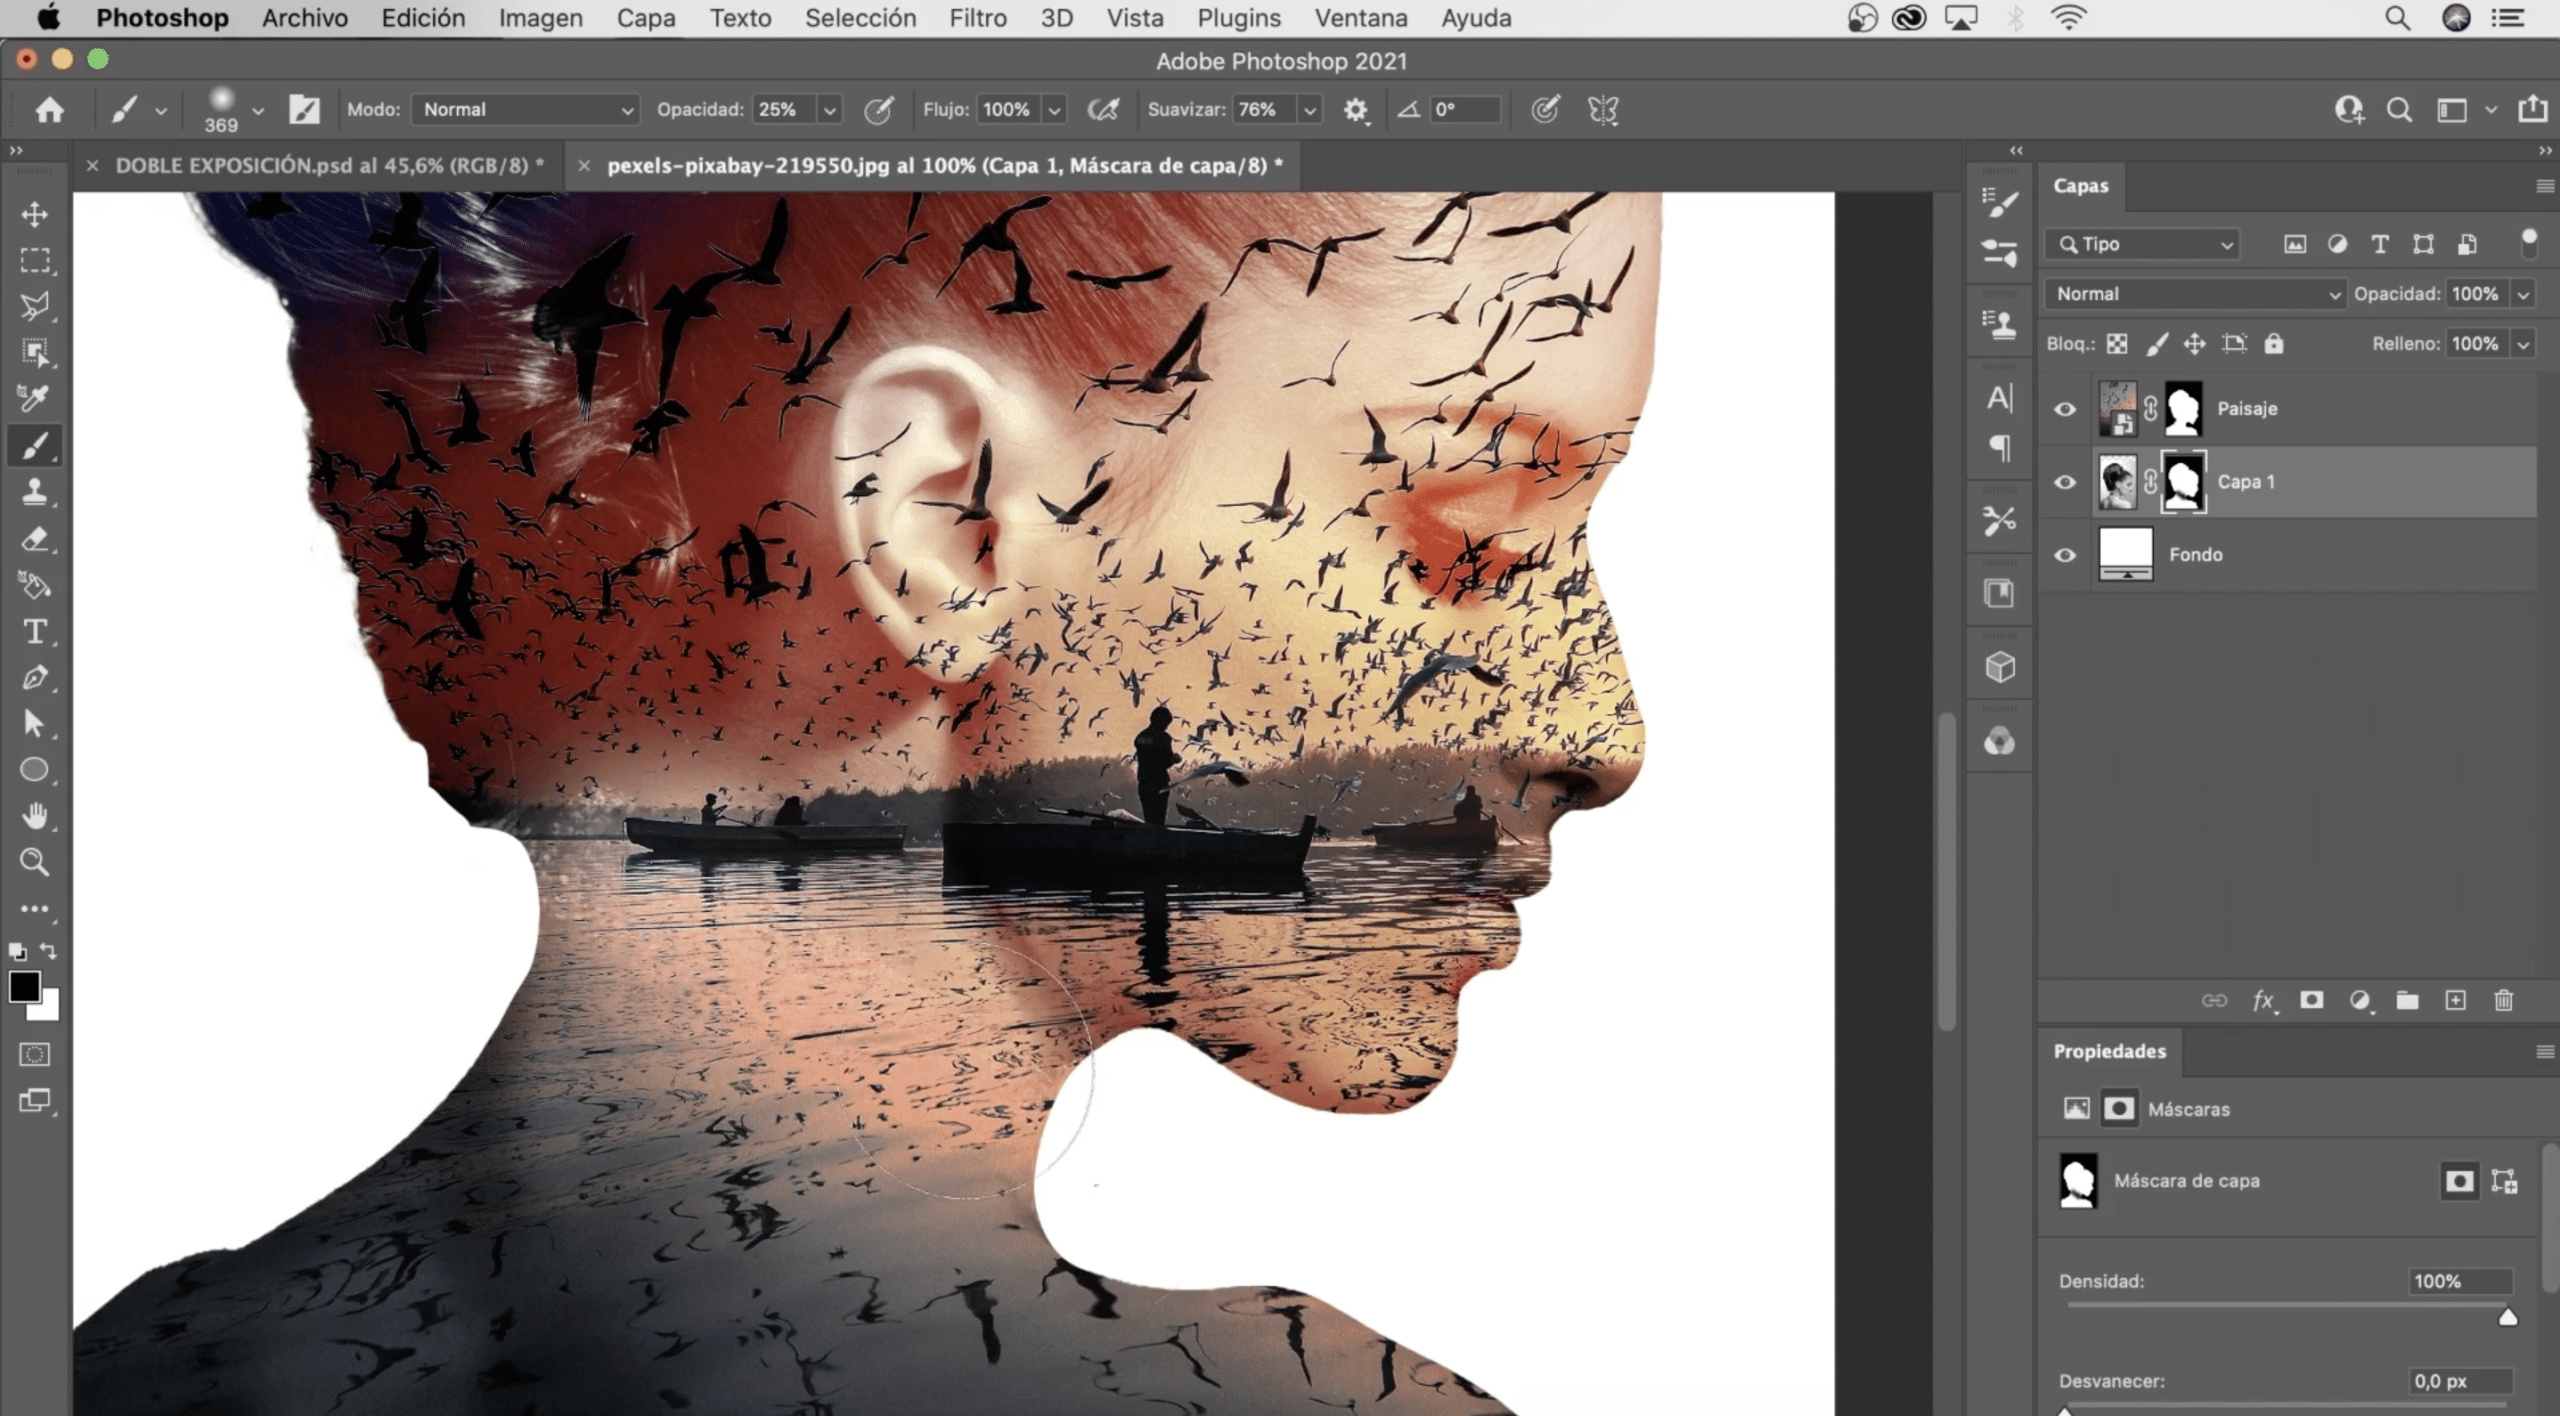
Do you remember the part of the necklace that I removed? I did it because the rhinestones on the necklace mask the landscape, we're going to remove it. Go to the layer mask of "layer 1" and select the brush. Change the settings in the tool options bar, choose a diffuse circular brush, increase the size quite a bit and lower the opacity to 25%. We are going to dab on the necklace until it disappears but without any unusual cuts or stains being noticed. Do the same in the lower part of the ear, which is very dark and also covers the landscape too much. When you finish duplicate layer 1, name it layer 2 and place it on the top.
Change opacity «layer 2» and improve visibility of the face
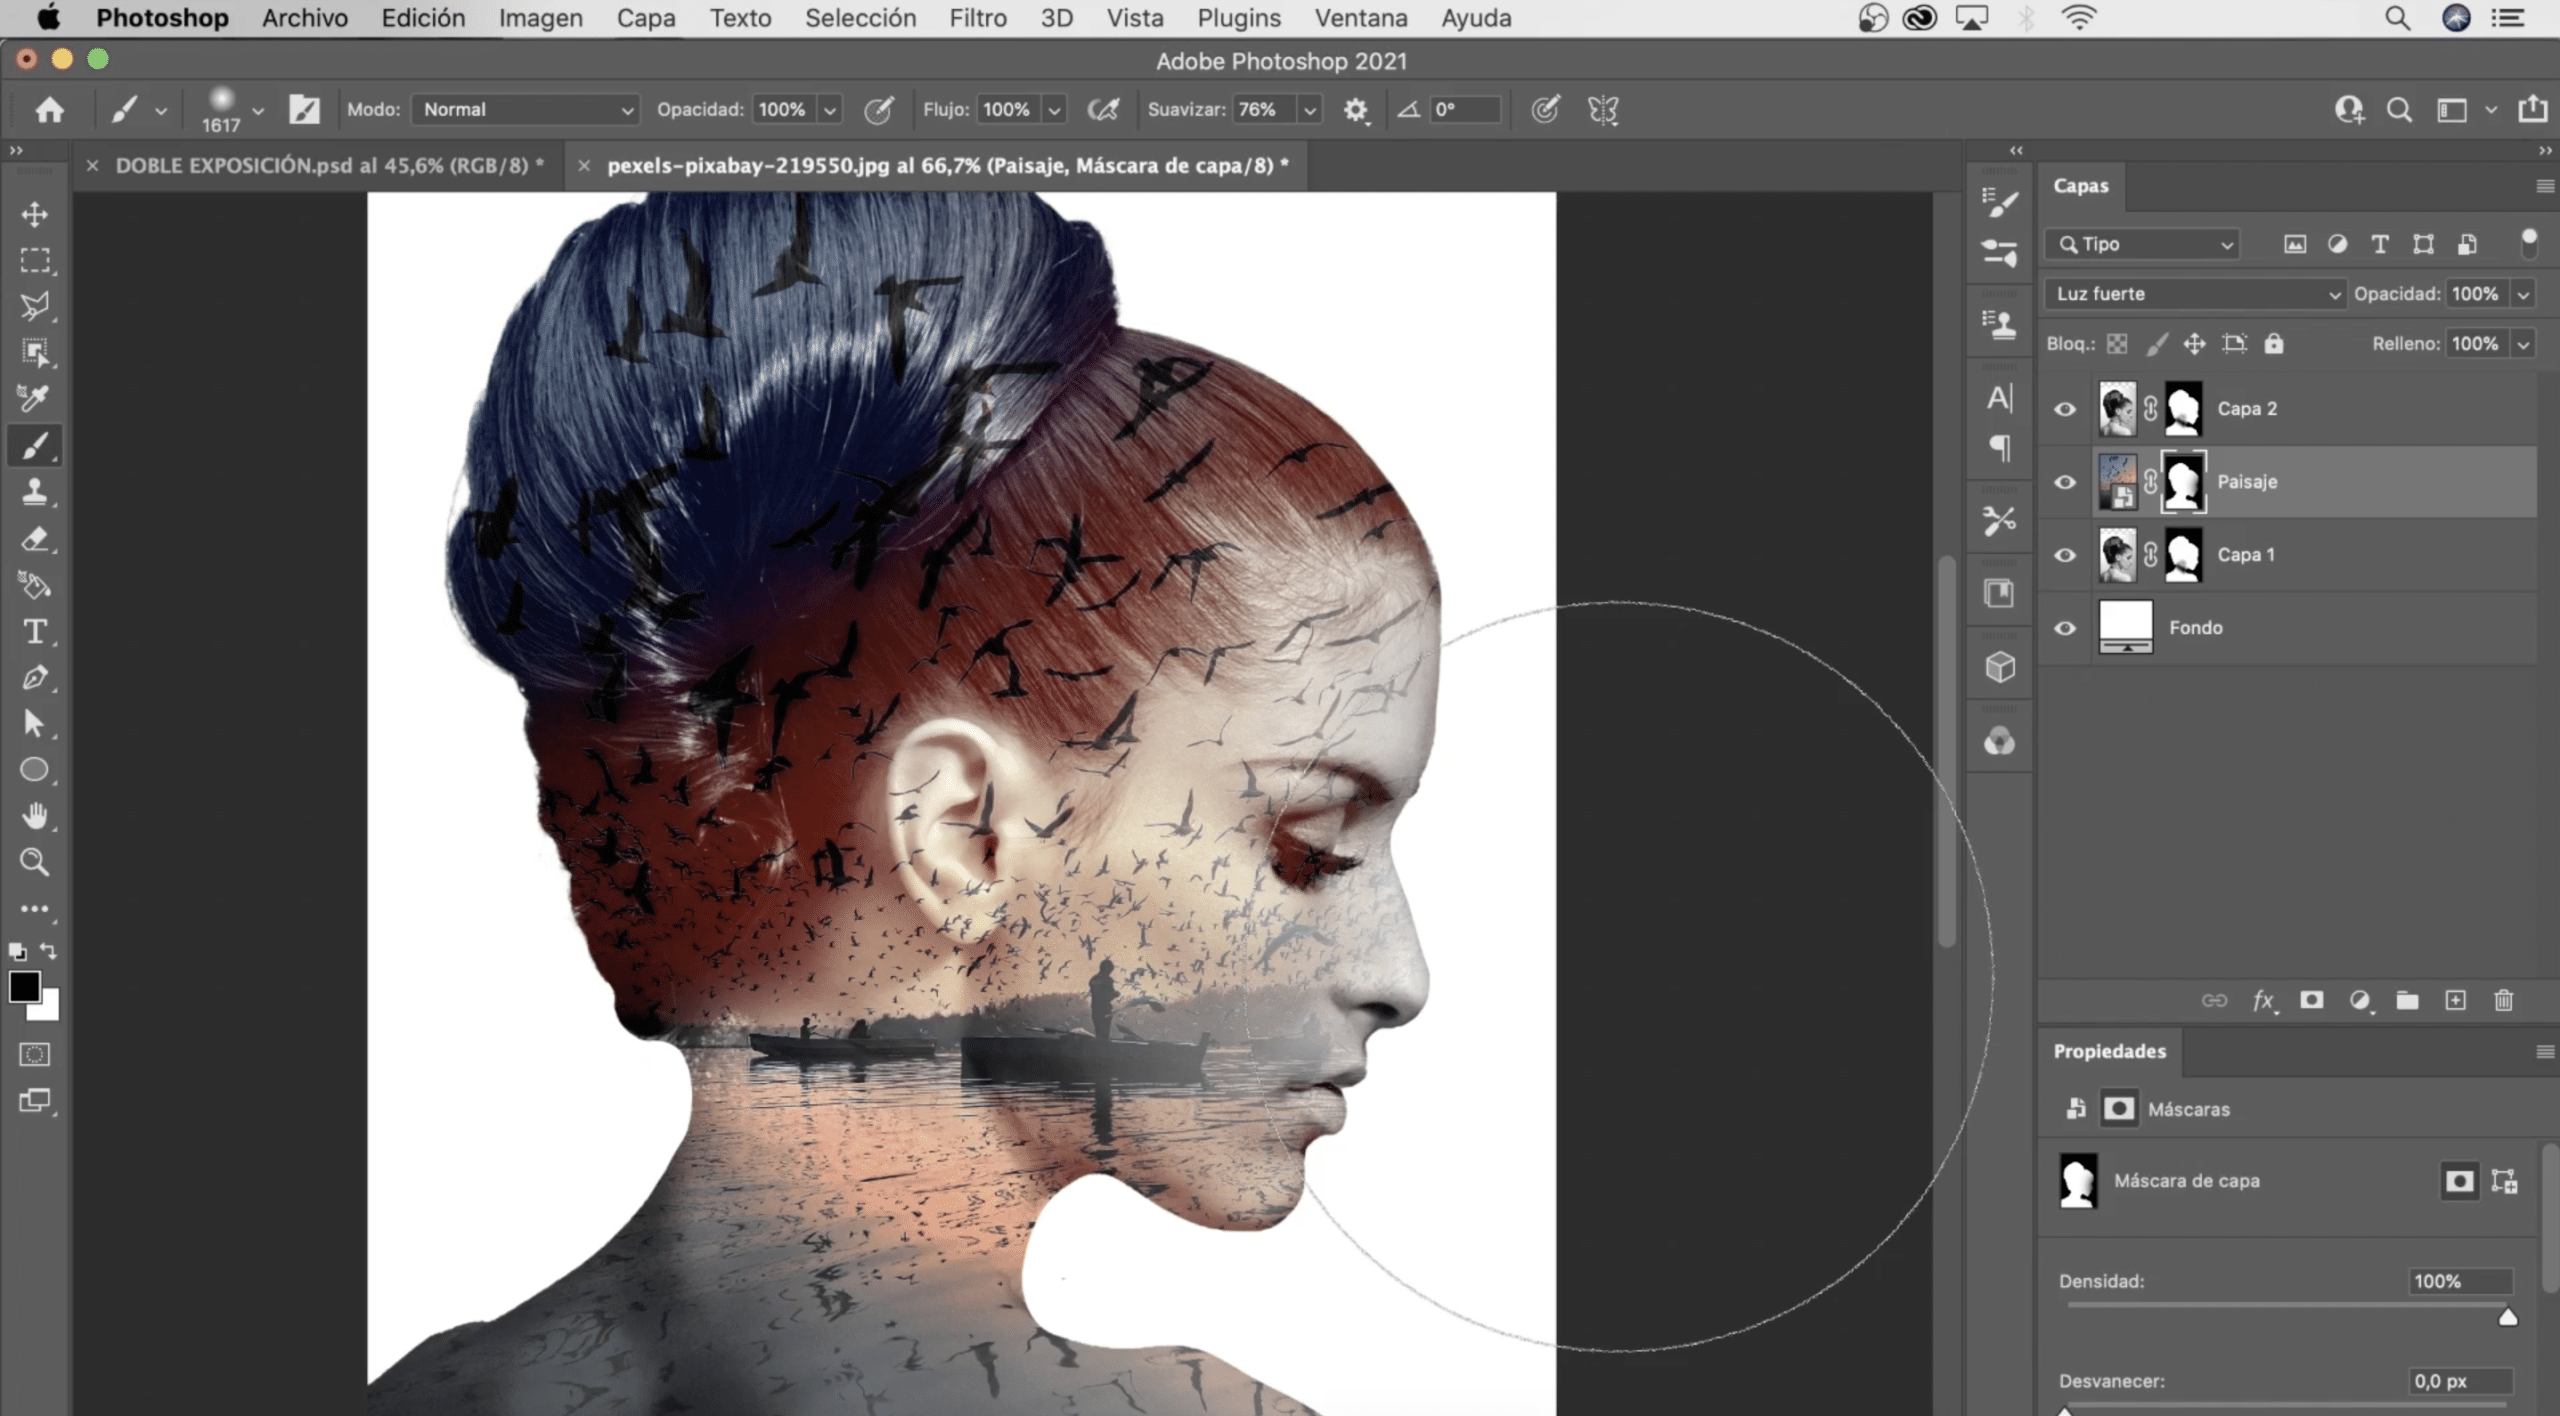
We will reduce the opacity of "layer 2" at 25%. To improve the visibility of the face, we will go to the "landscape" layer mask and with the diffuse black circular brush we will paint so that the features are better seen of the girl
Add life to the image, put the finishing touches
What we have so far is good enough, but let's give it the final touch so that the result is perfect. Hide all layers, including masks, minus the "landscape" layer. To make the mask that covers it invisible, click on it and press the eye marked in the image above. With the selection tool of your choice, I have used the object selection tool, select some of the birds that have stayed in the sky, copy and paste them on a separate layer that we will place on top. Make sure you don't leave a halo when making your selection because it will show. To that new layer, with the birds, We will apply the same blending mode as the landscape and we will lower the opacity to 80% so that the tone is as similar as possible. You can move the layer and place the birds wherever you want, if you always have one left over you can create a layer mask and with black cover them as we have done previously.
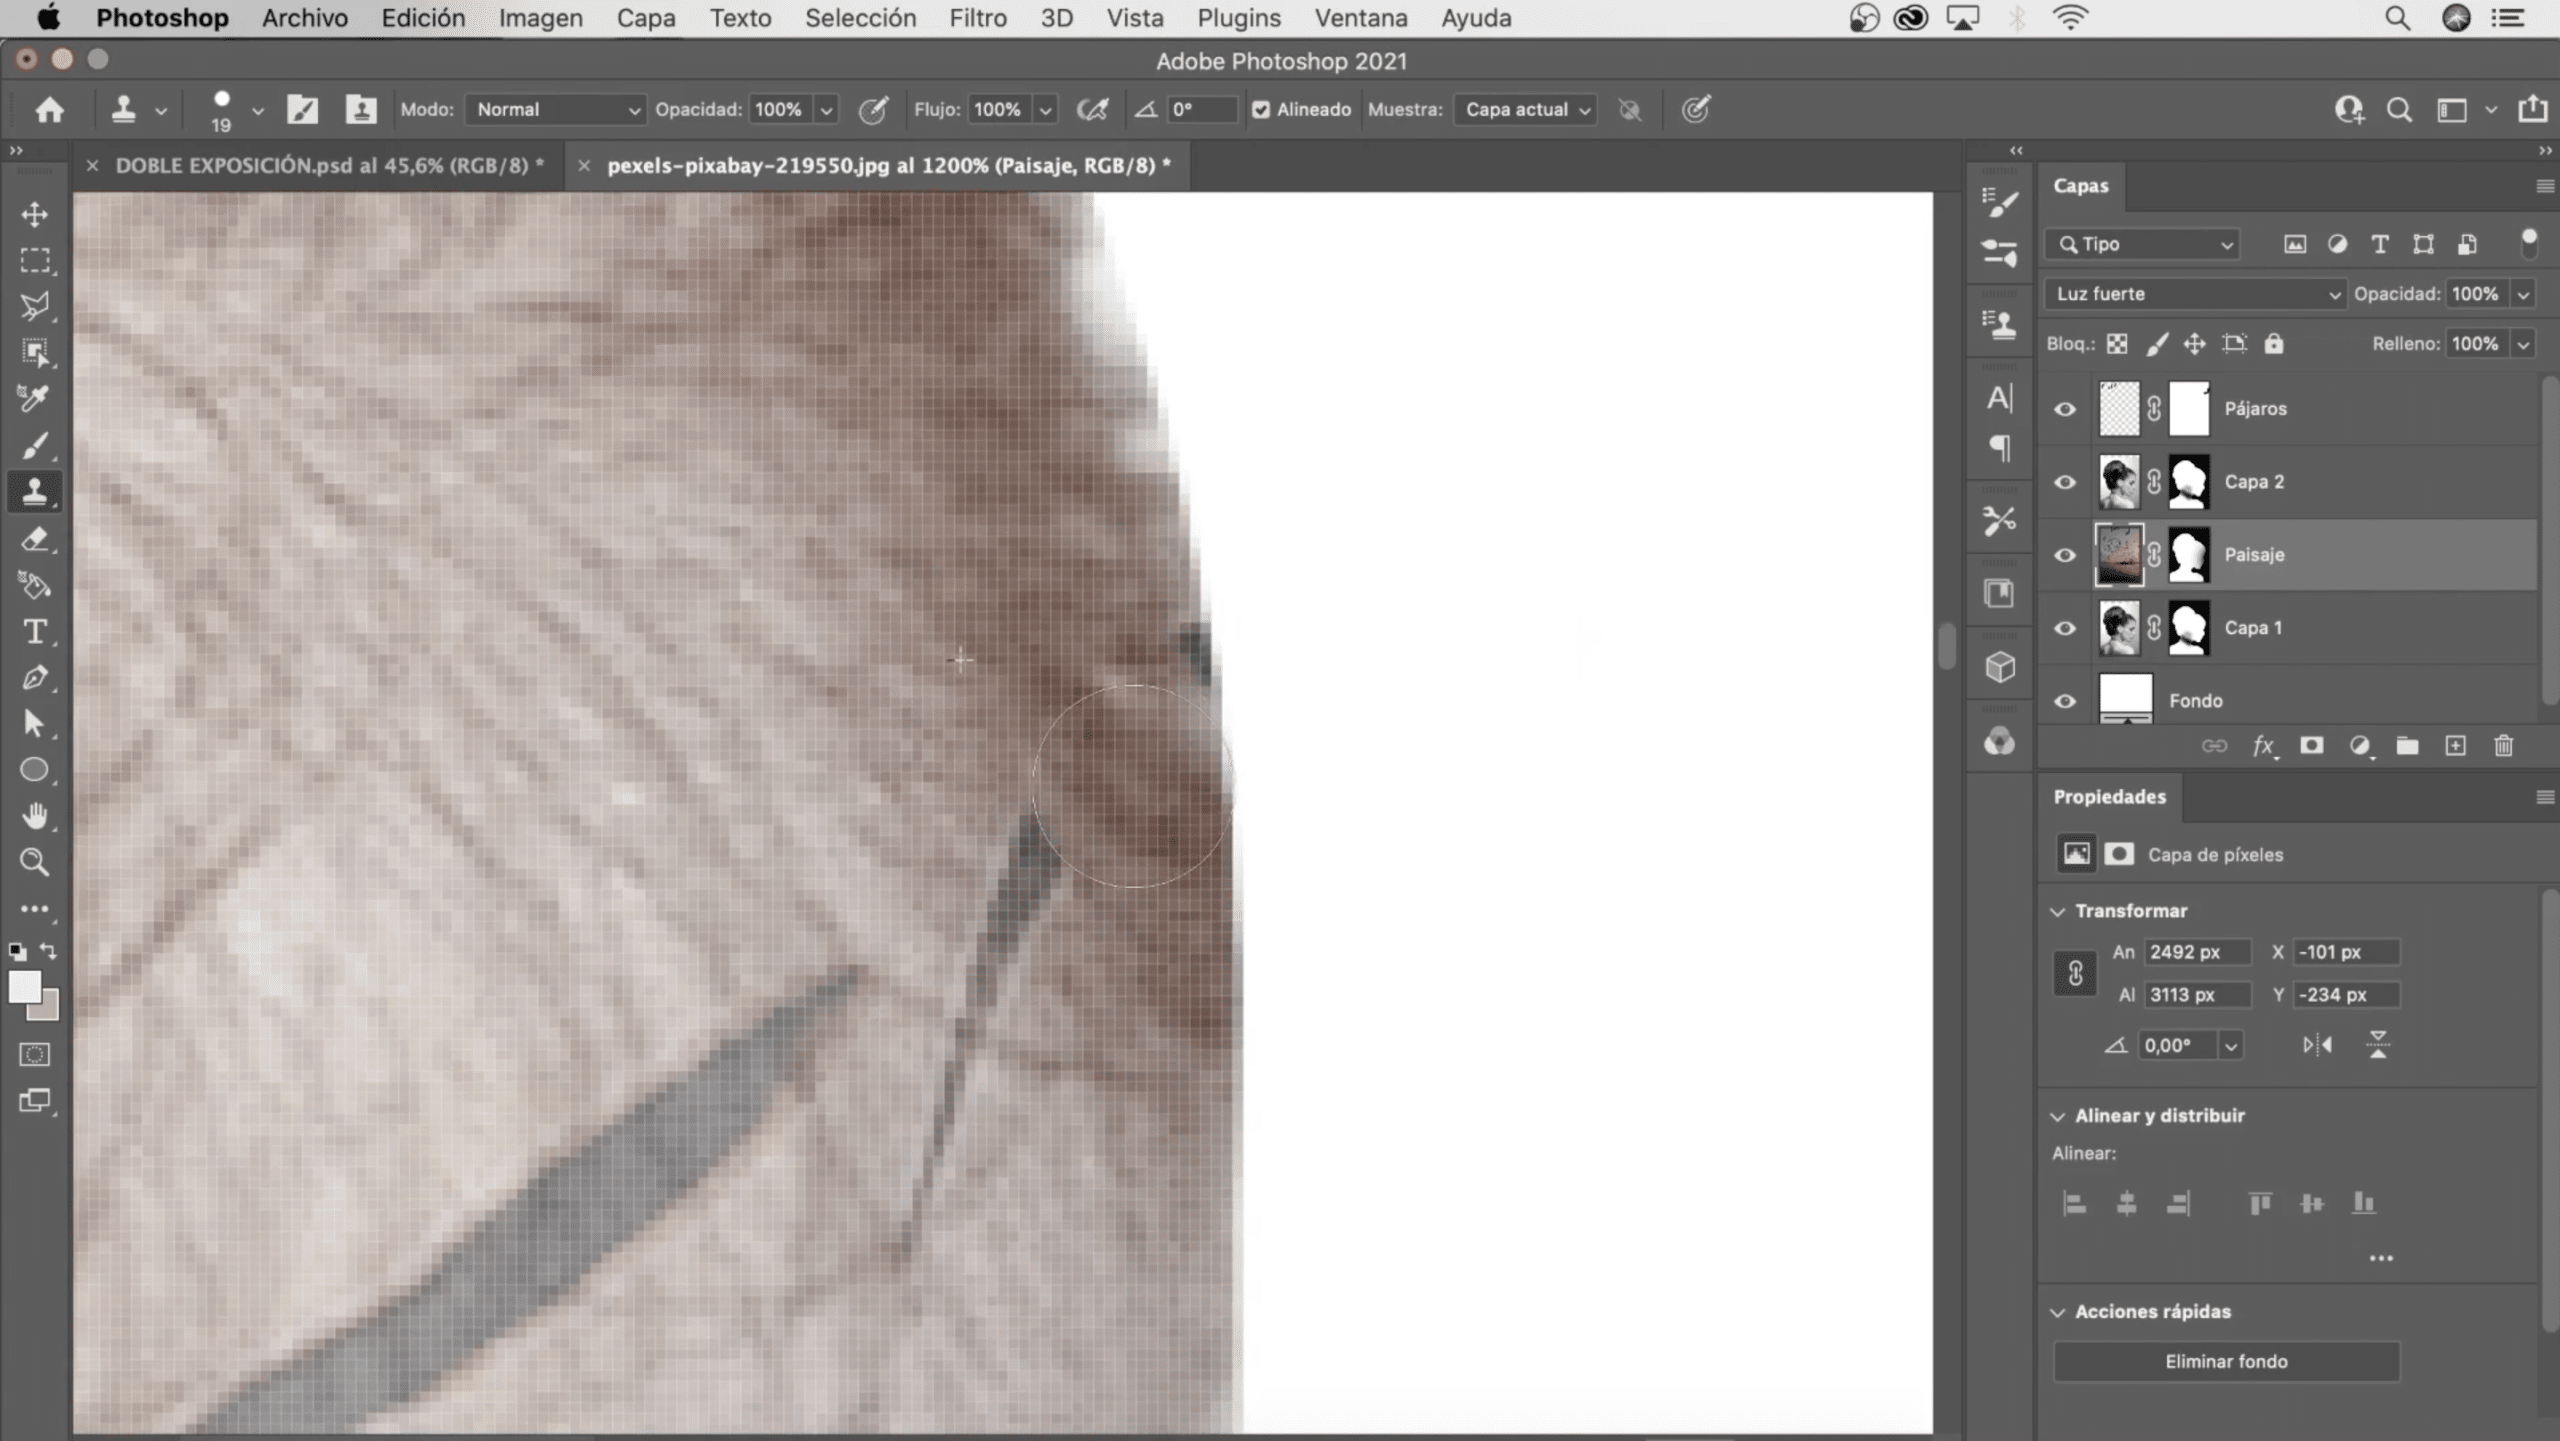
If you pay attention, some birds will have been cut off, or you just won't like how they look. Cwith the clone plug you can delete them. You just have to sample by pressing the option key and carefully paint over the element you want to delete.
Adjust the frame and combine layers
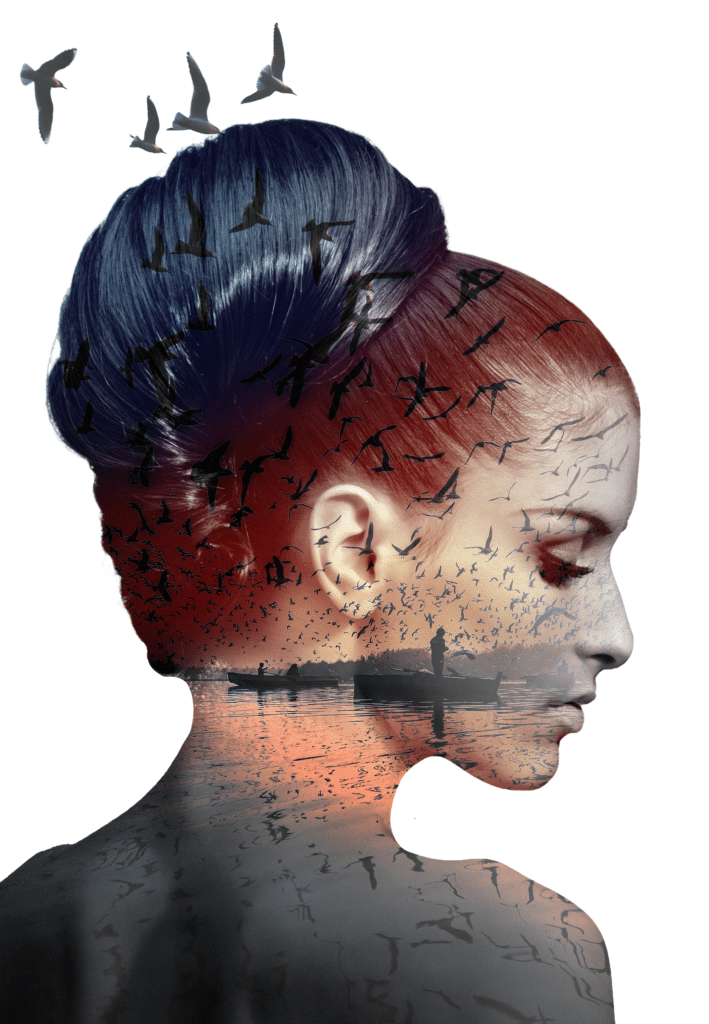
Perhaps, when adding the birds the image has not been well framed, with the cropping tool you can change the framing. This is how our image would look with a double exposure effect.