Making good selections is one of the most laborious tasks in Photoshop, in this tutorial we will show you a very simple trick to improve your selections in the program. In addition, we will review the main tools to select and you will learn how to smooth edges in Photoshop with the selection mask.
Selection tools in Photoshop

The automatic selection tools allow you to save a lot of time, you have them all together in the toolbar, you just have to press and hold in the place indicated in the image above.
Quick selection tool
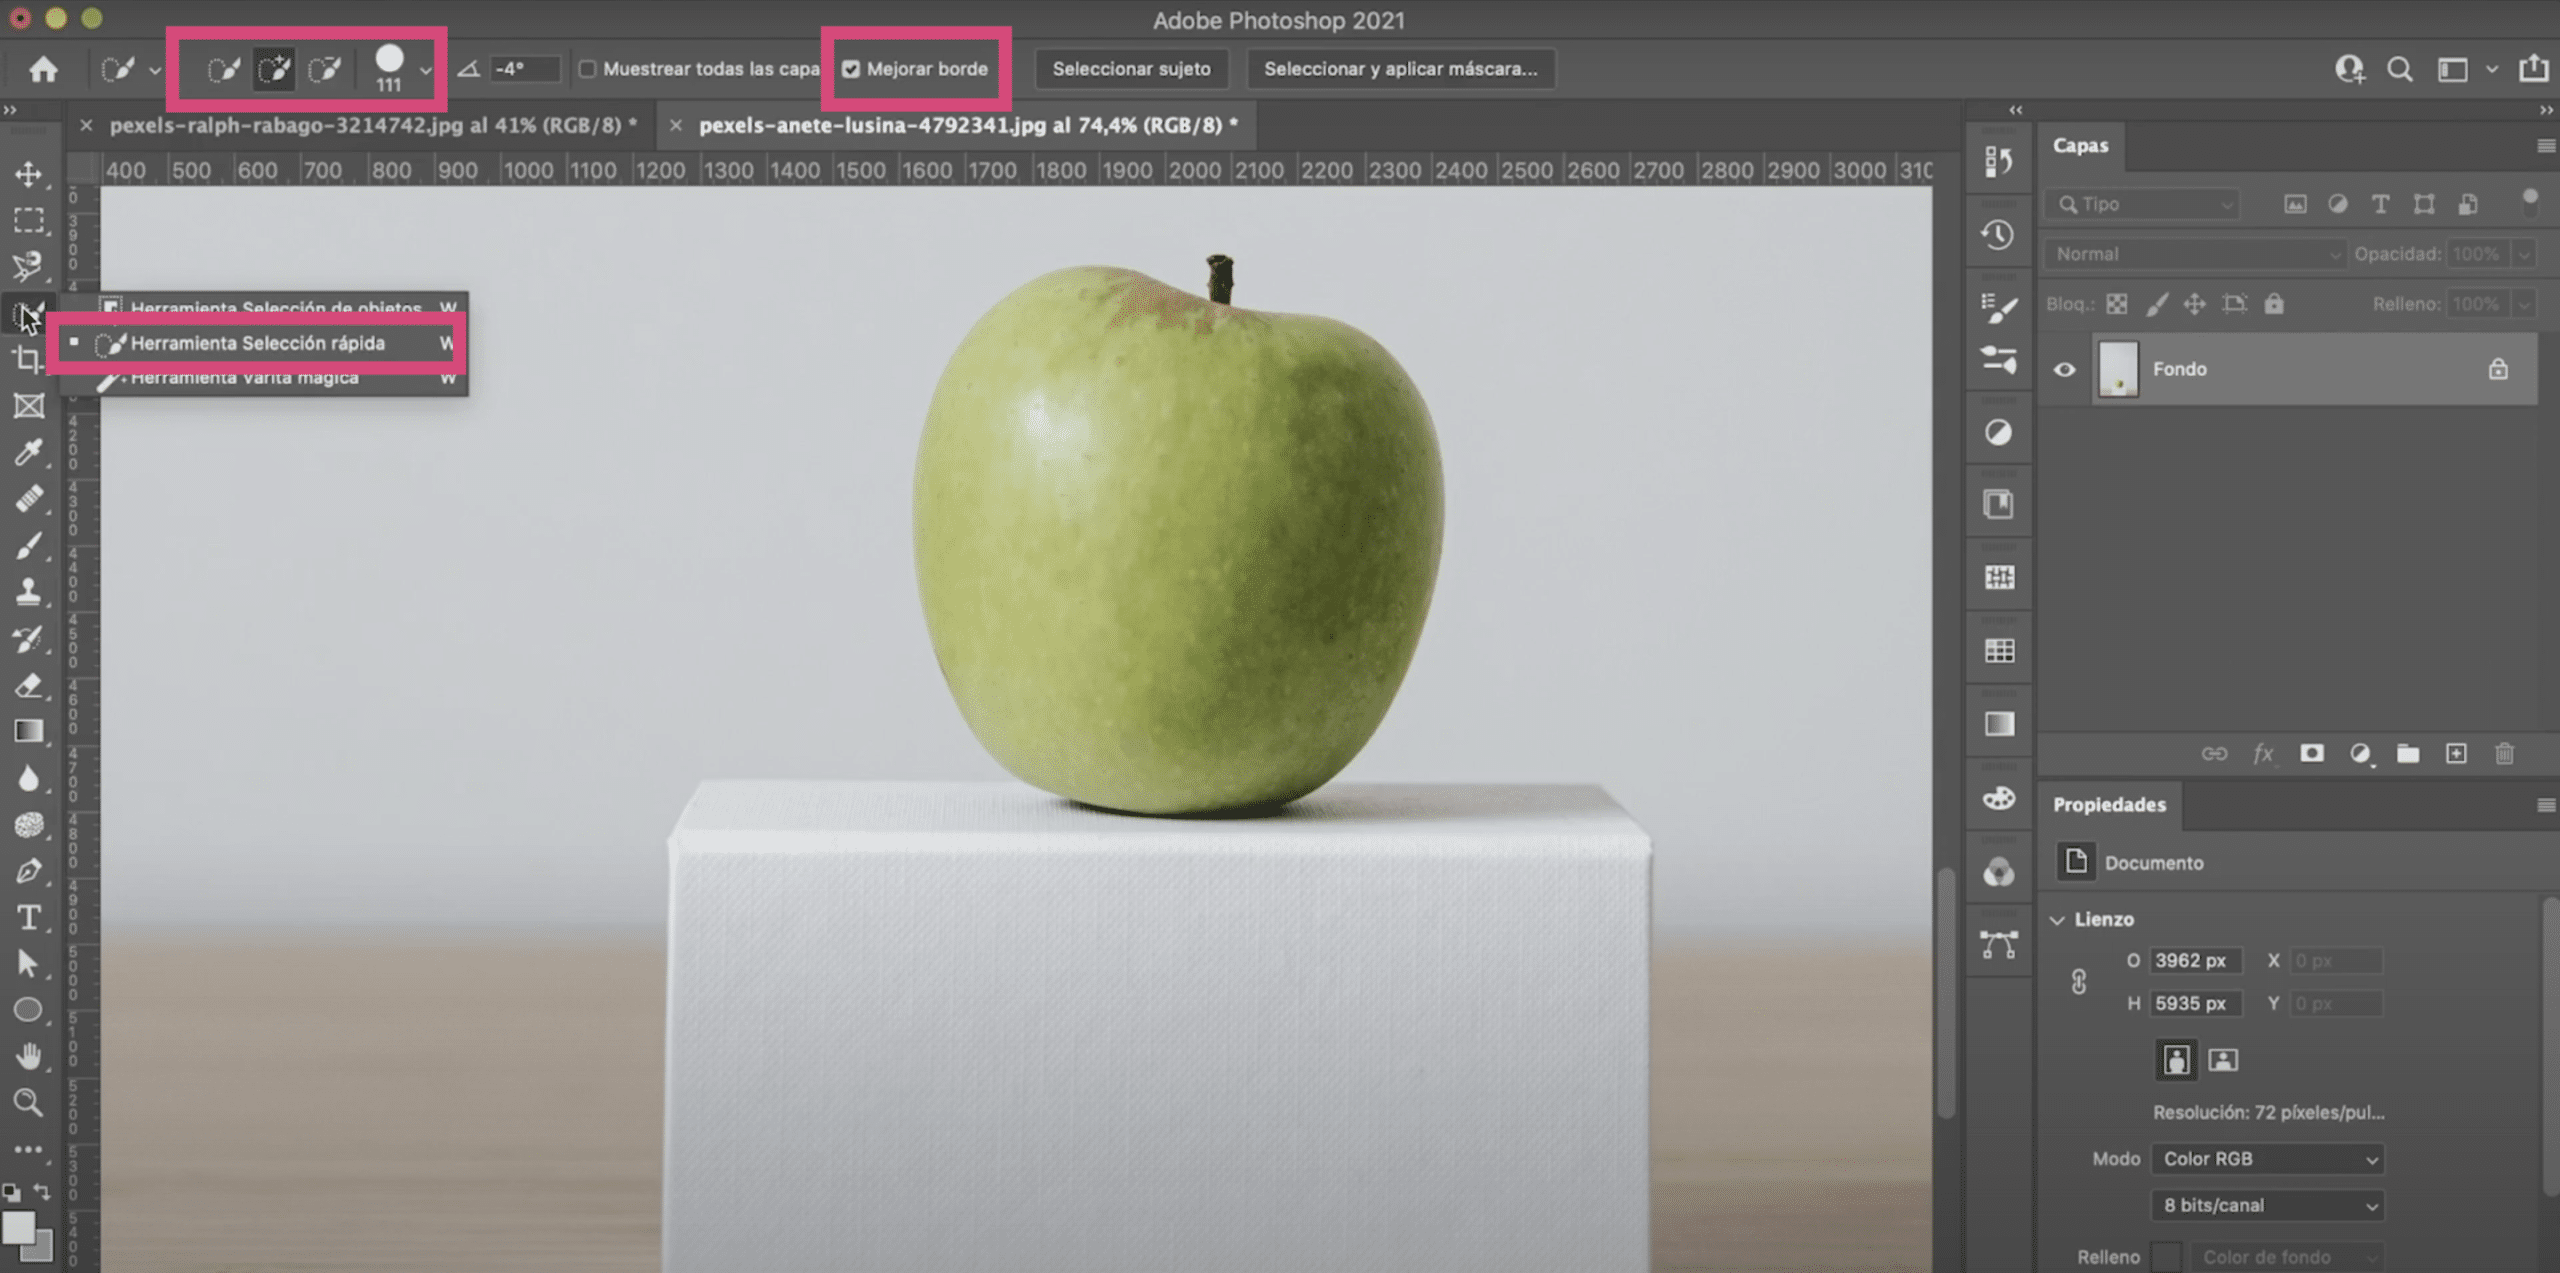
La quick selection tool works like a paintbrush. If you click in the tool options bar on the brush with a positive sign, when painting you add to the selection. If you make a mistake and select more, you can hold down the option key if you work on Mac or alt if you work on Windows to subtract from the selection.
For best results check «improve edges»You can also modify the size of the brush depending on your needs.
Magic wand
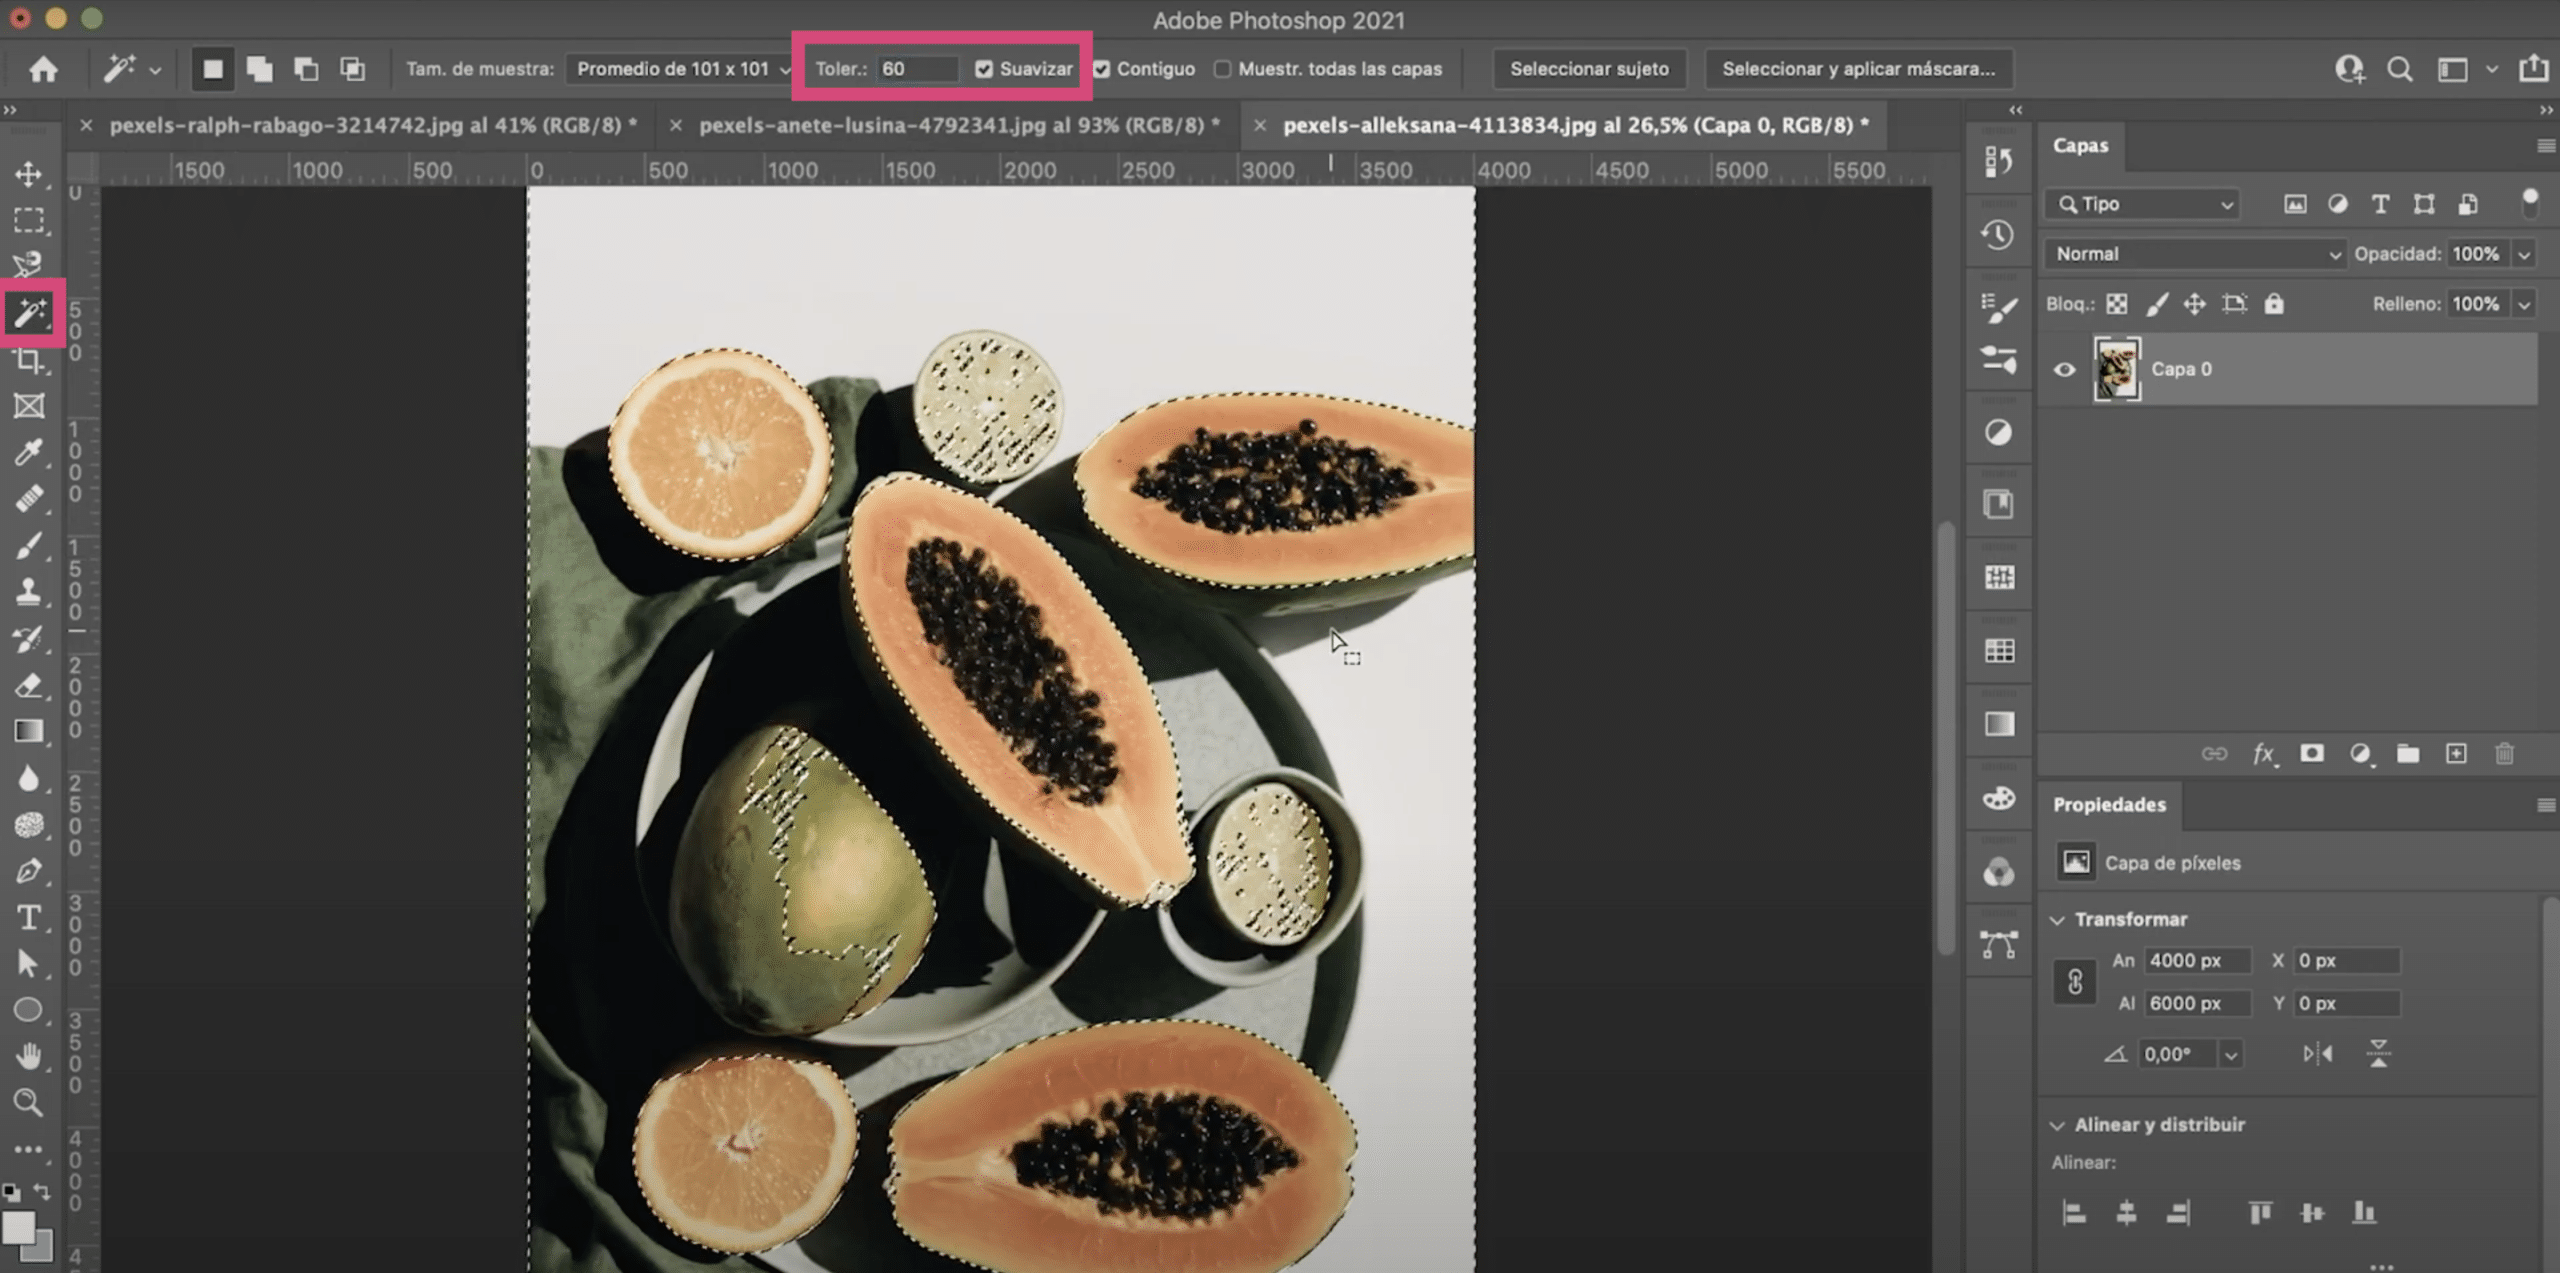
It makes automatic selections by making a single click on the zone. With tolerance, here, in the tool options menu, you tell Photoshop how wide the color gamut should be of the pixels when selecting, that is:
- If you put a very low tolerance, for example 30, will select pixels from very similar colors
- If you put a higher tolerance, for example 60, will admit more colors in selection.
You must try to find out which is the most correct, it depends on the photograph and the area you intend to select. Important, mark «smooth», so that the selection treats the edges better.
Object selection tool:
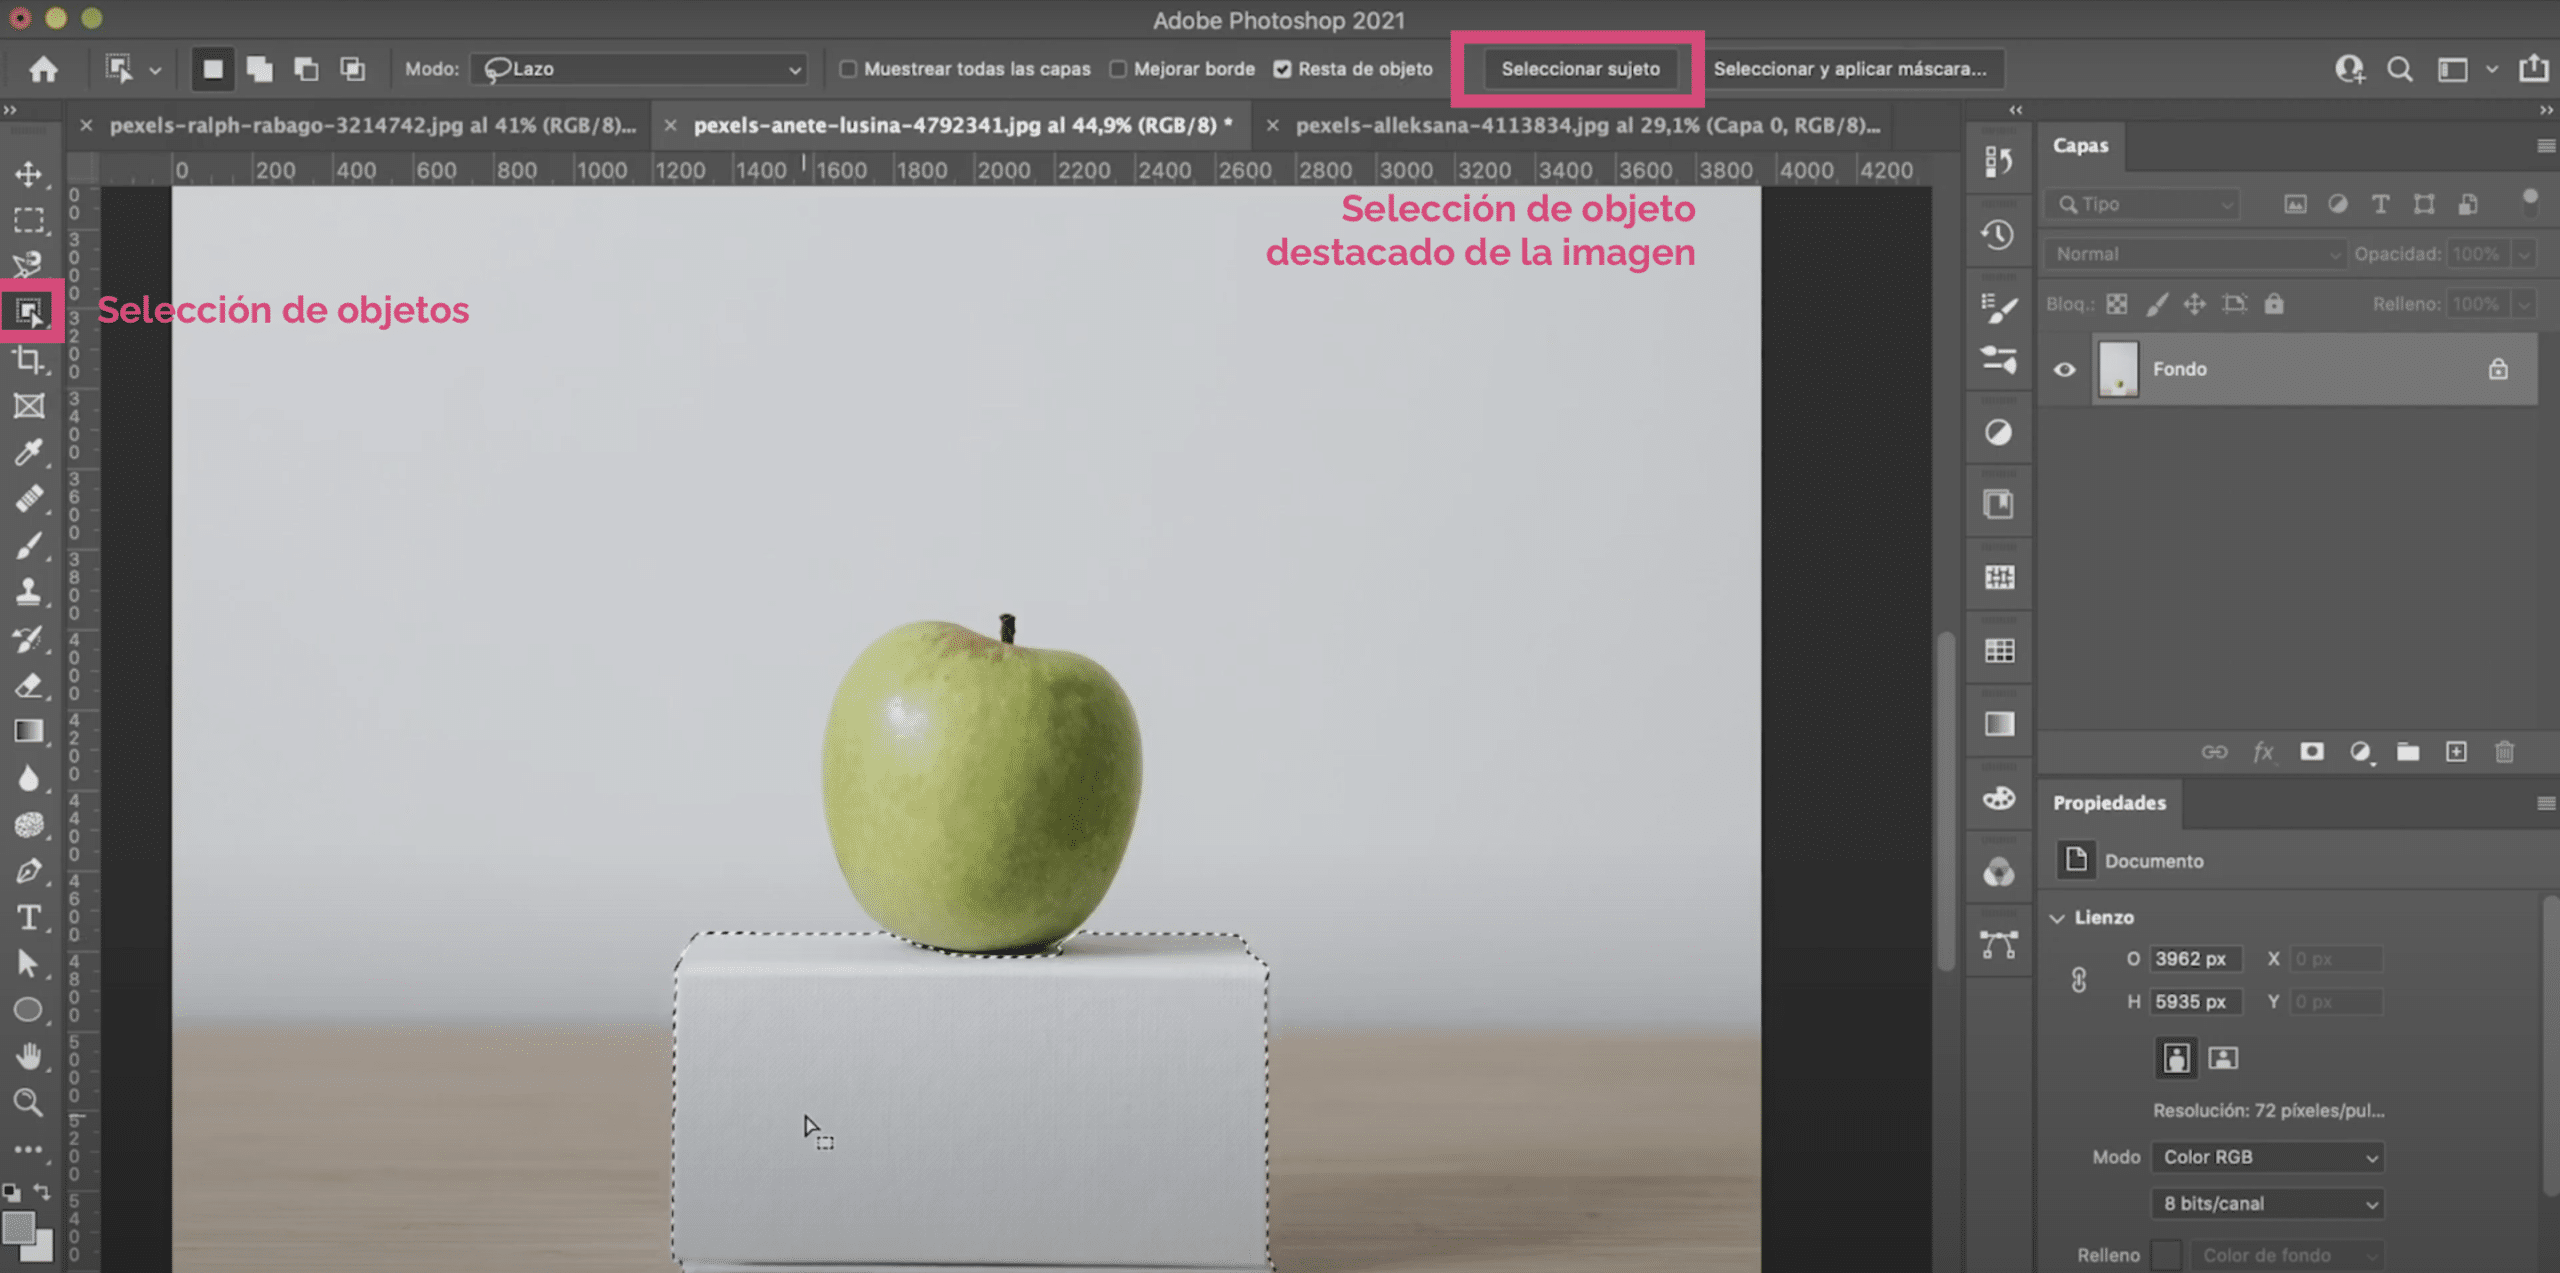
Automatically select the object you surround the image. You just have to drag the mouse and the program will detect the object.
Select subject
It is available in the tool options bar when you click on any automatic selection tool. In this case, the program selects the object or subject highlighted in the image.
Selection mask
When making selections in Photoshop the selection mask will be your best ally to correct errors. The selection mask is available by clicking on any selection tool above.
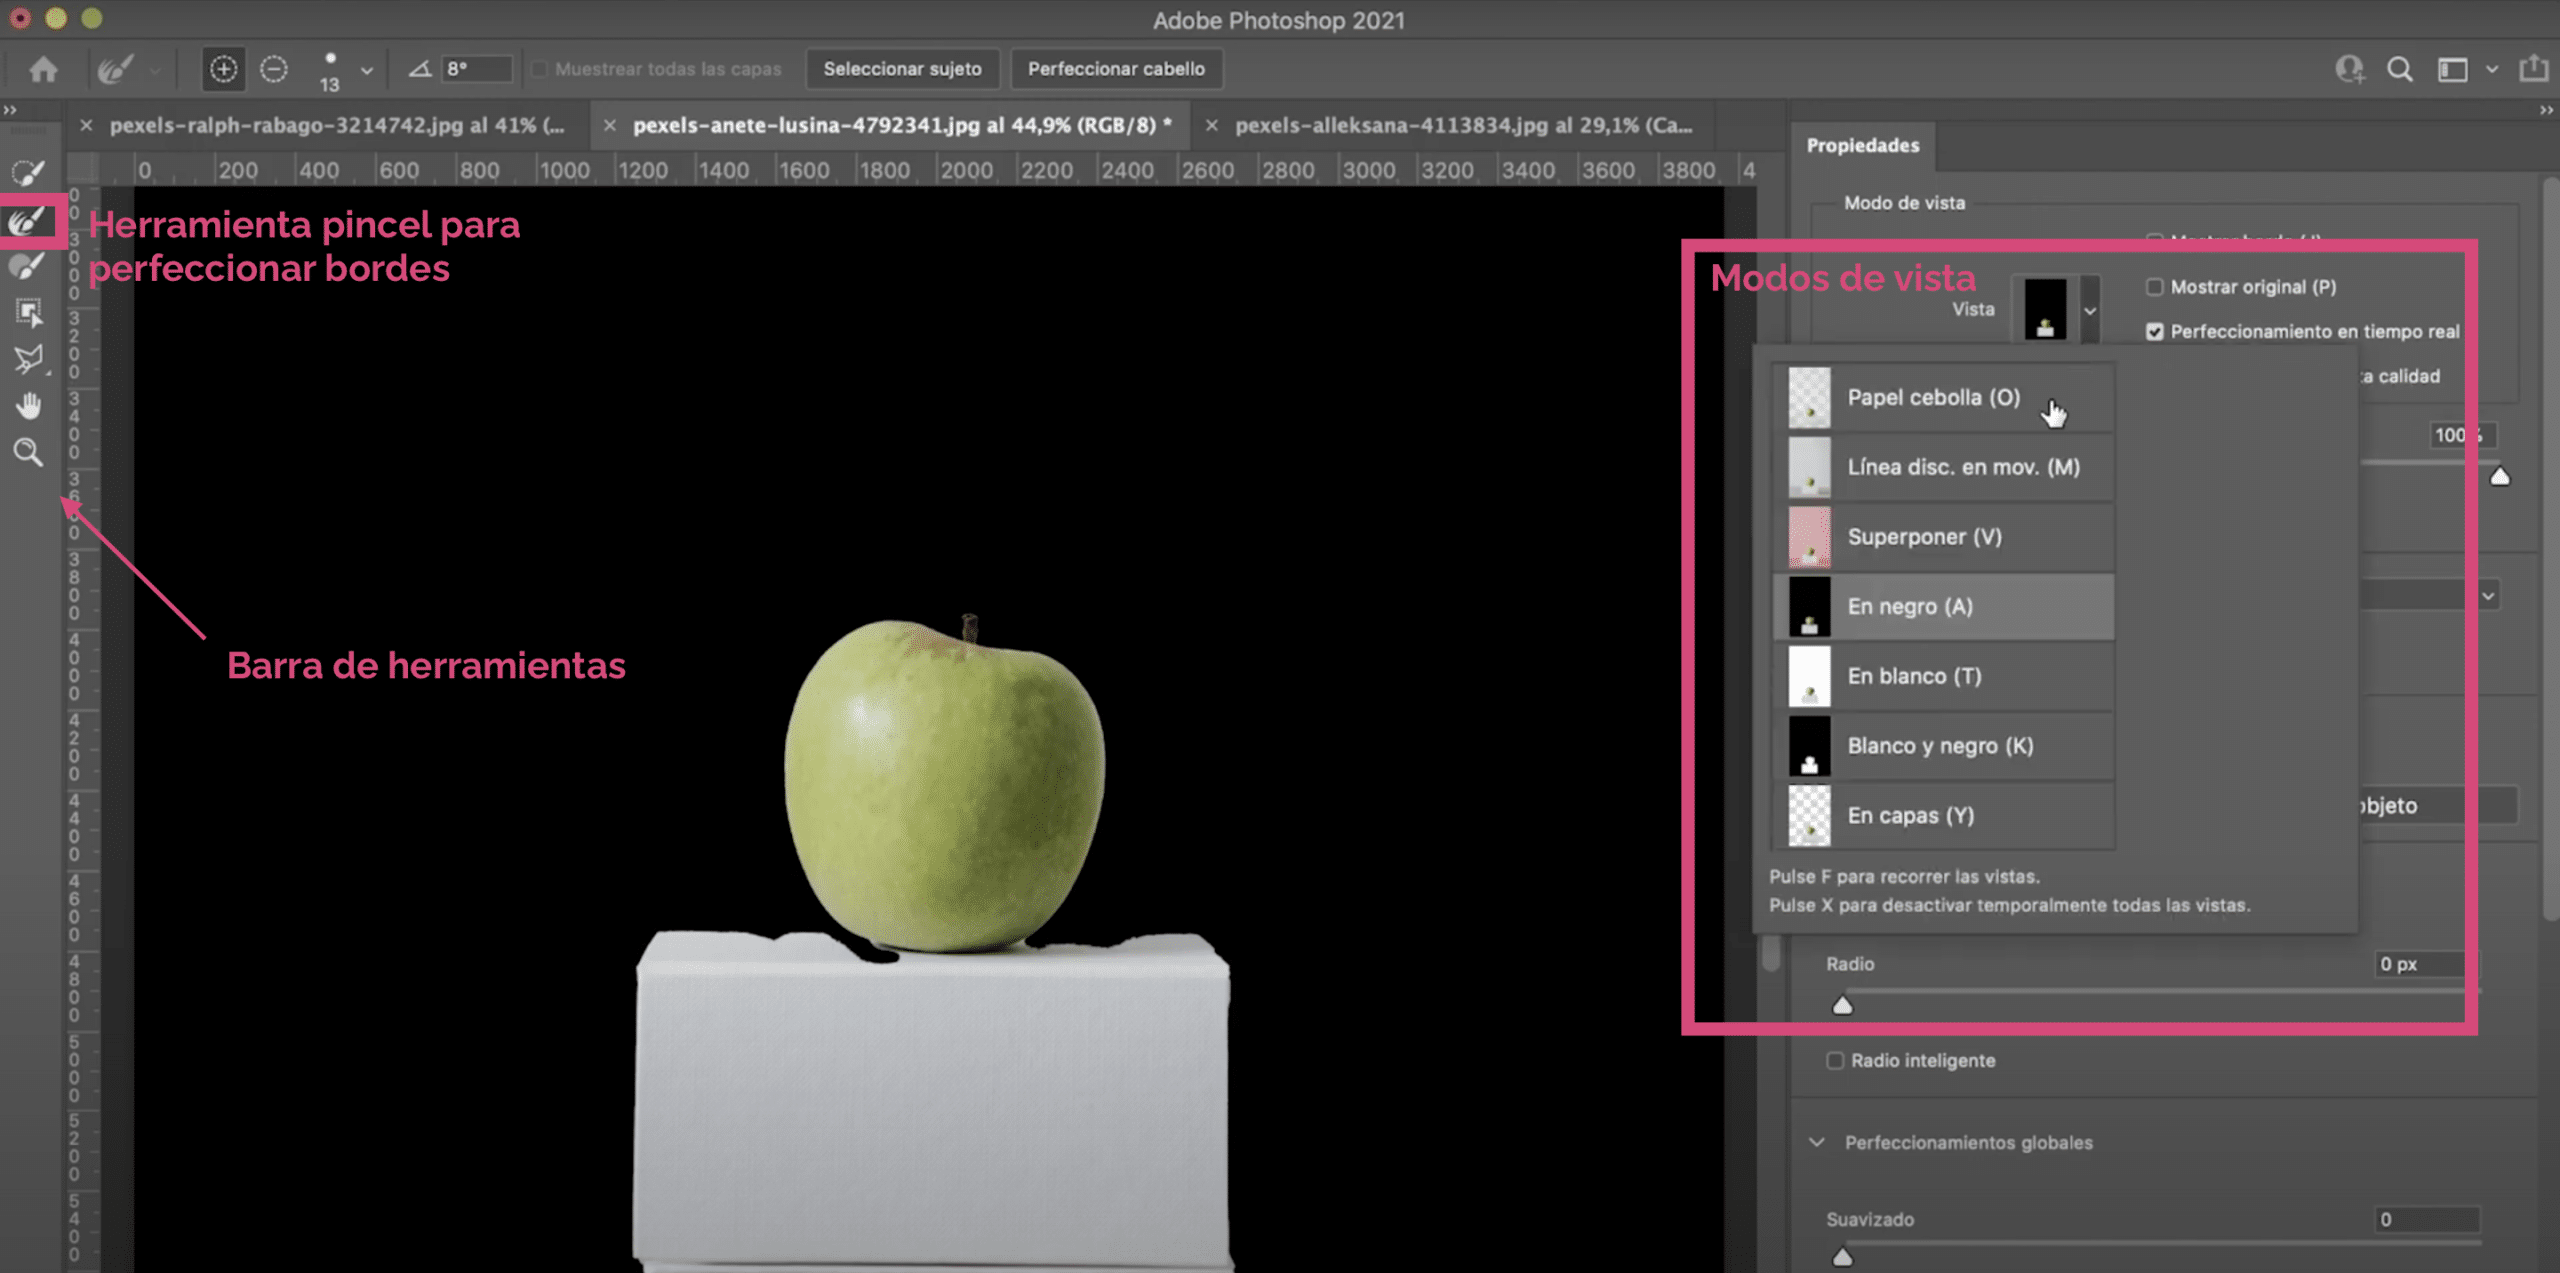
You can set different view modes:
- The onion skin view is one of the most used. In this case, the selected part appears colored and the background (what is not selected) covered with squares. You can play with the transparency level to see what you include and what you leave out.
- Tips: In cases where the background of the image is light, use black view mode. When the background is dark, view mode is white. This way you will see how perfect your selection is and if there is a halo around the edges. It is fatal and that is what we will solve by smoothing the edges of the selection.
In the toolbar, within the "selection mask" mode, you have available some tools to correct. The ones I use the most are the brush and the quick selection tool. But there is a very interesting tool to smooth the edges: the brush to perfect edges.
Brush for perfecting edges
This brush smooths the edges of the selection and allows you to get better results. It works like any other brush, if, in the tool options bar, you choose the positive sign you include in the selection and if you choose the negative you subtract from the selection. The size of the brush can also be changed.
Easy trick to make better selections and smooth edges in Photoshop
The selection mask is very useful for smoothing the edges and making better selections, but I'm going to show you a trick with which you will get a very clean selection in no time.
Select subject
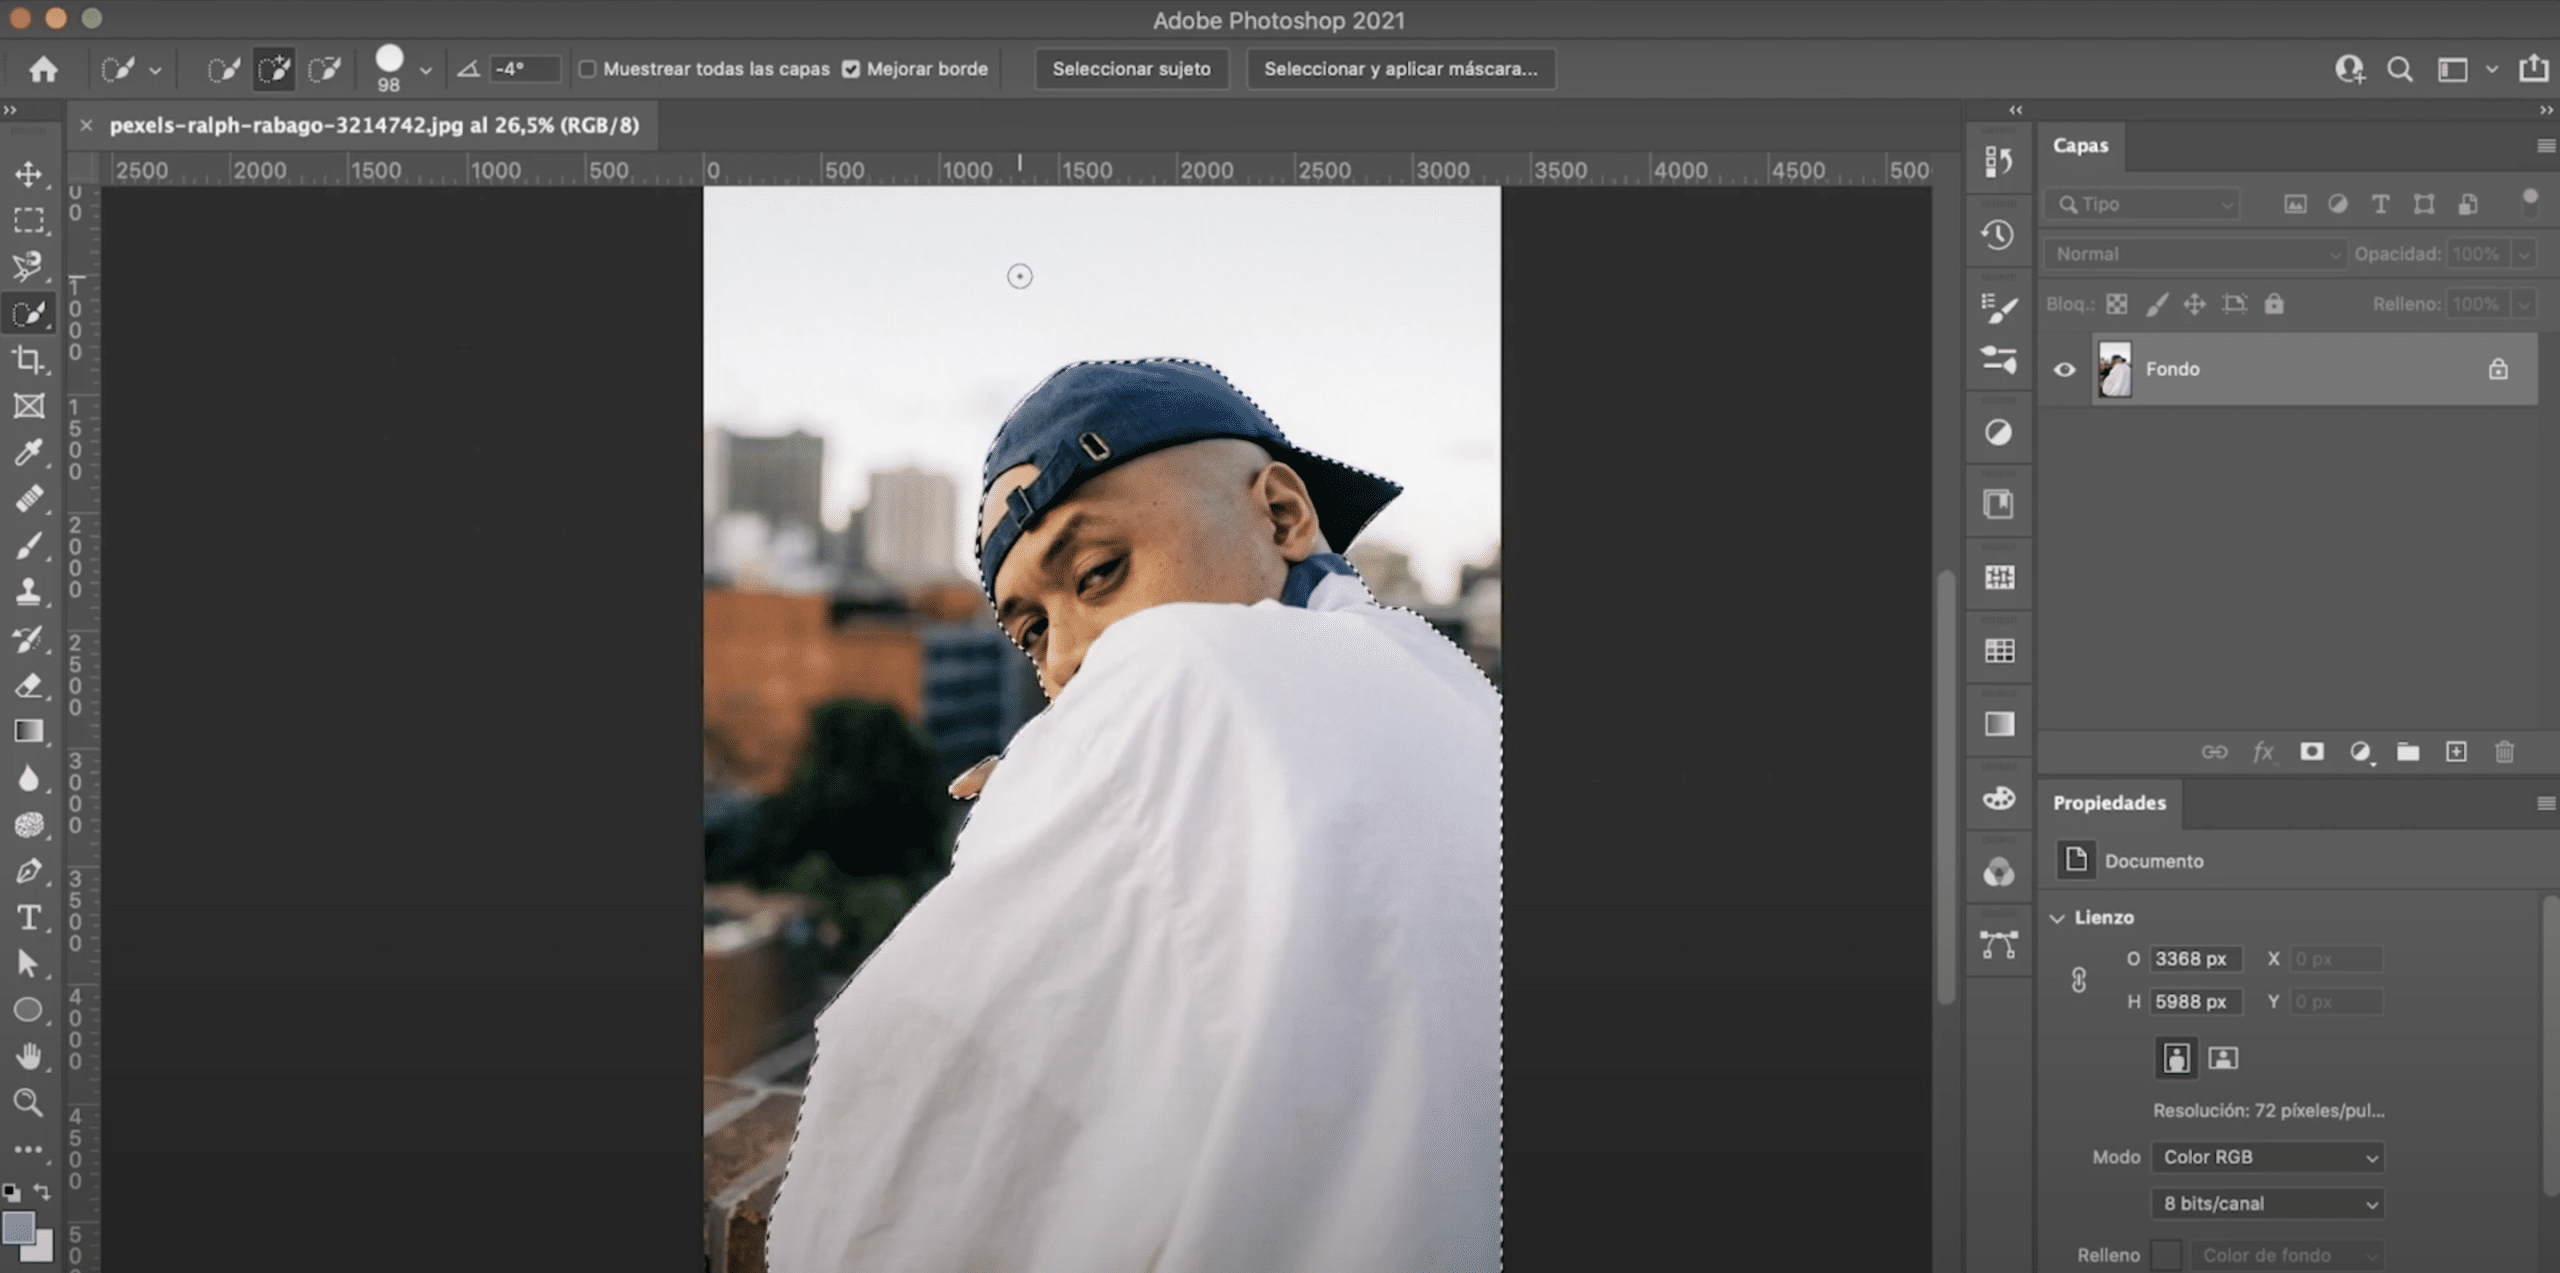
The first thing we will do is select subject (use some of the quick selection tools we've seen). For example, I am going to choose to "select subject", but you can use the one that is most comfortable for you.
If you prefer, you can select the fund and then invert the selection pressing command + shift + I on your computer keyboard, if you have a Mac, or ctrl + shift + I if you work with Windows.
Create layer mask and a background
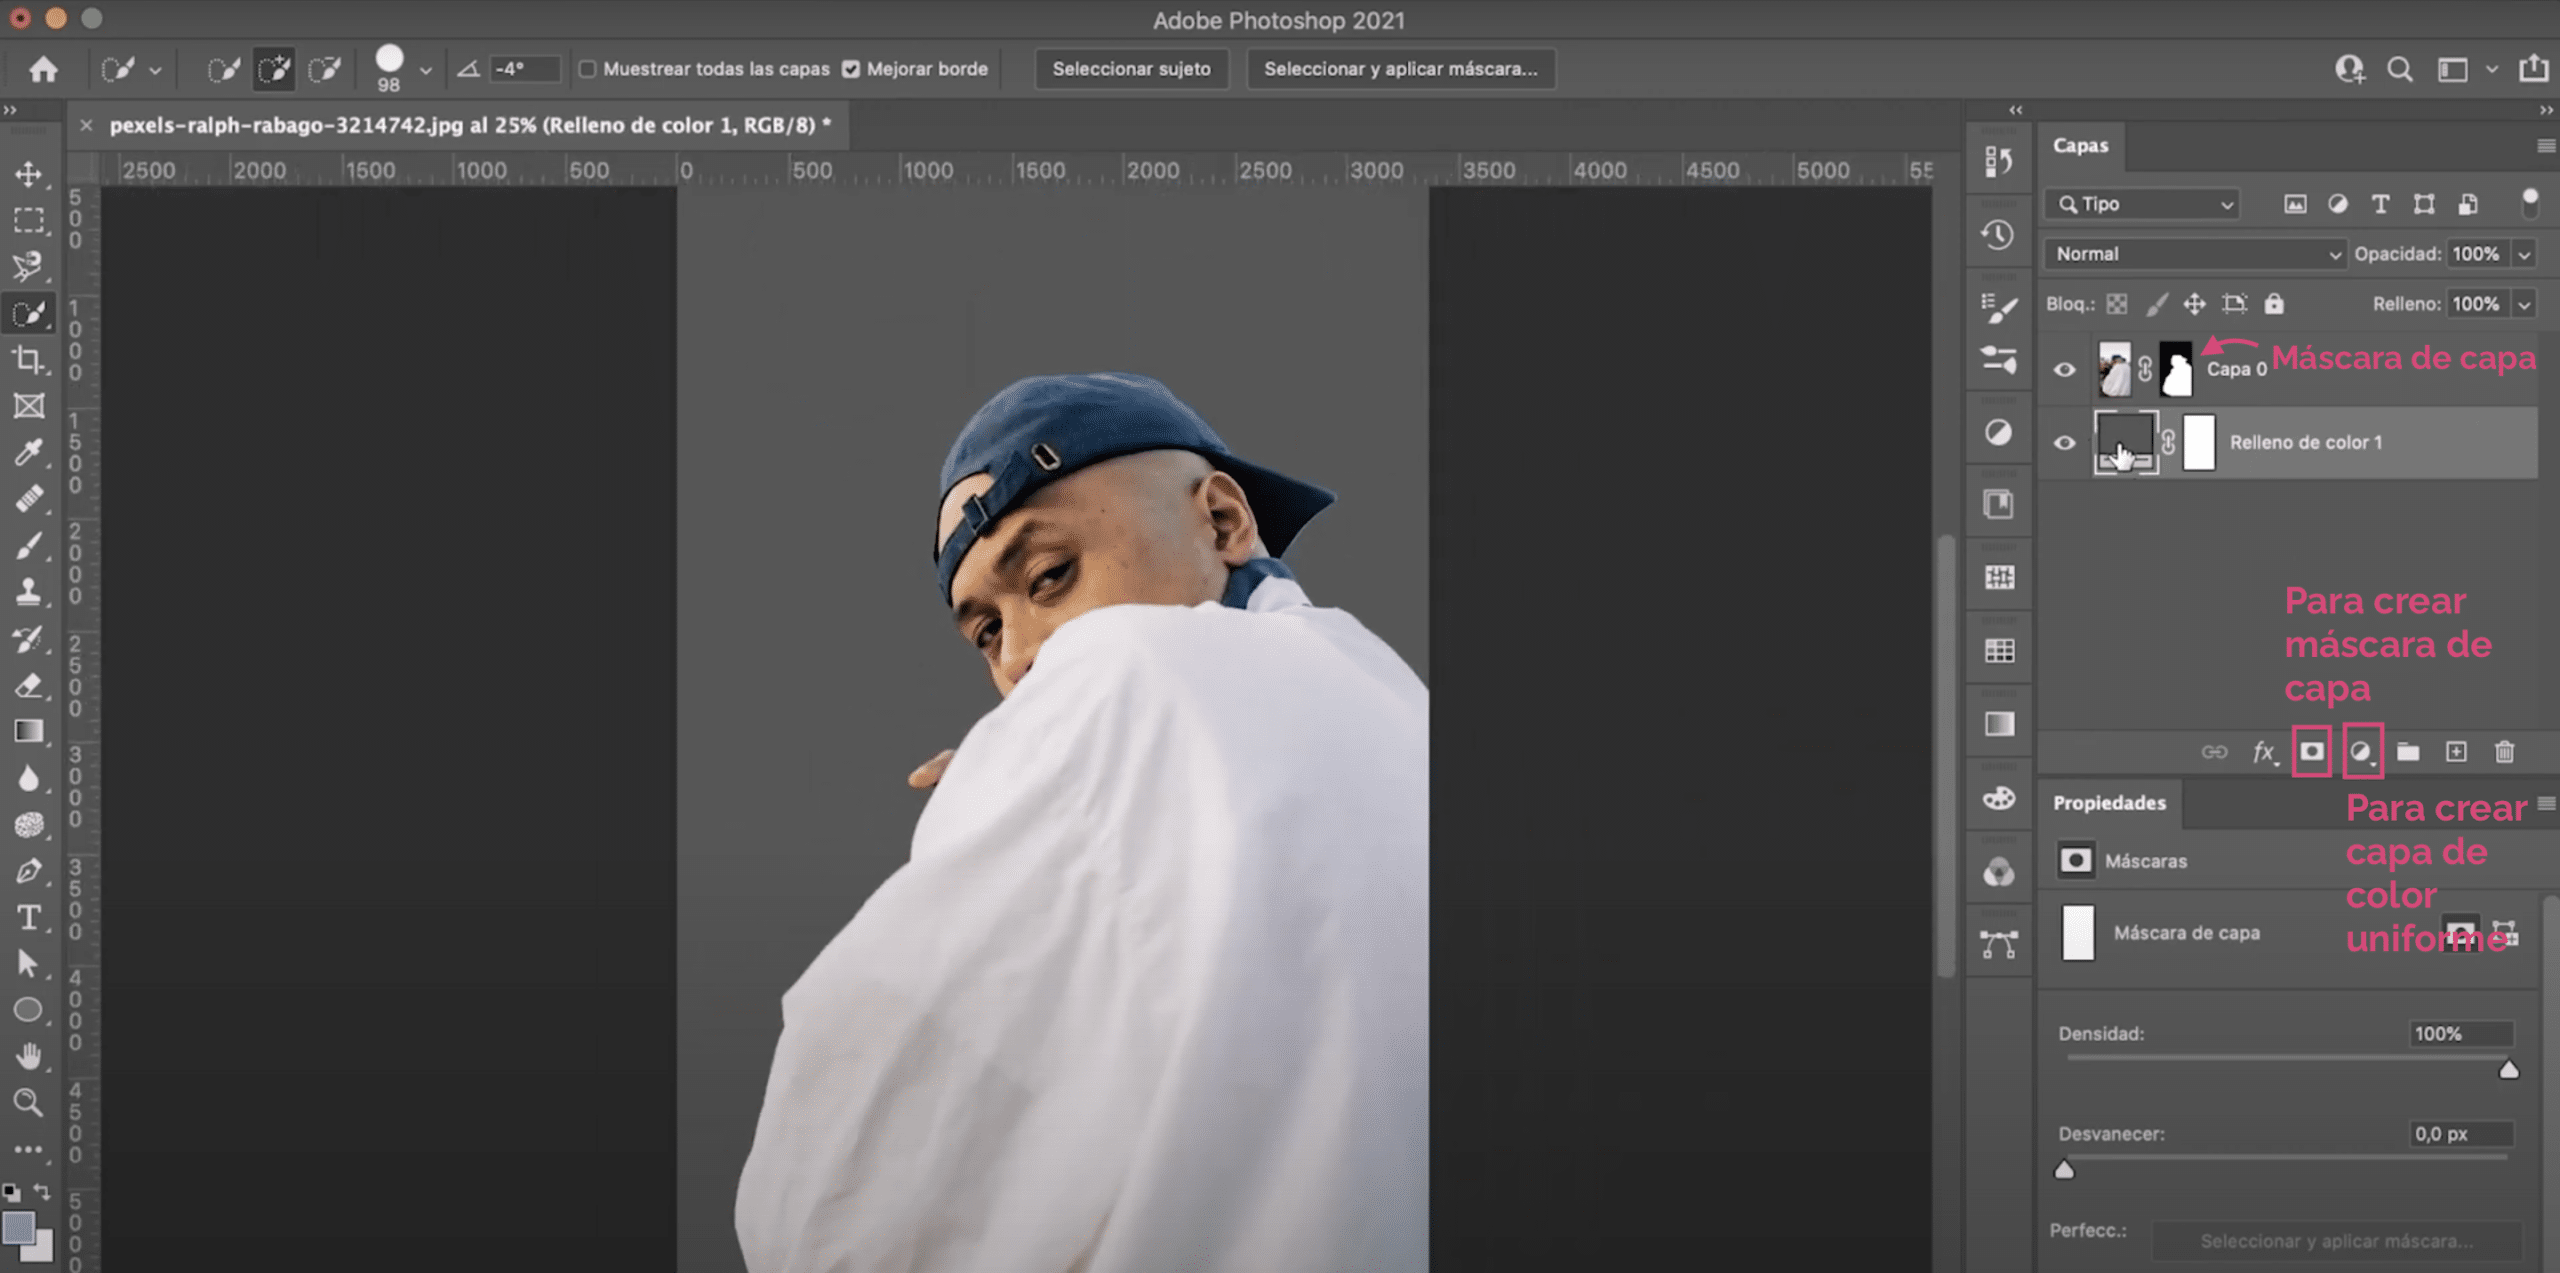
Now, we will create a layer mask. You can do it by pressing the symbol that appears indicated in the previous photograph. Create a layer of uniform color underneath, choose a neutral gray. If you widen, you will see that a very ugly edge has crept into our selection. Let's fix it!
Return to the selected subject and modify the selection
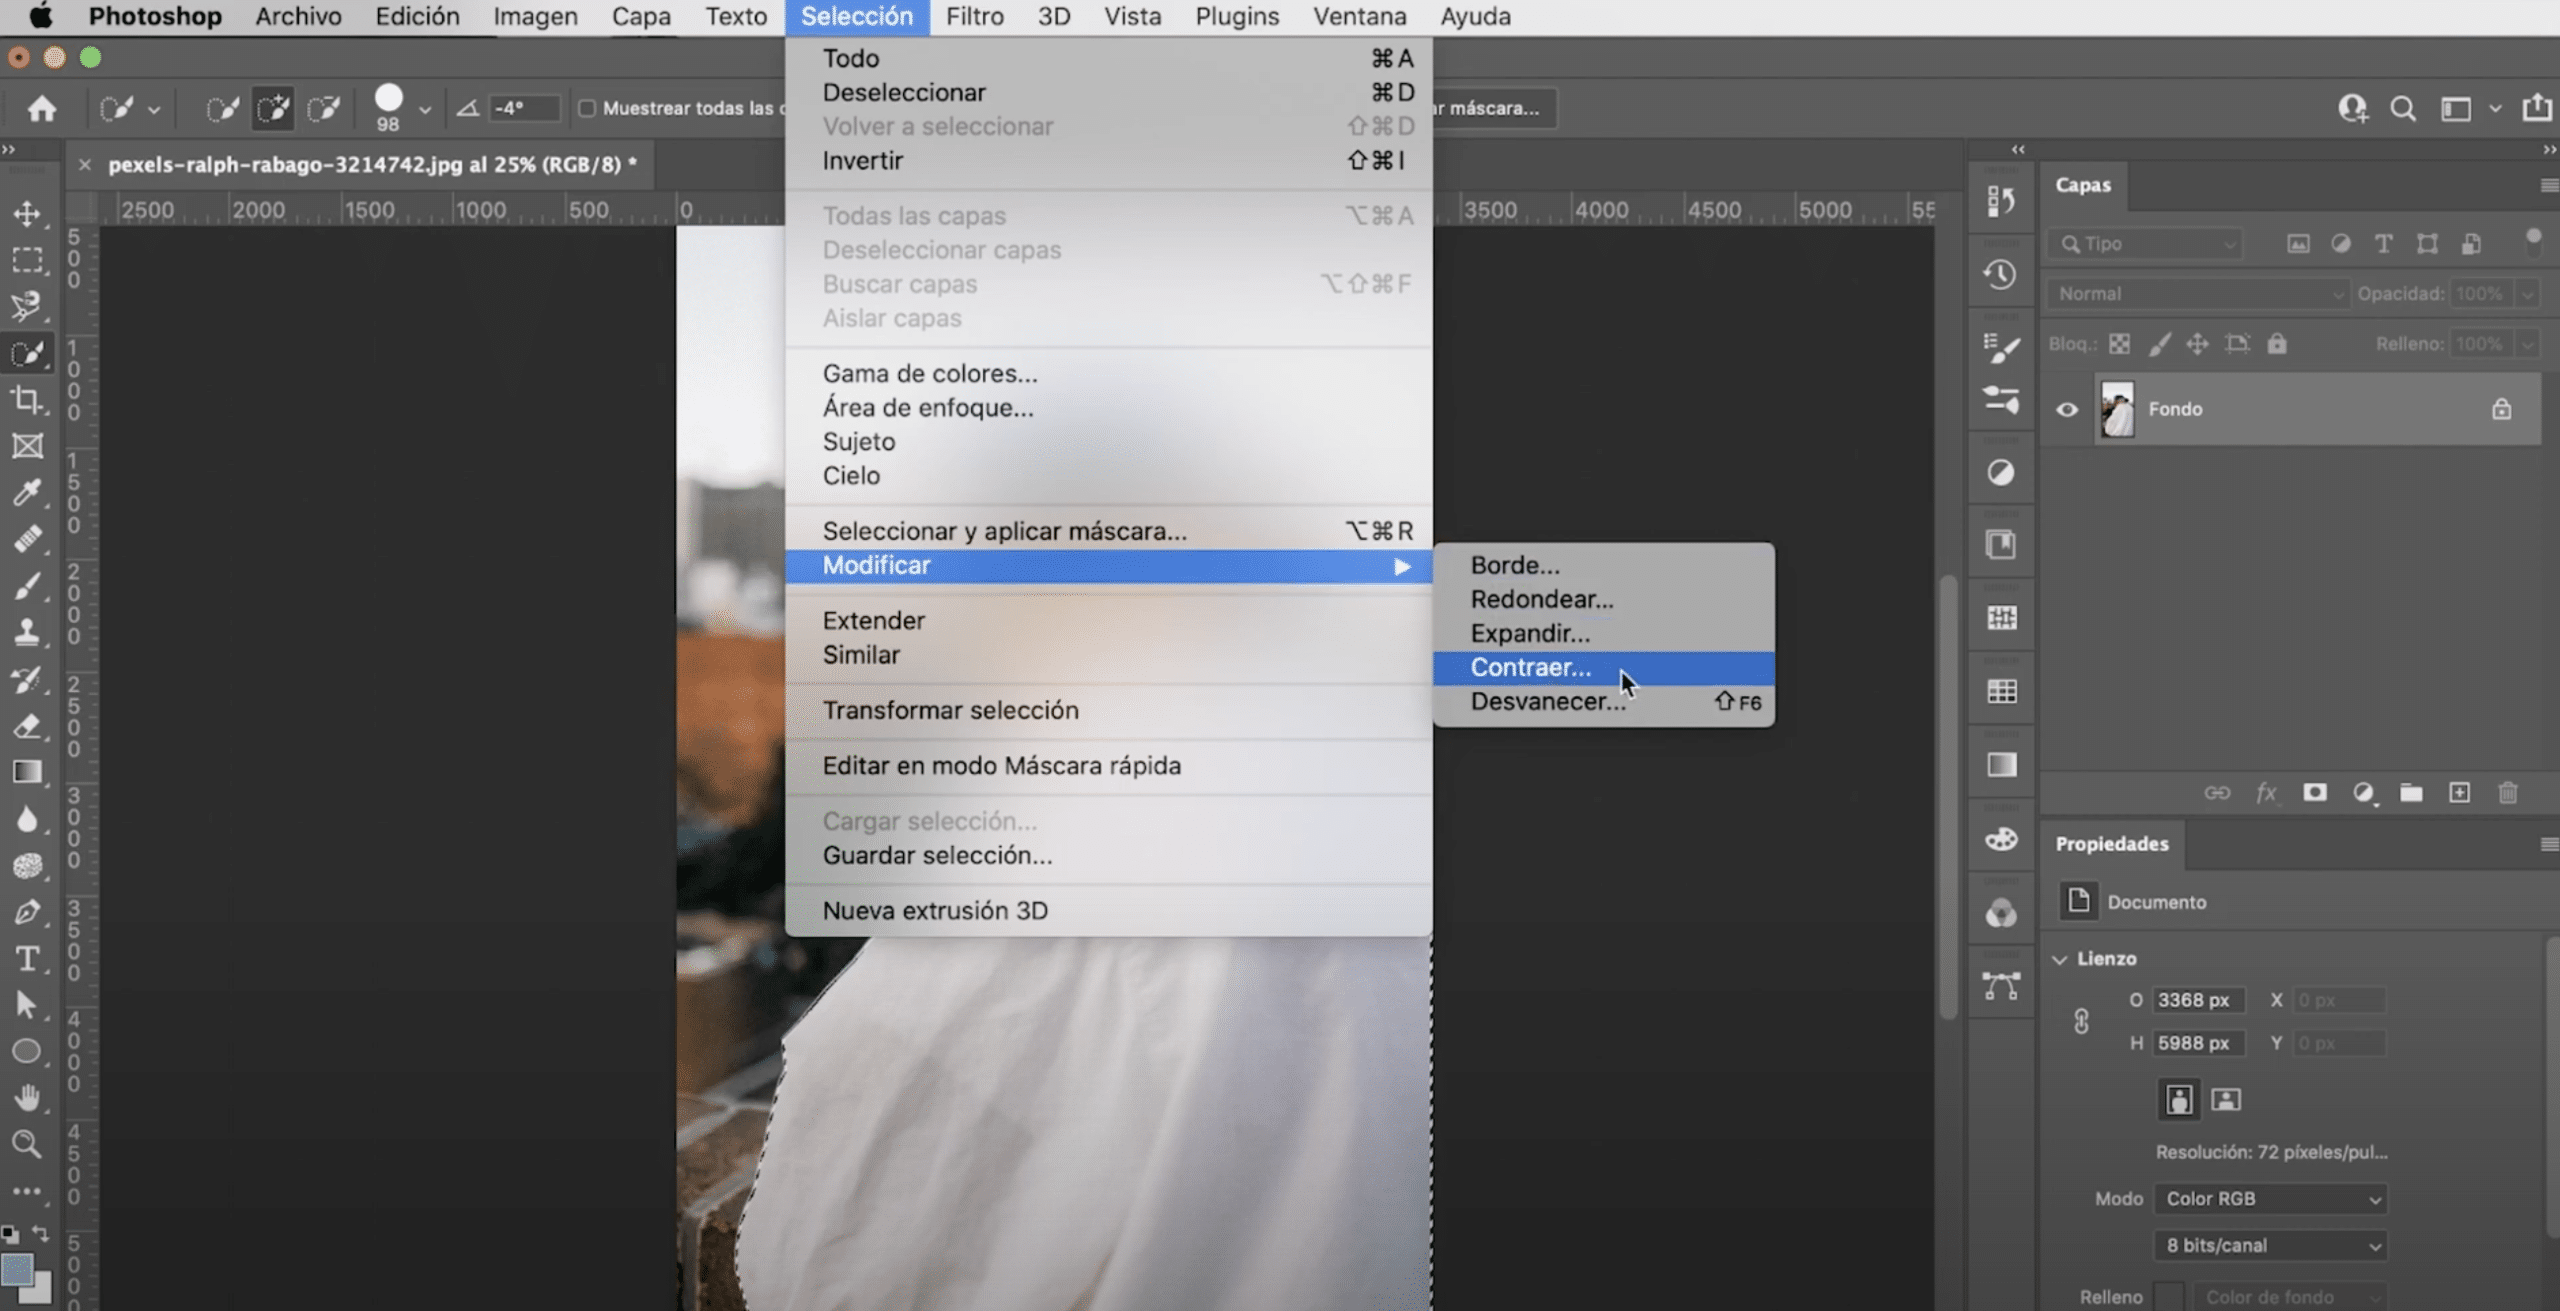
Something that usually works in these cases is modify selection. We will do it as follows:
- Erase the solid color layer and get rid of the layer mask. You can do control + Z (Windows) or command + Z (Mac) until you reach the selected subject or go to the tab »window»> History and click on the step «select subject».
- Then go to the top menu and in the "selection" tab search for "modify" and click on "collapse". With this action we get the selection to contract a few pixels. A window will open, as the halo that has remained on the edges is very fine, we only need the selection to close 2 or 3 pixels, so we will put those values.
Correct imperfections with layer mask
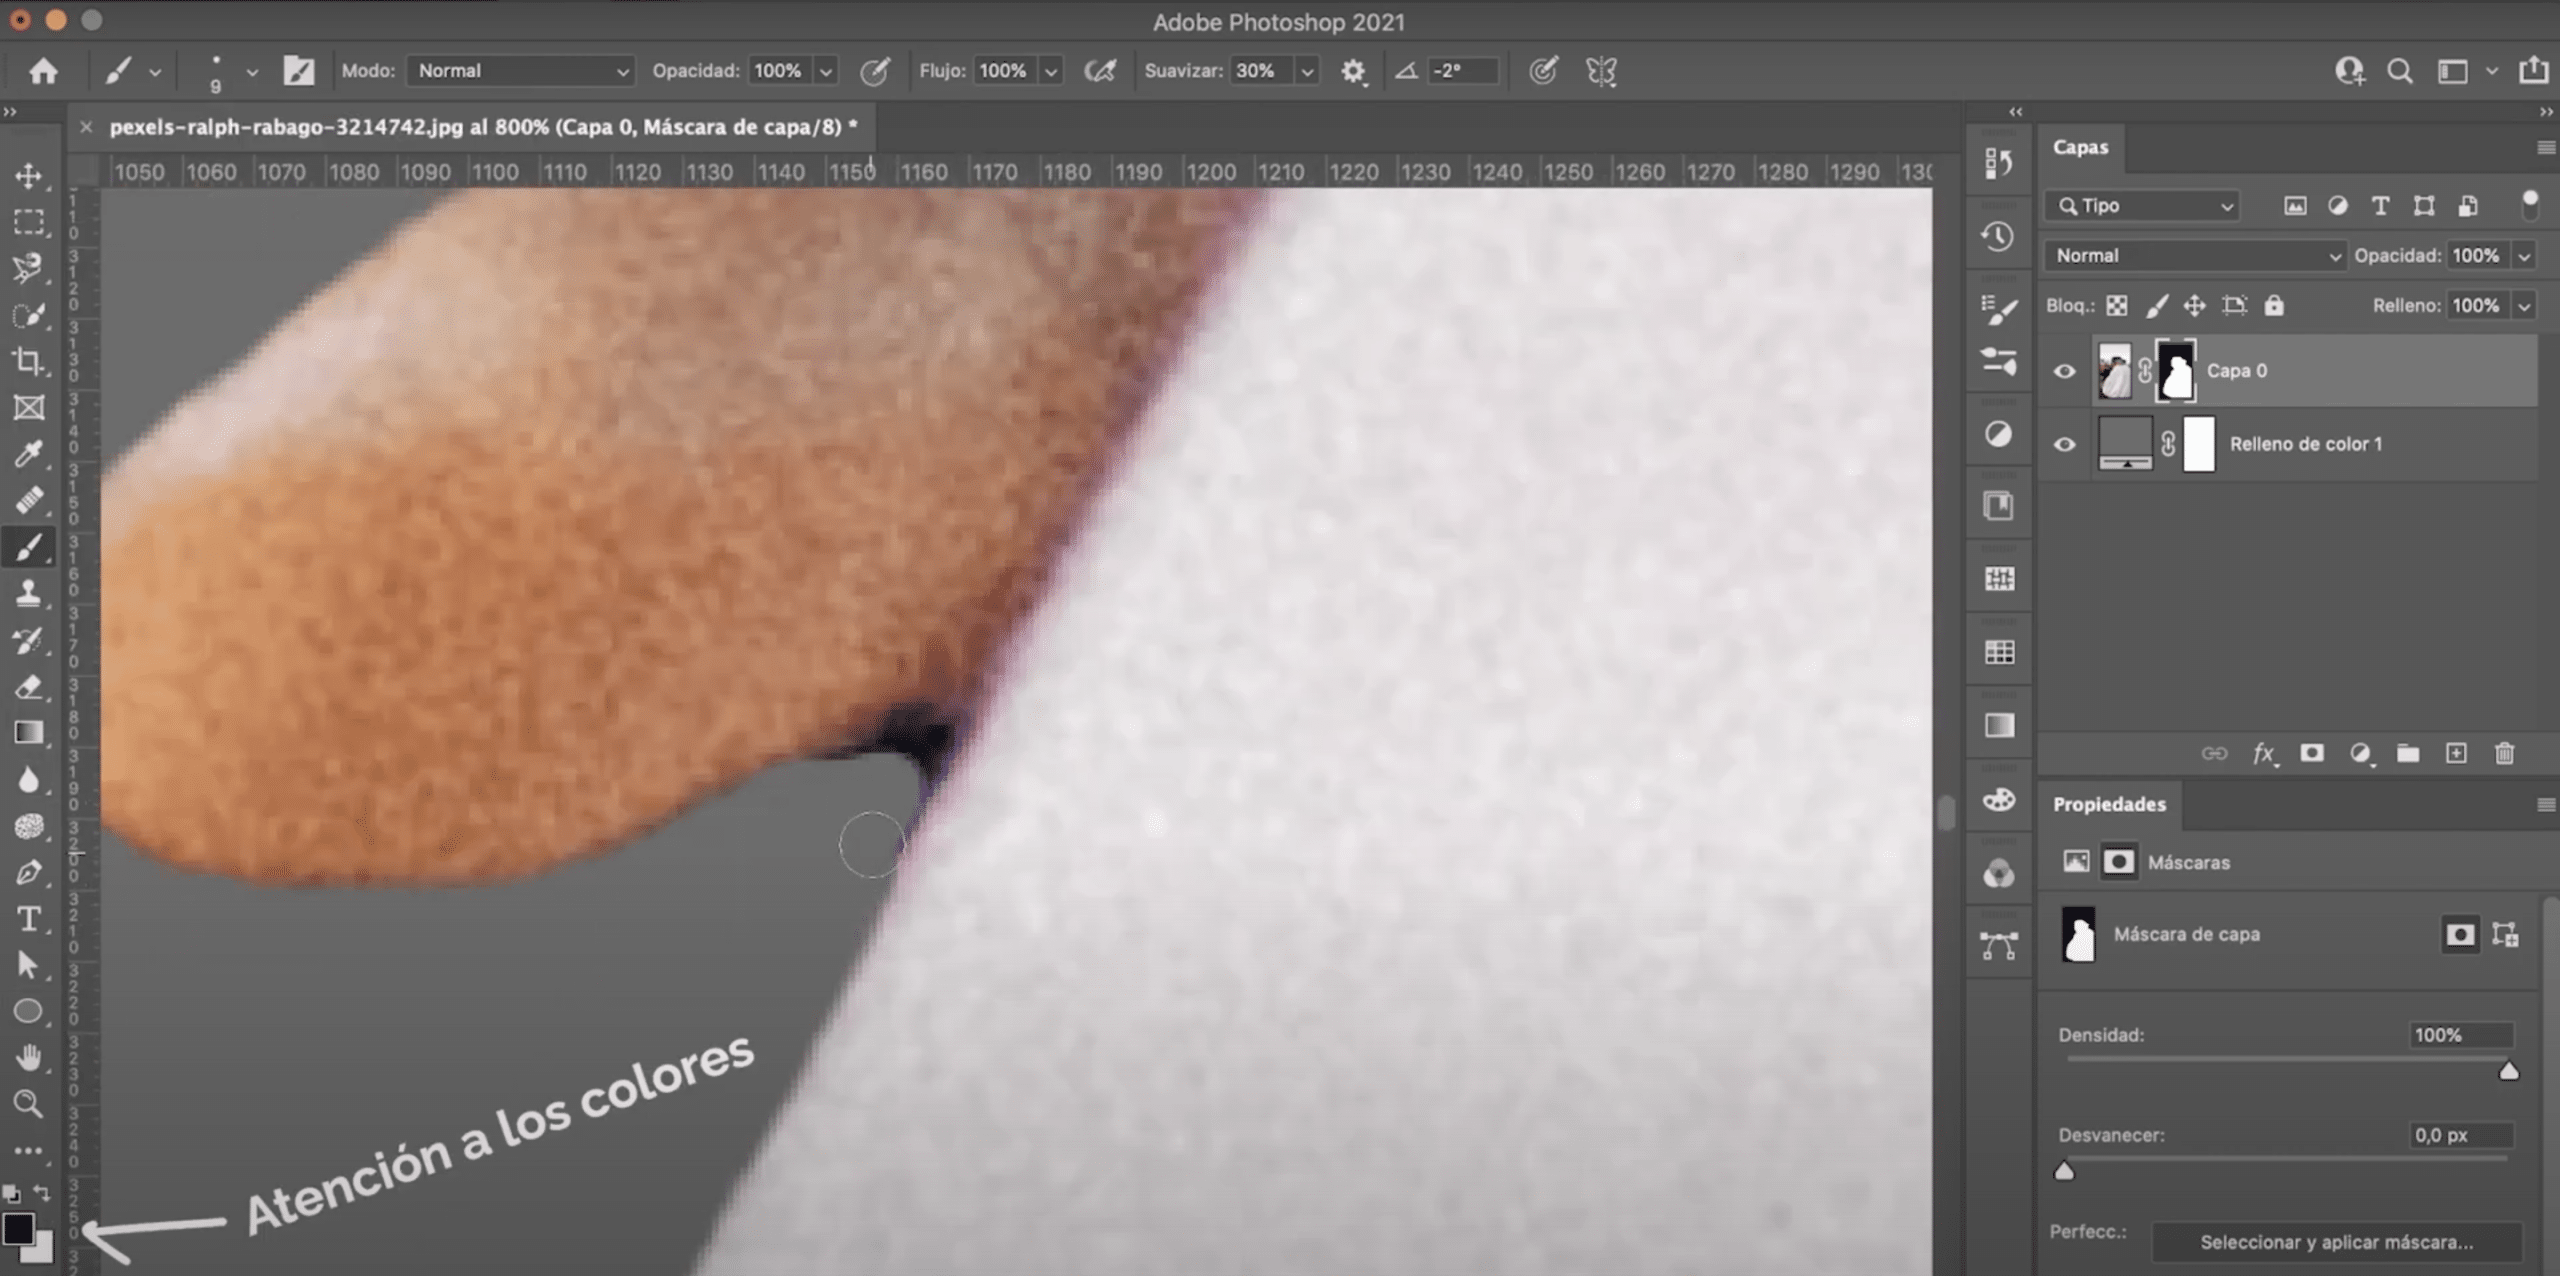
If you see any more imperfections, always you can create a layer mask. By clicking on it and with the brush you can correct those small errors that have been able to stay. Remember that with black color we exclude of the selection and with white we include.
If you liked this trick, you cannot miss this one for change the color of anything easy and fast in Photoshop.