Photoshop is a great tool to give an artistic touch to your photographs. In this tutorial we will tell you how to transform a photograph into a real pencil drawing.It's super easy! If you want to know how to make the drawing effect in Photoshop, don't miss this post.
Open the image and duplicate the background

The first thing we will do is open the photo we want to edit In Photoshop, you can just drag the file and it will open automatically. The bottom layer is we will doubleTo do this, go to the "layer" tab in the top menu and click on "duplicate layer". We will give the copy the name of "Layer 1".
Desaturate layer 1 and create layer 2
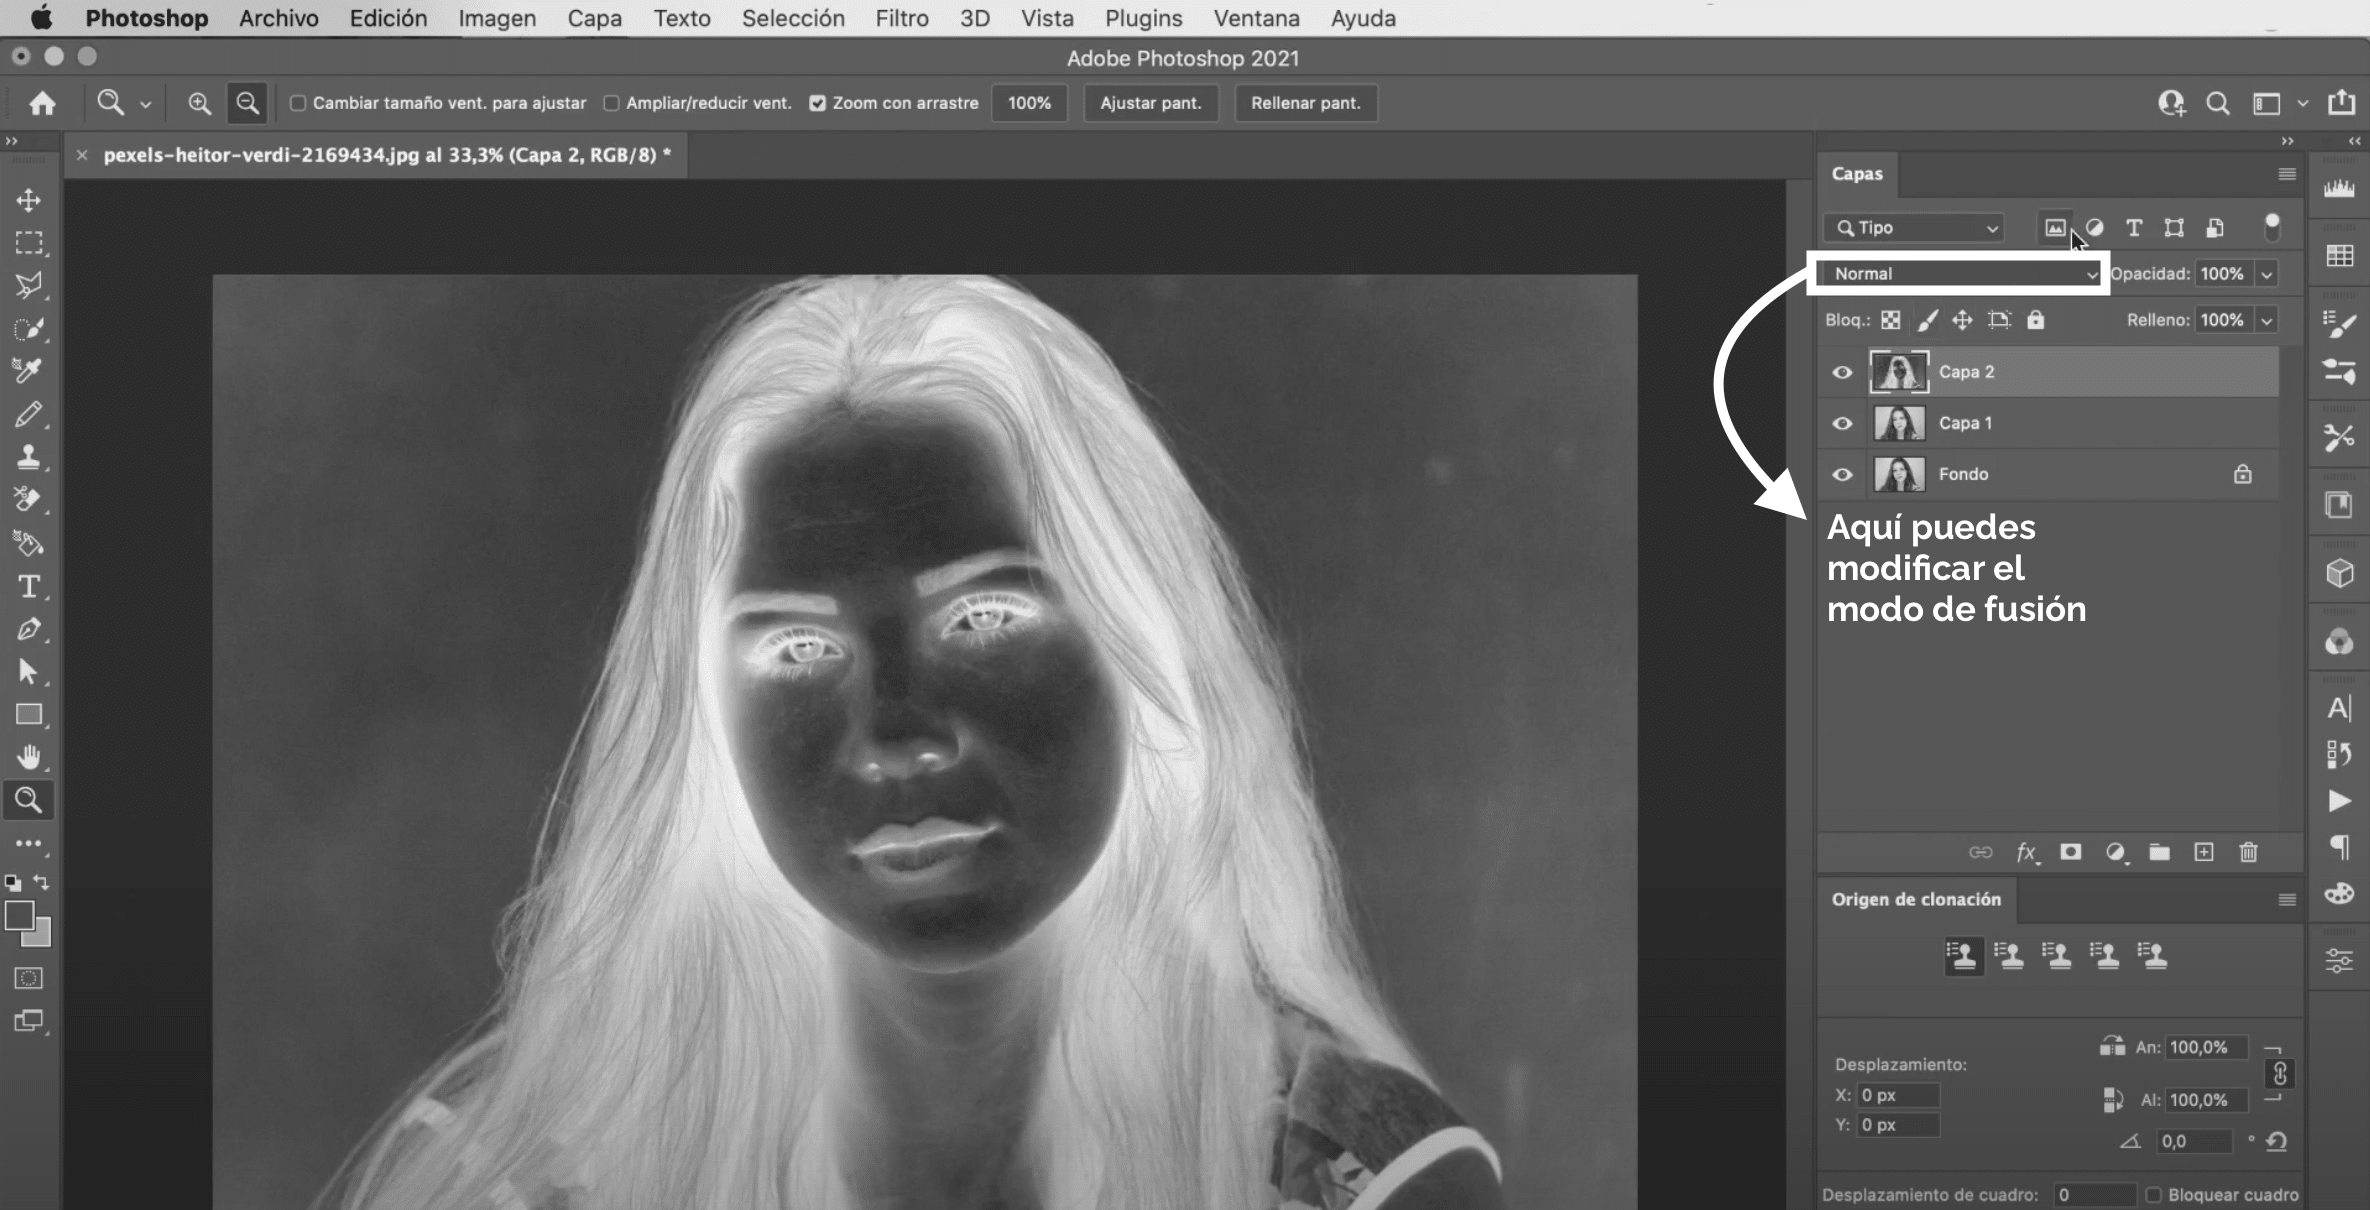
We need the "Layer 1" be in black and white. To do this, select it, go to the "image" tab in the top menu, "settings" and click on "desaturate". Now let's duplicate "layer 1"We will give the copy the name "layer 2". Next we will invert the colors of this new layer, for this type command + io control (Mac) + i (Windows). When you have the negative image, change blending mode. You can do it in the menu that appears indicated in the image above, select the color dodge option. The image will go completely blank, but don't worry, let's fix it!
Apply Gaussian blur filter
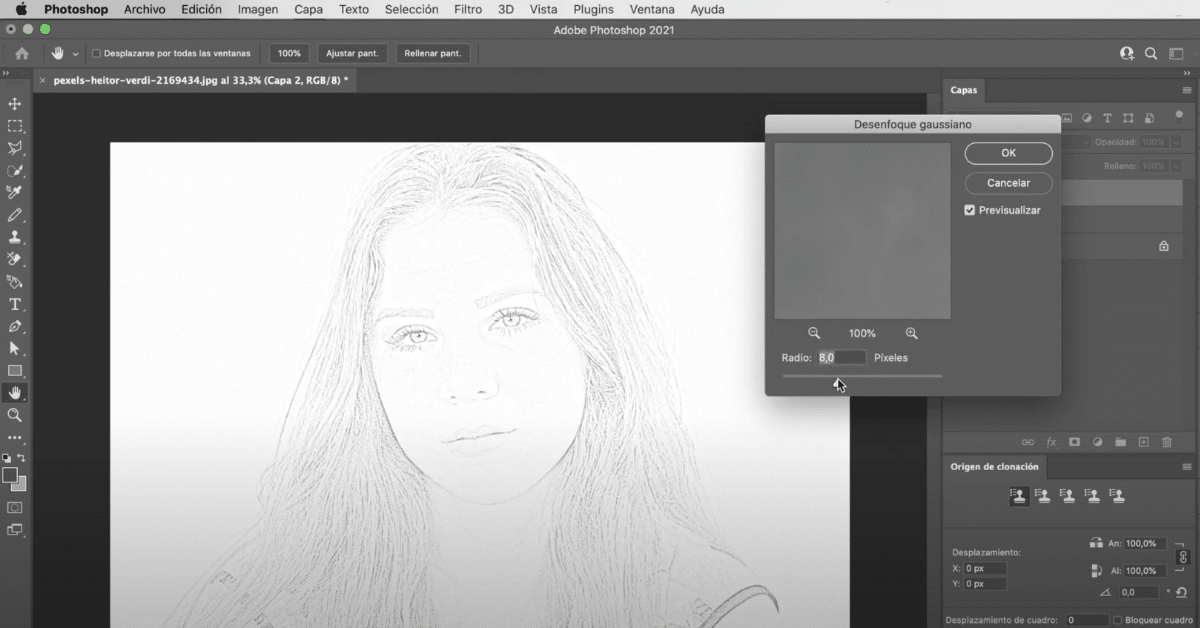
About "Layer 2" we will apply a blur filter. Go to the tab "filter" In the top menu, click "Blur" and select "Gaussian blur". A small window will open where you can modify the values of radio. The higher the value you give it, the more level of detail the drawing will have. So I prefer to leave it more to the left, at 8, to reinforce that pencil drawing effect.
Final touches with the Burn tool
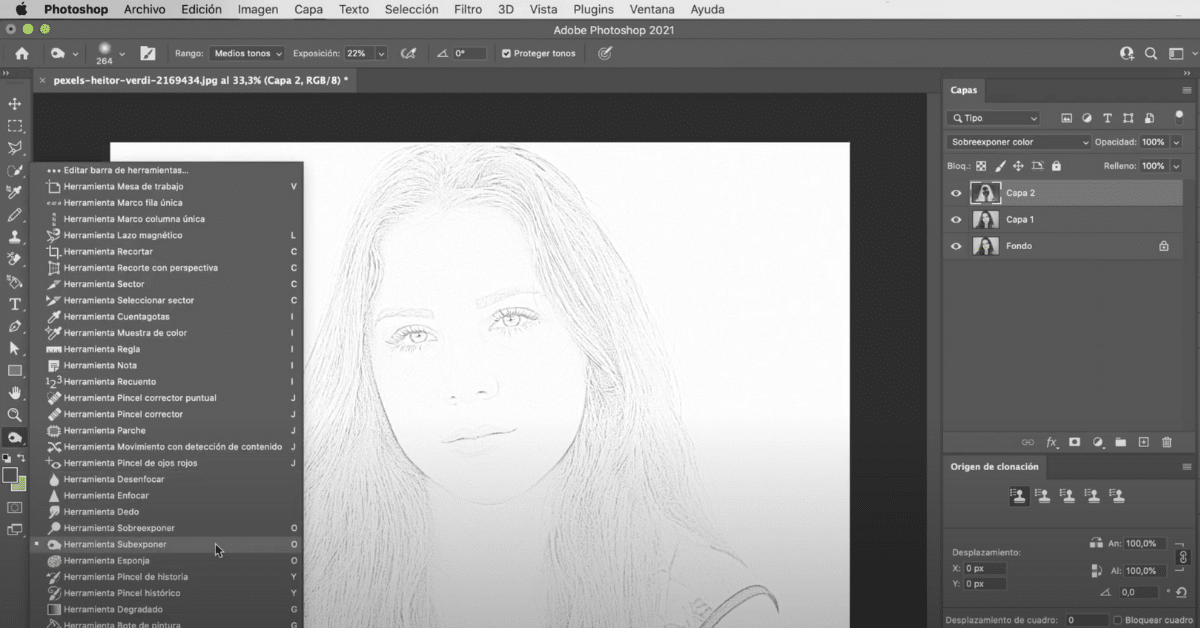
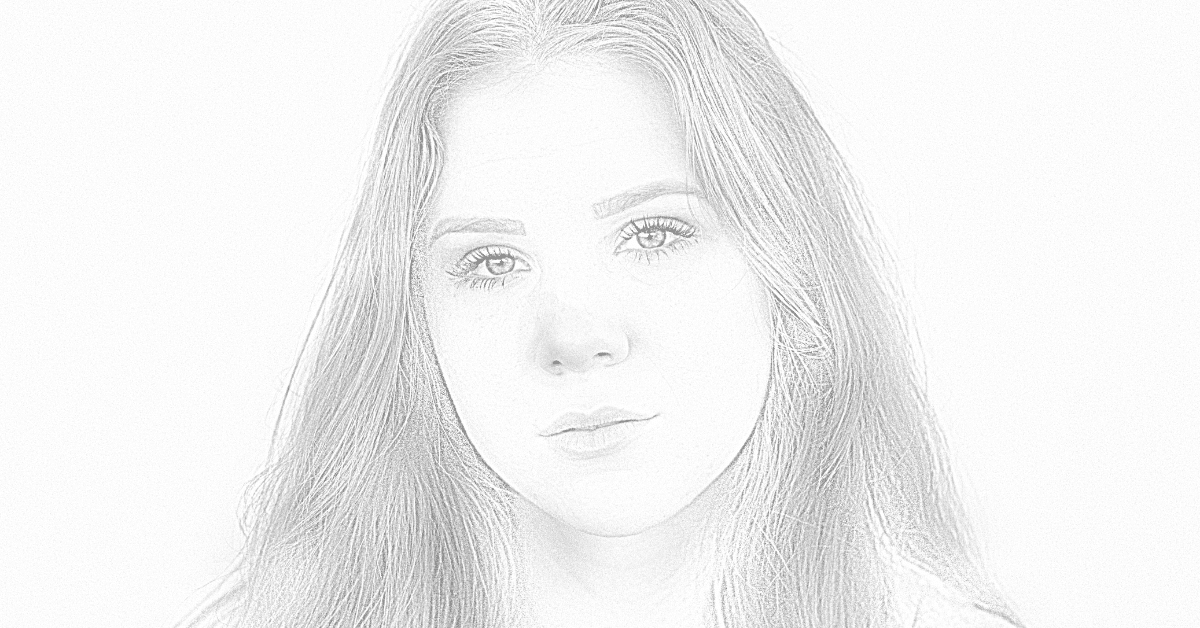
What we have already looks like a drawing, but let's go one step further to make the result even better. In the toolbar we are going to find the Burn tool. In the tool options menu you can modify the type and size of the brush and adjust the exposure level. I recommend you choose a diffuse circular brush, large and keep a exposure from 20 to 25%. Now let's paint specific areas of the image, with this we will get a shading effect which will improve the appearance of the drawing. I have painted areas of the hair, nose, eyes, chin What do you think of the final result? If you want to continue learning tricks to give your photographs an artistic touch, you could see our tutorial on how to apply smart filters in Photoshop.