
Although today let's have a zillion apps For mobile devices that allow us to apply effects and filters of all kinds, such as those Vintage, it is always very good to be able to apply them manually if we put ourselves a bit in the work of knowing the steps to leave our photographs with our own personal touch .
In this extensive tutorial we will take a photograph that has specific nuances to accentuate its character and turn it into a vintage That will make the social networks where you share it burn to like you. In about 30 minutes you will have with you a totally modified Vintage style photo if you follow the steps that I am going to share.
How to apply Vintage effect to your photos with Adobe Photoshop
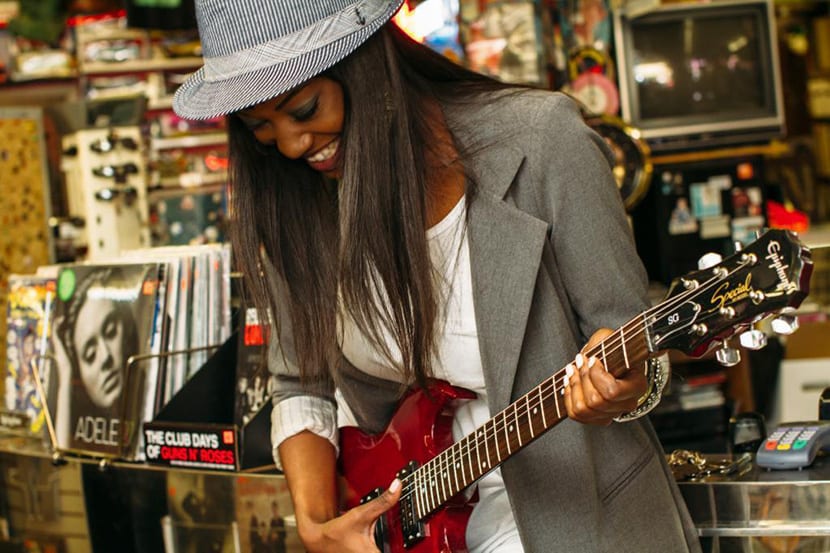
I have looked for a photo that has something in particular such as the smile of the model, which have an object with her so that it adorns the composition well and has a background that can create more harmony in all the photography and the Vintage effect that we are going to apply.
I also have to say that for the tutorial I have used Adobe Photoshop CC.
- The first is download the photo that I have taken for the tutorial from this link
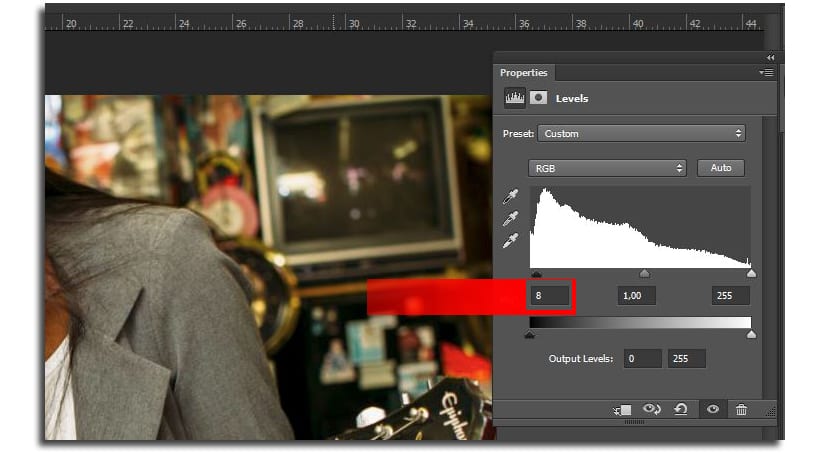
- We open the image in Photoshop and go to the «Adjustments» panel and create a «Level Adjustment layer»:

- We increase the amount of black to 8 as you can see in the image below:
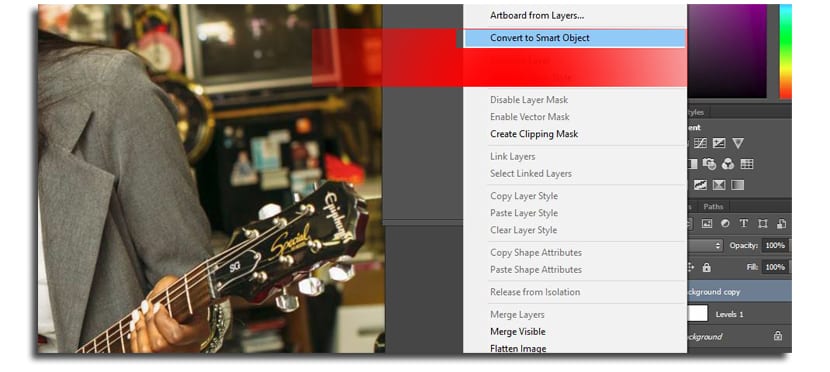
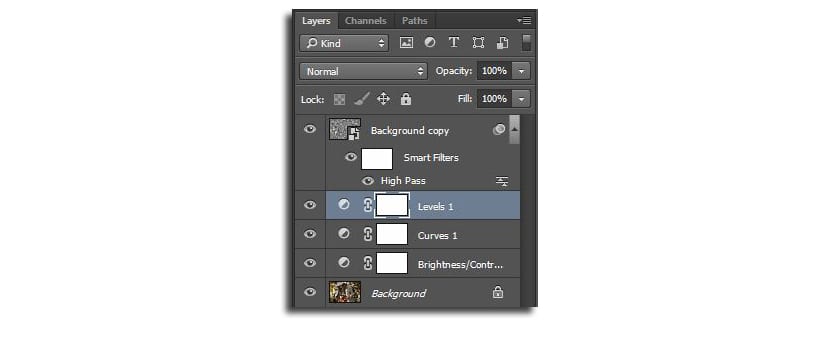
- Now we duplicate the layer «background»And we move it over the top of all the layers we have
- Right click on the new layer in the layers panel and select «Convert to SmartObject«. This allows us to easily review or correct the effects that will be applied next, if needed.
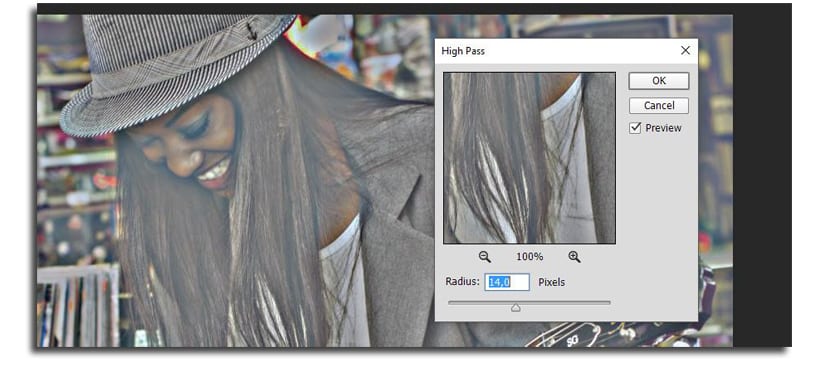
- Now we are going to increase the line thickness and contrast of the image, so we are going to apply the High Pass filter to the new layer created. Select Filter> Other> High Pass
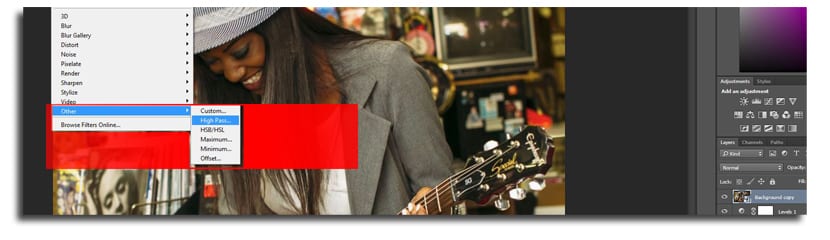
- We will use the radius of 14 and click on «Ok»
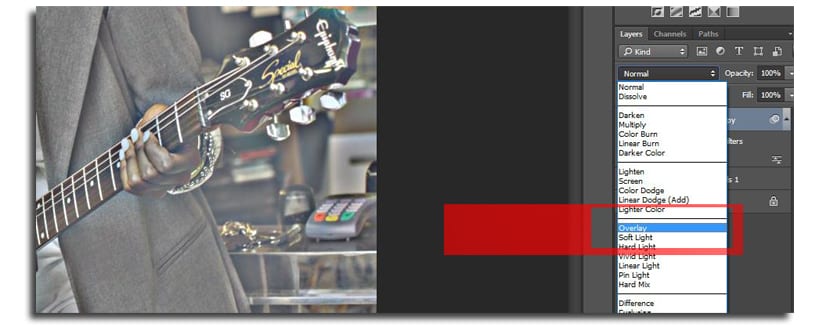
- Now we have to change the layer mode to «Overlay»To accentuate some aspects of the photograph, as shown in the image:
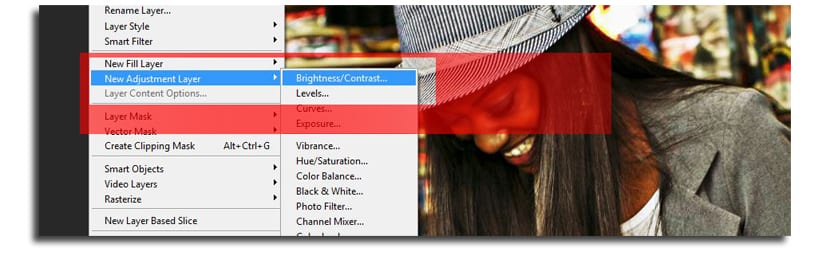
- The next thing is to decrease the contrast of the background of the layer. We are going to Layer> New Adjustment layer> Brightness / Contrast
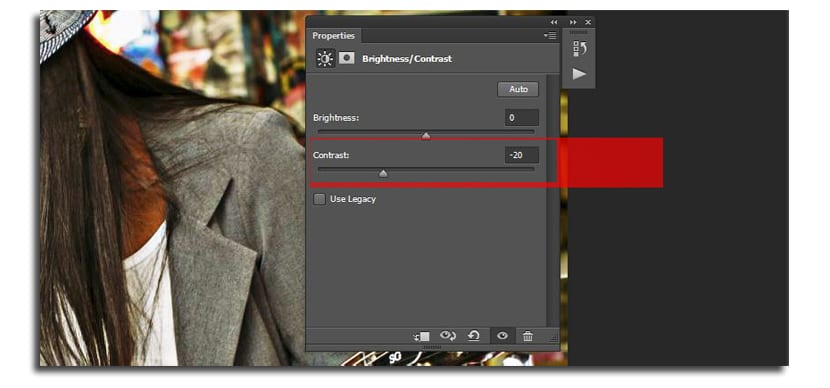
- We use the contrast setting at -20
- Now we add a new layer of «Curves» from the «Adjustments» panel as shown in the image:

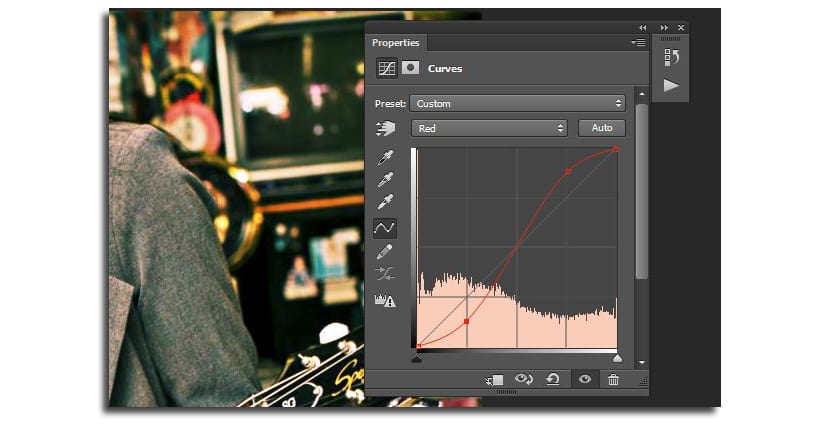
- Now we have to manipulate each of the channels individually. For him Red Channel We increase the light tones and decrease the dark ones by using a curved shape by creating a point at 25% and another at 75%. The picture shows it perfectly:
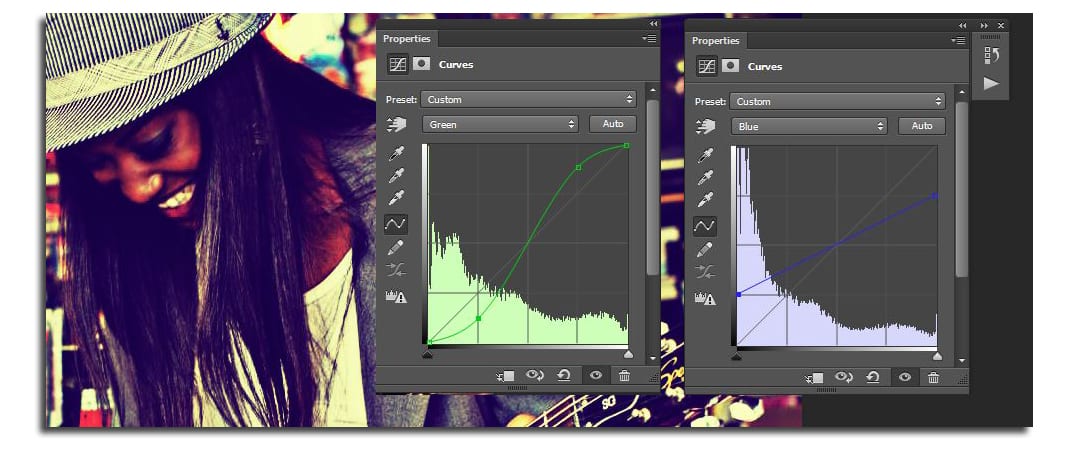
- For the green channel we do the same as with the red channel, and for blue only we will lower the light tones to 75% and we will raise the dark tones to 25%. To clear the image:
- Now we are going to upload the layer «background-copy»To the top above all
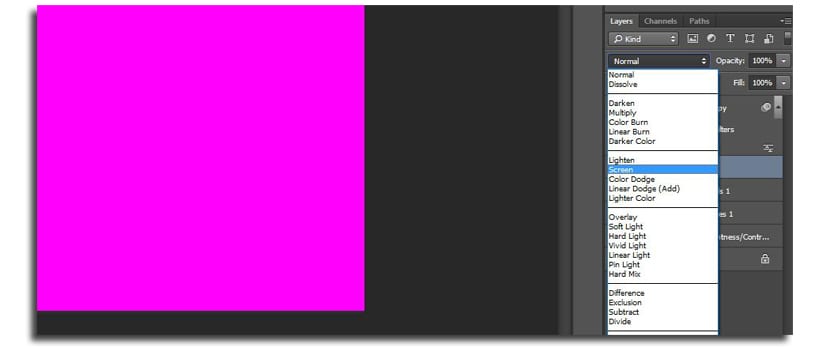
- The next thing is to create a layer on top of the «Levels» layer and fill it with magenta with the values R255, G0, B255

- We change the layer mode to «Screen» and we reduce the opacity (Opacity) to 6%. With this what is achieved is to add a little warmth to the Vintage effect
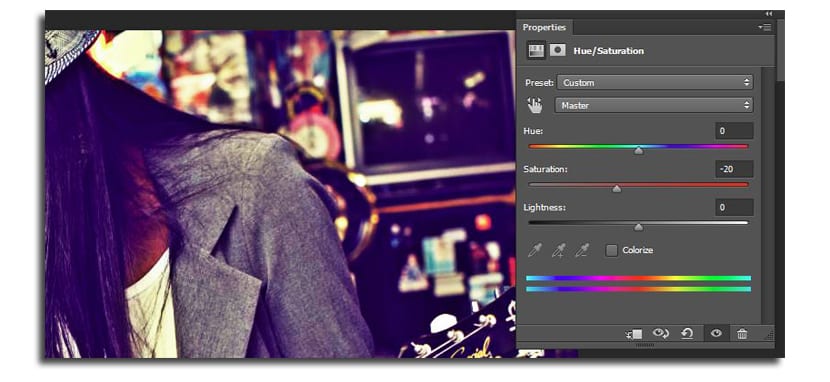
- Select the "Background" layer and add a Hue / Saturation adjustment layer from Layer> Add Adjustment layer> Hue / Saturation. In the window we move the saturation slider to -20. What this does is whiten the image without reducing the warmth added previously
- We duplicate the Background layer and select Filter> Noise> Add Noise. Here we use an amount proportional to the size of the image. The one used in this tutorial has a width-sized image of 1024 pixels, so we use a percentage of 4.0. If the image were 2048, it would be 8.0… Multiple of 4
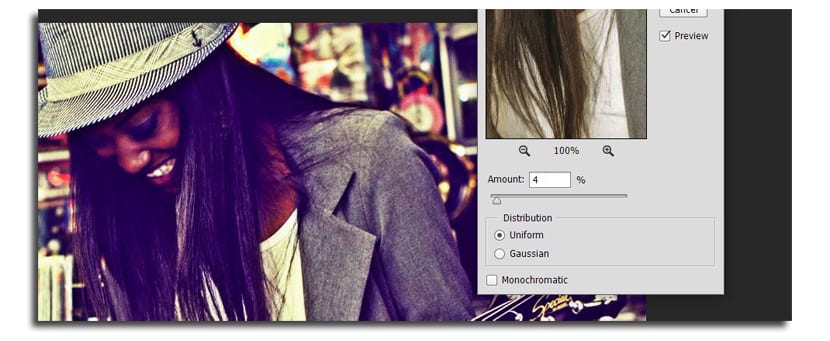
- You have to make sure that Uniform is active and Monochrome no
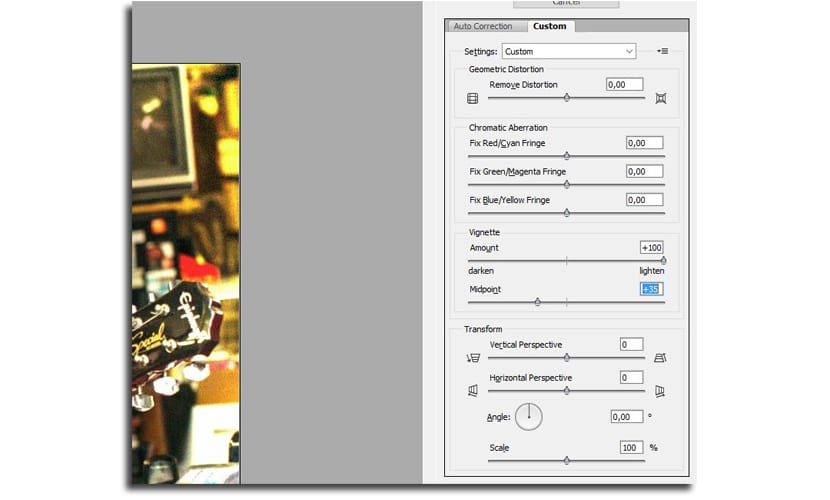
- Now, with the noise layer selected, we choose Filter> Lens Correction. In the window we select Custom Tab and in the Vignette section, we reduce the amount to -100 and raise Midpoint to +35
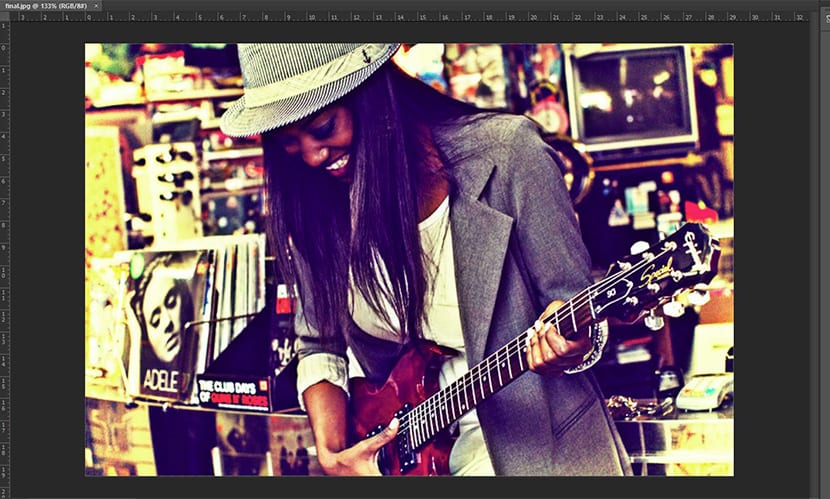
- We have list the picture with the Vintage effect as you can see:
We leave you with a tutorial for coloring a photo in Photoshop.