
Do you love hand painting and want your illustrations to look just as good digitally? This is your place. In this post we will use Photoshop's Magic Wand tool to fix possible scan errors in your illustrations and build quality images.
From analog to digital
In a previous post I talked about how to correctly digitize your illustrations, I recommend you read it well before going to this step. Next I will explain in more detail the use of the magic wand, as well as the handling of the corrections.
Using the magic wand
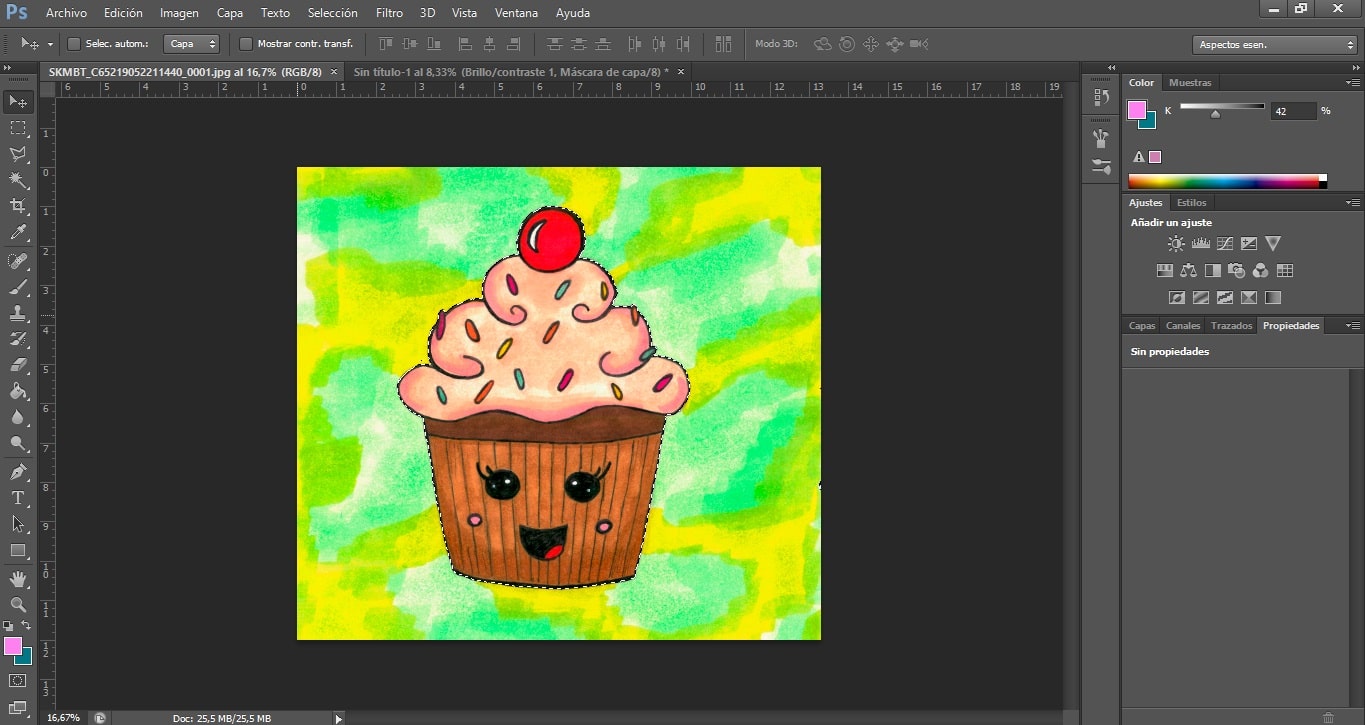
- First We select the background where the drawing that we want to separate is located (we click on it with the wand). If it does not take the entire drawing, we will have to increase the value of the tolerance. It is possible that selected dots remain scattered around the background, to remove them we just have to click on them. If these points are numerous, we can encompass them with the select tool, they will be automatically eliminated.
- Press Selection> Invert. Now only our drawing will be selected, without the background.

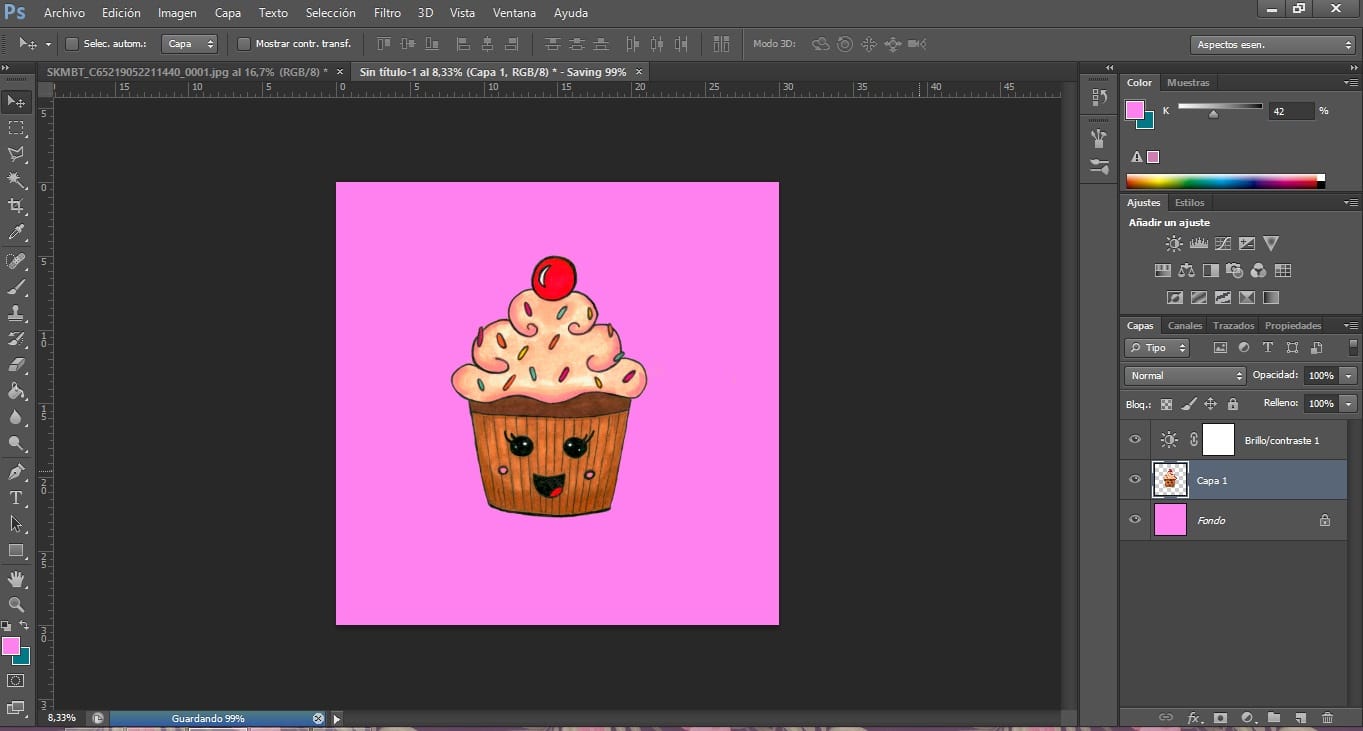
- We create a new document with the color background that we prefer and we copy and paste our drawing there. Edit> Copy (being in the drawing document), Edit> Paste (in the new document). A new layer will be created with this object, independent of the background.

- If we want to put multiple illustrations in our new document, we do the previous steps again, pasting the illustrations in the new document, which will be in different layers. If in the future we want to put together a pattern (like those used in textile design), it is advisable to have a document like this, where we will file all our drawings clean, which we will use later in different patterns.
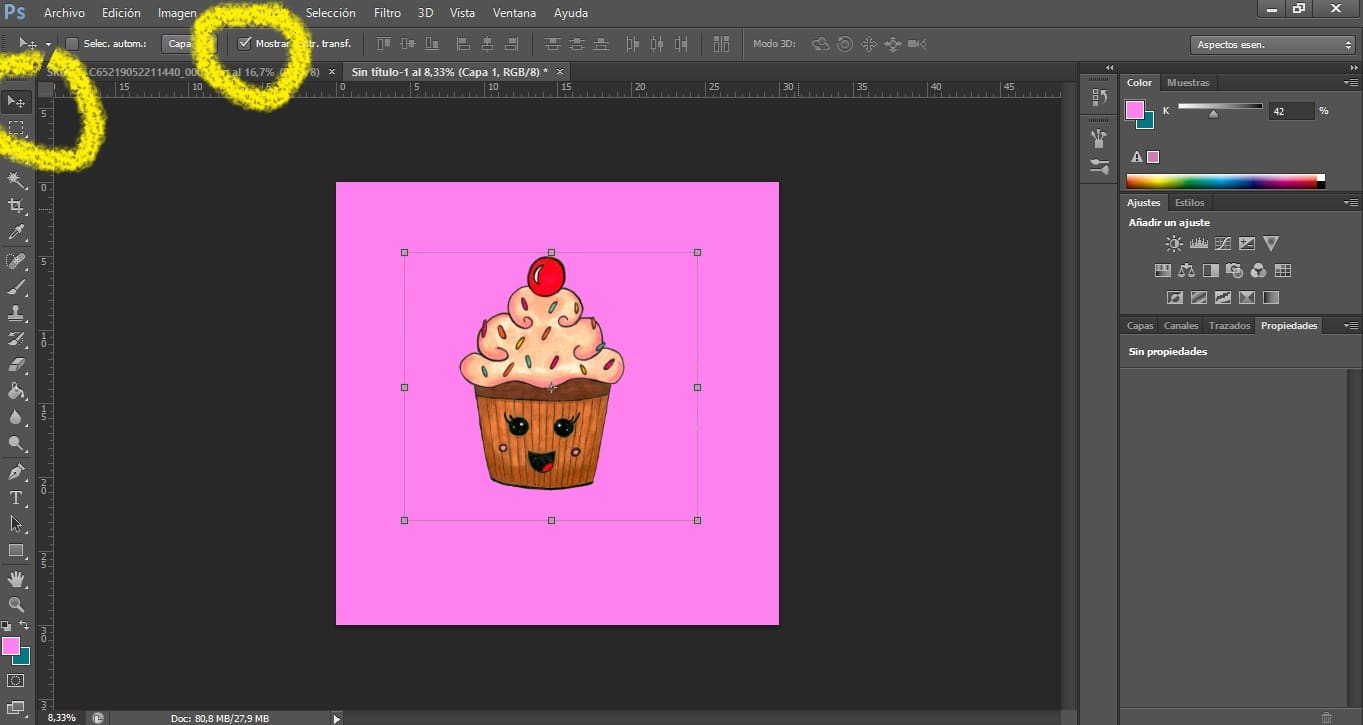
- We can resize any object by clicking Edit> Transform> Scale. Also with the Move tool and pressing the following transformation button:

- If we want to change the brightness, color, etc., of one of the drawings, without changing the others or the background, we must press its layer. Next we will press the setting that we want to change and, before making the changes, the following button. This will ensure that we modify this object and not the others. When pressed, the layer we modify will be underlined.

- Our illustration may contain halos, that is, it is surrounded by a kind of light that distorts the sharpness of its edges. We can partially remove them by clicking on Layer> Halos> Remove Halo. In the event that it does not identify it, we will proceed to upload the pixels. Remember that you must always be on the layer of the object you want to modify. To better erase the halos, we can use the eraser tool and do it manually. It is advisable to enlarge the drawing well to be more precise.
- We may have to retouch some color area of our illustration, which did not look good when scanned. For it we will use the Brush tool. To select a color that we already have in our drawing, keeping this tool pressed, we click with the mouse on the desired color area, pressing the Alt key (the eyedropper will appear). Now our brush will have that desired color, being able to fill in the area we want. We can also use the Clone tool to fill an area with color.
- If we want to modify the colors of our image in a precise way, we have several options. One of them is to press Image> Adjustments> Color Balance. Another would be Image> Adjustments> Saturation (ideal for selecting a color and modifying the undertones).
- If what we want is completely change the color of a drawing, we must select two colors with the eyedropper and go to Image> Adjustments> Gradient map. We are shown several options that we can use, as is the case of inverting the colors of our image.

To be able to use the images, we will create a new document and, by clicking on the image layer we want, we will select and cut it. We copy and paste in the new document. Only our image will be pasted, as we have created it on a separate layer from the background.
We already have our illustrations ready to be used in many new creations!