Would you like to know how to make patterns or prints to apply them to countless products? In this post we will learn how, from hand-painted illustrations, we can create beautiful designs that you can use on textiles, mugs, notebooks and much more.
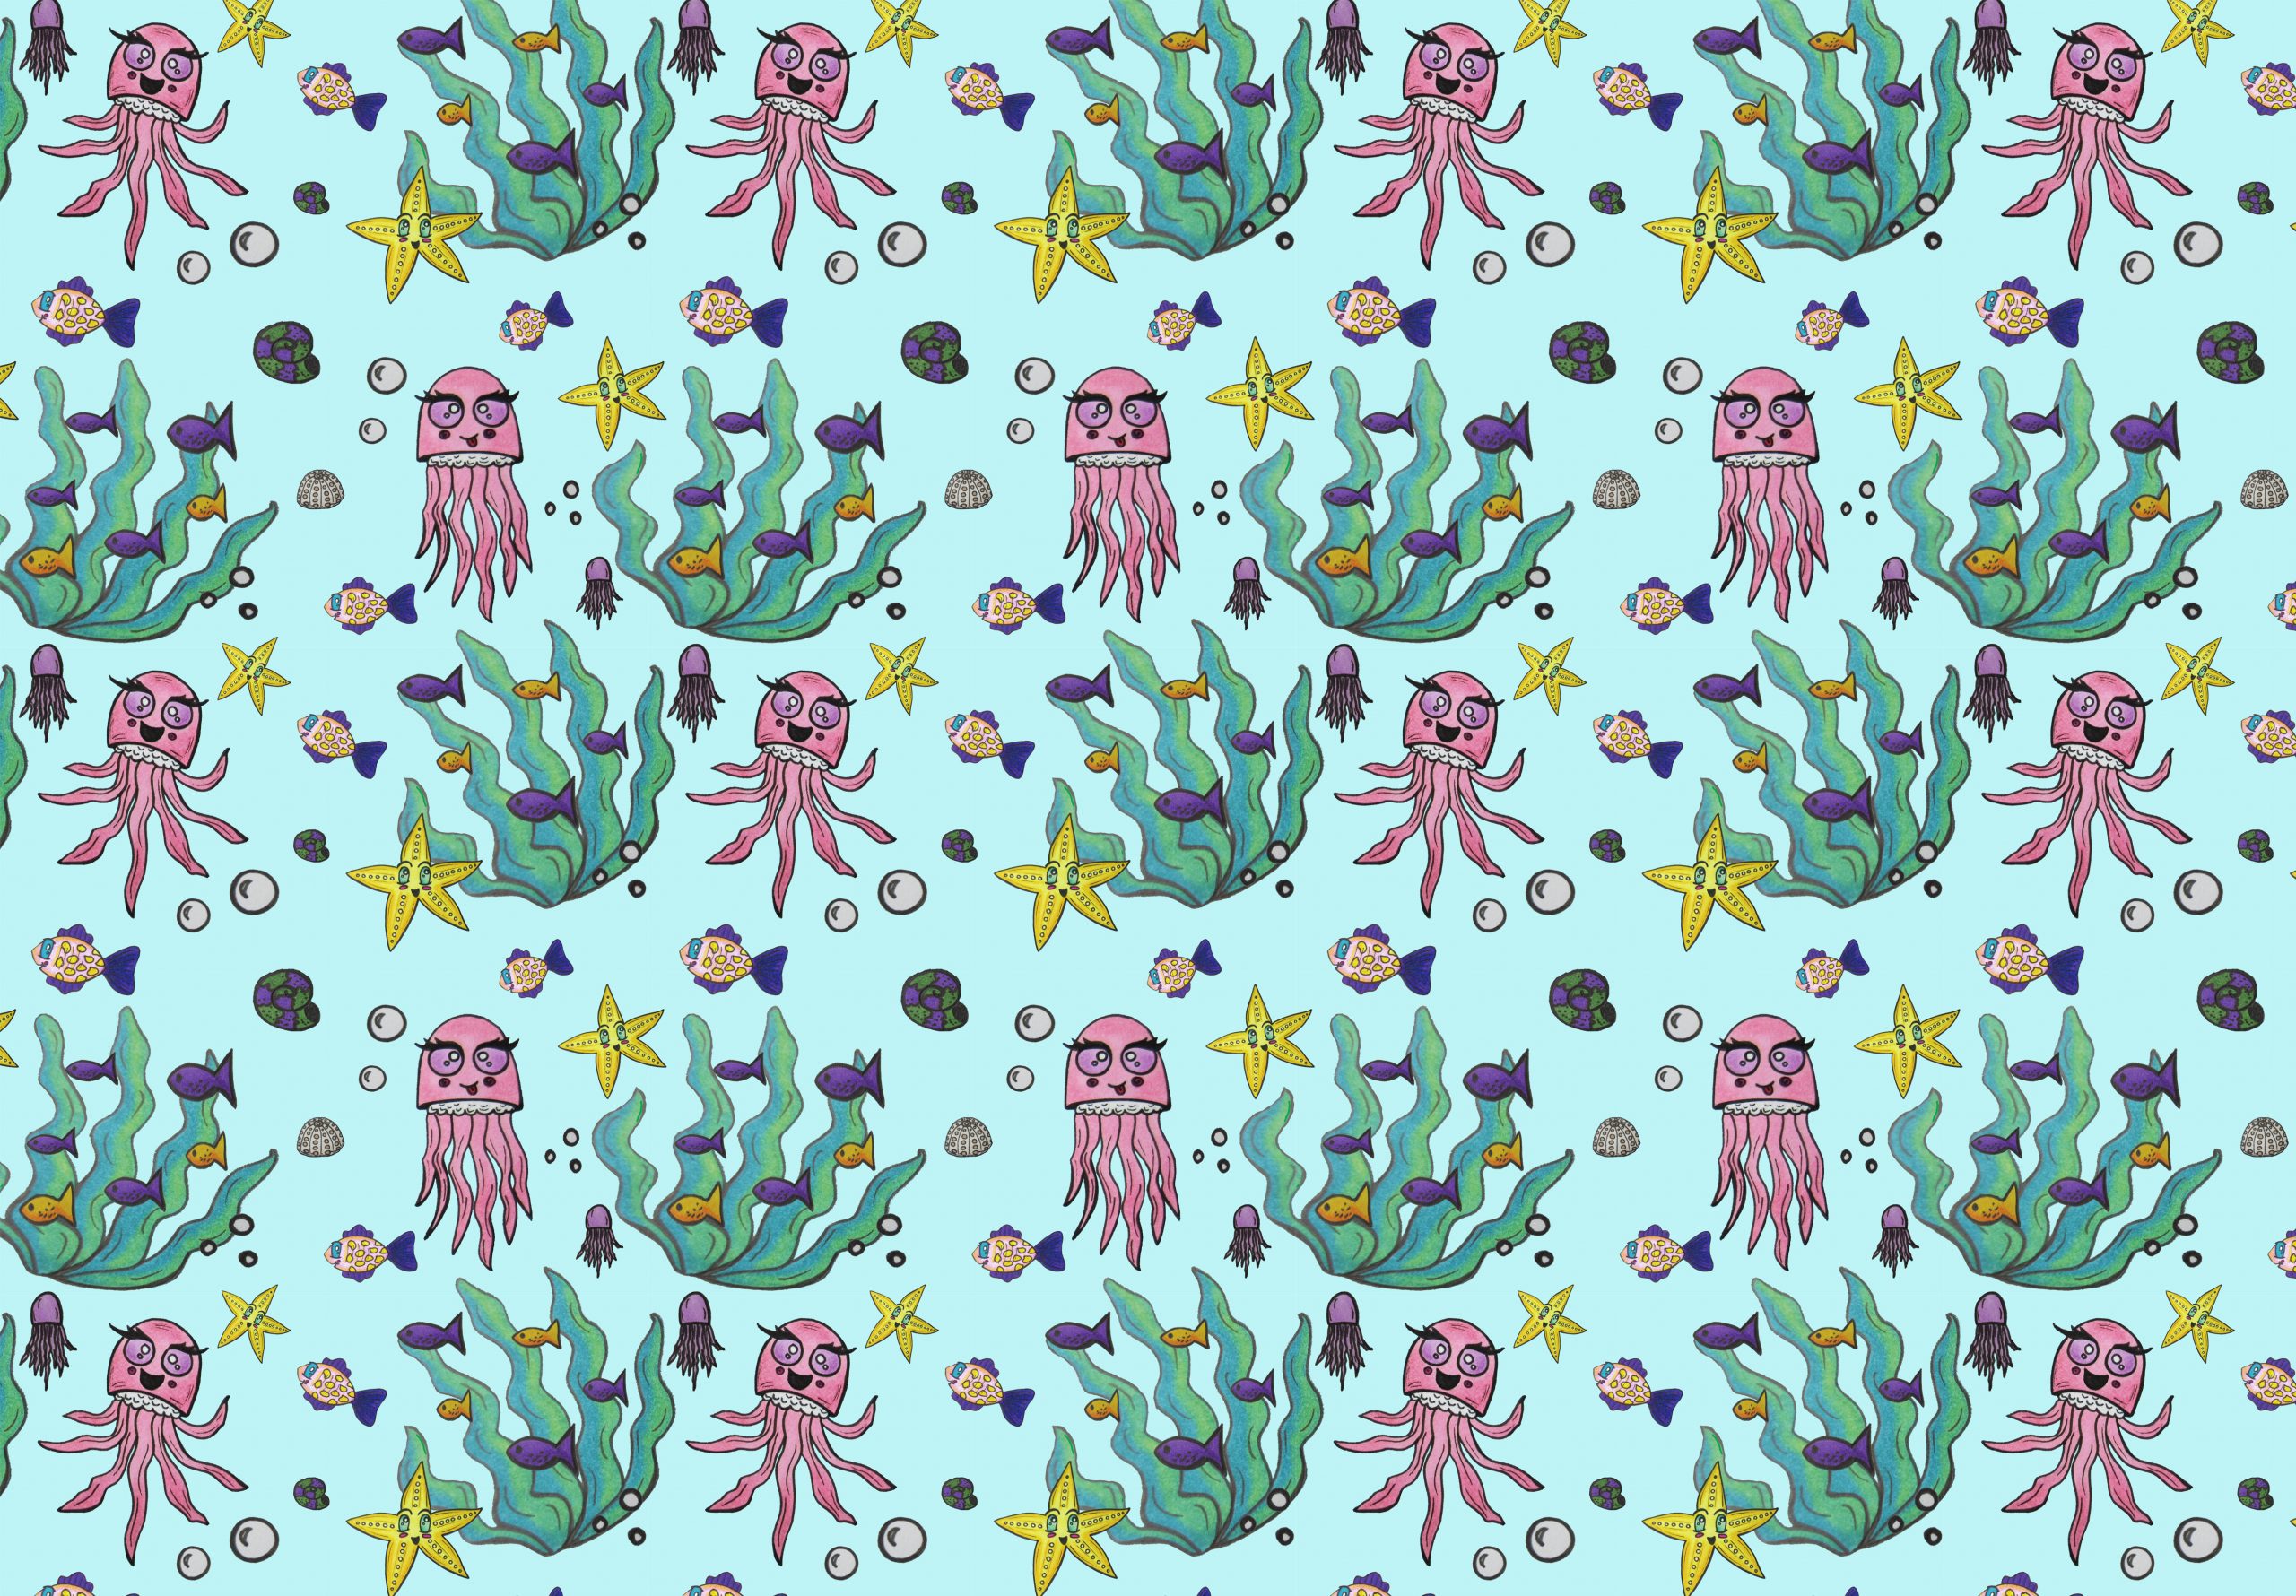
A pattern or print consists of a set of basic repeating units called rapports. Thus, by being assembled in this way, we ensure that there is a very wide continuity of a pattern to be applied on any surface, without the loss of quality that would occur if an illustration were greatly enlarged.
If this is the first time you come here, I advise you to read first my post on how to create a rapport or unit of repetition, as it will be the basis of our pattern.
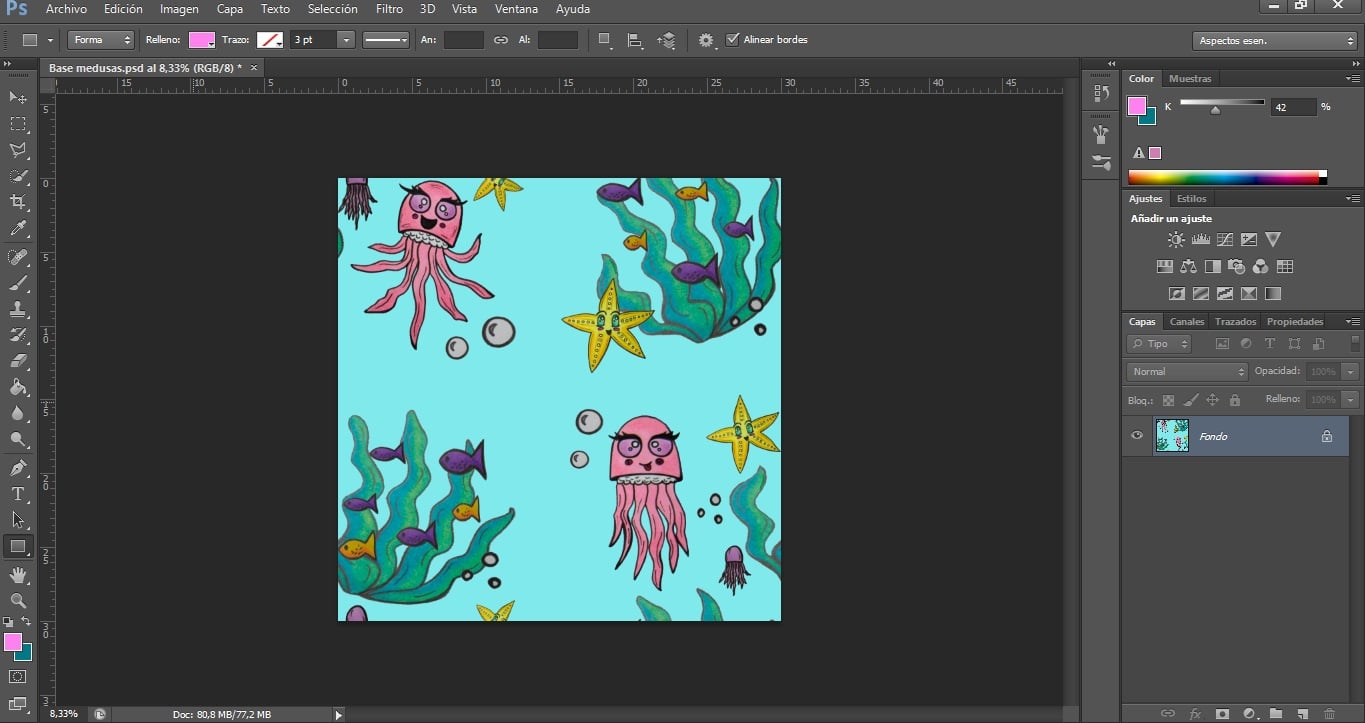
Once we have created this basic unit (which we will have saved as Inteligent object to be able to modify it later), we can create a new document and copy our repeated rapport in any way we want, for example by forming a grid. But here comes the problem: we have gaps between the rapports and the grid shape is noticeable.

Filling gaps between repeating units
It is important that our pattern has a continuity, that is, that the gaps are not seen so clearly (unless we want this specific design). How can we solve it? First we will rasterize the Smart Object to be able to operate on it.
To solve the mentioned problem, we have two ways:
Option A: Create a copy of the drawing layer
- We place the drawing that we want to be in the gap between units outside the canvas. This drawing will be, for example, in the 1 layer.
- We duplicate layer 1. To do this we will select it and drag it to the lower icon of Duplicate layer, creating the Layer 1 copy.
- Now selecting Layer 1 copy, press Ctrl+A.
- While still in said layer, we press Suppress.
- Now we click on the drawing that is outside the canvas and that we cannot see, and we drag it to the opposite side of the canvas. It is important that it is centered at the same height, so that, when squaring the rapport from the side, it remains centered. For this we press Shift at the same time that we move it.
To be able to do all this, the upper box of Automatic selection.
Option B: Use of coordinates
- With the layer grouped (we have combined the previously visible layers), we adjust the size of the image to put one that is easier for us to handle. For example 5000 x 5000 px. For this we put: Image> Image size.
- Now we click on Filter> Other> Offset> 2500 horizontal 2500 vertical> Flip. In this way we can fill in the gaps with more drawings easily.
Arming the pattern
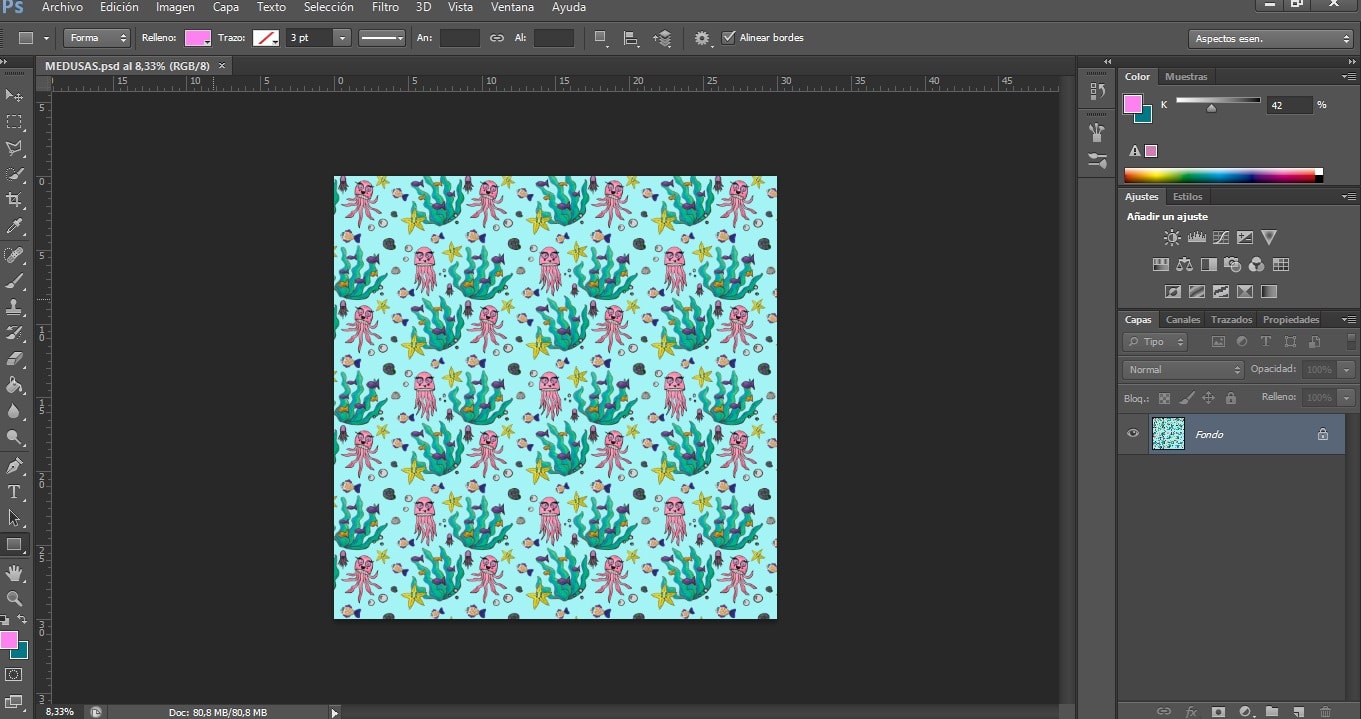
Once all the gaps in the basic unit have been filled in, we will proceed to build the pattern. We will follow the following steps:
- We combine the visible layers of the rapport that we have created and converted it to Inteligent object.
- We create a new document the size we want (taking into account what we are going to print our pattern on).
- We select all our rapport. Edit> Copy.
- Edit> Paste in the new document.
- We adjust the size of the rapport.
- To have the same size of the rapport and repeat it, we are doubling it. To do this, we select its layer and drag it down, to Duplicate layer. And we have already assembled our pattern.
In this case, we have made a pattern in the form of a grid, which is the simplest, but there are a multitude of forms.
Types of patterns according to the shape
- In form of Grid.
- In form of brick.
- With drawings on overlap.
- Simple (with many gaps).
- Complex (very ornate).
- Macroscopic (with large drawings).
- Microscopic.
- In form of fan.
- Without foot. In this pattern the drawings have no foot, that is, if we rotate it it works just as well. The use of it will allow us that, for example in textile design, the seams look good, whatever we put the pattern. It is more difficult to square the seams in a foot pattern, where the images must be well centered.
- And a long etcetera.
What are you waiting for to let your imagination run wild creating beautiful patterns?