
In the earlier part of this tutorial, we saw how we could use the combination between two powerful tools of Adobe Photoshop, as are the Brush and Pen, to start inking our pencil drawings obtaining a professional result. For this we used one of the tool options Feather, which allows outlining a marked path of several different possibilities, one of them being to do it with a Brush before preset.
It is important to know how to handle the tools of PhotoshopIt depends on the task we have set ourselves. For example, when it comes to inking and coloring drawings, the drawing and tracing tools are essential for inking, and the gradient, fill, and selection tools are essential for introducing color into the drawing. Let's follow the tutorial de How to ink and color our drawings with Adobe Photoshop (3th part).
Continuing where we left off in the previous part, How to ink and color our drawings with Adobe Photoshop (2th part), we are going to use the part of the learned technique to inking our drawing little by little and with patience, seeking to place the lines where we like the most and making the result of our inking resemble our drawing as much as possible, which at the end of the day is the goal of this tutorial.
I remember how in the past in comics, the figure of the inker was like a hindrance for the cartoonist, who used to take all the credit from the public, which did not realize the importance of inking in the final work. Although it is true that there were inkers capable of destroying the work of the best draftsman (the best example we found in the early 90s with To Milgron, that destroyed every cartoonist who touched him in the series of Marvel) we can also talk about people like Paul neary (which enhances the works of god level draftsmen such as Bryan Hitch or Alan Davis, which the latter required by contract for his works) or Mike de carlo (comic artist since the late 70s, who has inked mostly series of DC comics, doing it with a personality and style that made his style associated with the image of the publisher).
Now the current technology allows a type of inking more in line with the drawing of the draftsman, losing the version made by the inker of it, which in many cases is good and another means a loss of quality of the drawing. That is why learning to ink and color our own drawings is so important, since we will have full control of our work and we will also be able to participate in other people's projects. Let's continue with the tutorial where we left it.

Defining the Brush
As you go inking you will realize that the thickness of the brush is not the most suitable for many areas, for example where the line of the drawing is enlarged. You will also realize that some brushes offer you a finish and others a totally different one. In order to gain control of the tool, I recommend that you try the brushes that you like the most and then save the ones you like the most. I will leave you a downloadable file with various types of brushes among other things.
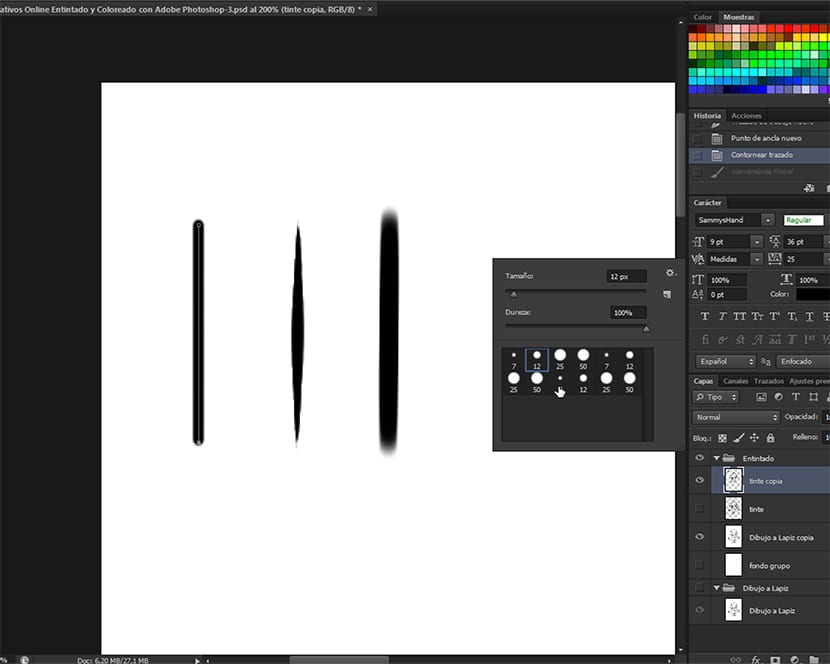
The brush and thickness that you leave selected will be the one that applies Photoshop to the route you have made, so you must choose well before choosing one or the other. In the pack of brushes that you will find in the downloadable file at the end of this line of Tutorials You will find 3 types of brushes with which I have made the inking of this drawing, one with the straight ends, another thin at the tips and thick in the center and a last with the blurred tips. These different brushes will be the ones we need to be able to ink our drawing. The ones we need to color I will comment on them later.
Inking
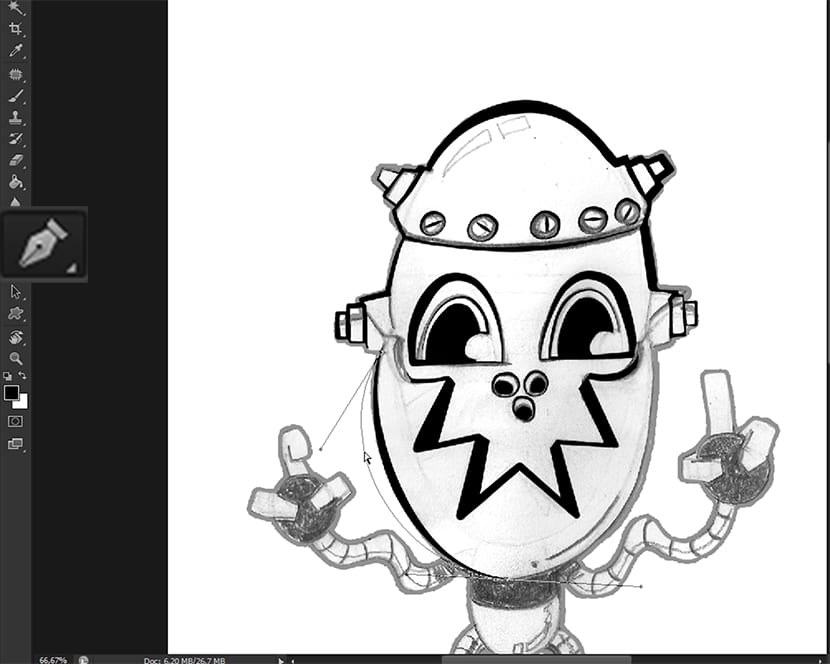
Once we start ink using the tools Brush and Pen, we will find several peculiarities in terms of the ways of working with the different shapes and brushes, most of which are adaptable to our style of work.
The use of different brushes will always be defined by the geometric shape that we are drawing. The brush Thin-Thick Line It is particularly useful for spicing up your drawing by applying it to curves and circular shapes. The brush Straight line It is very useful to find the definition and when we want the line to have the same size on all sides, for example to draw polygon objects. Brushes Blurred Line We will use them in a more creative way, achieving finishes and decomposed forms.
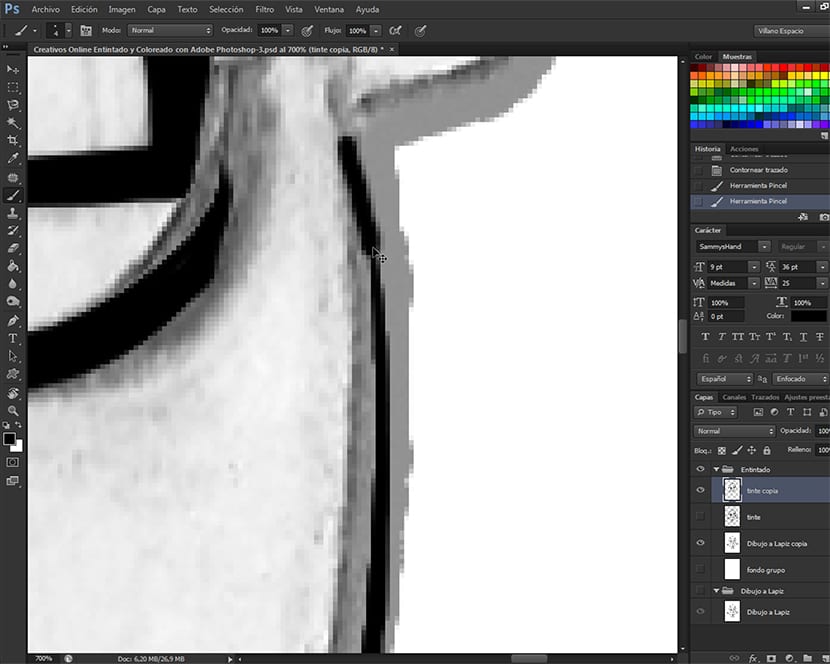
For the finishes left by brushes Thin-Thick Line, we will lower the value of the brush size to half minus one, always rounding down, thus being able to guide those lines to the end with the desired thickness.
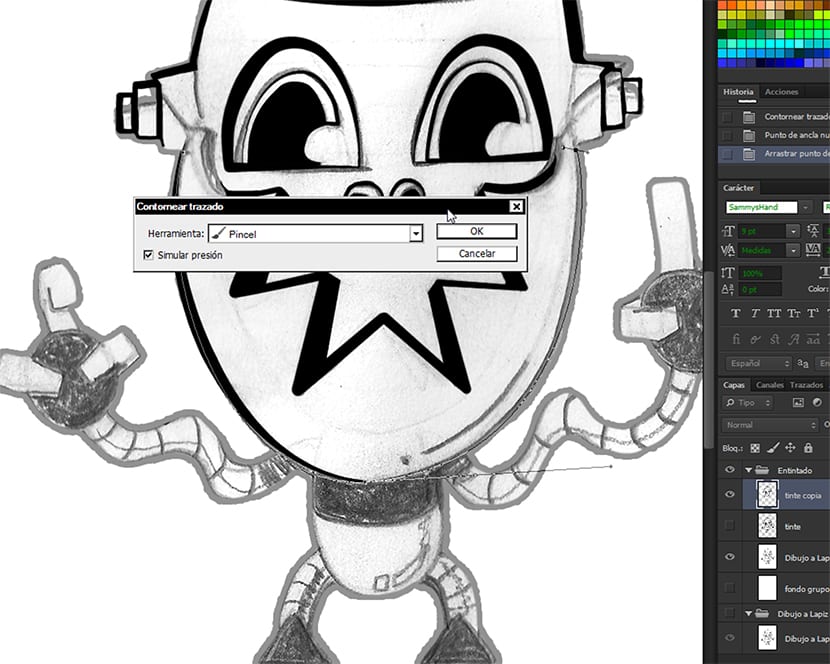
The tool Feather it is easy to operate if you have some experience with vector drawing, and gives a lot of control over the stroke to be made. If we want a handle we only have to set a point and rotate the mouse to obtain it, in the same way if we want a static point, we only have to click without moving the mouse. The handlers will help us guide the line of the route to the place that we like the most. We can also manipulate the line, leaving the letter pressed Ctrl and thus accessing a tool for editing the path.
In the next tutorial We will finish the drawing and start working with the channel selections.