
We continue with the tutorial of How to ink and color our drawings with Adobe Photoshop in its sixth part, where we will begin to color the drawing of the robot that we have used to develop this tutorial, and that we will find at the end of the last part that composes it, in case we want to do it with the same elements as me, which I recommend when making the teaching / learning experience that I propose more enriching and orderly. Adobe Photoshop has several tools for color y shade our images, and in this tutorial We will apply several of them in order to complete the technique that I propose of inking and coloring in the most complete way possible, giving you several options, with the idea that you keep the one that best suits your needs. Let's go to hell.

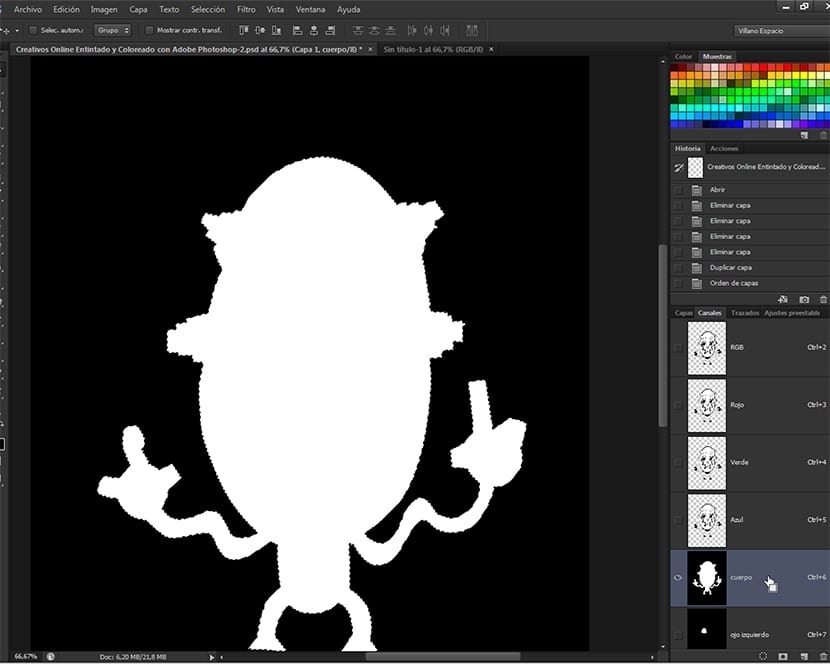
If in the tutorial previous,How to ink and color our drawings with Adobe Photoshop (part 5), explained the use that we were going to make of the channels and how to make channel selections, when separating the different elements to be colored within our example illustration and then making and naming them, now we are going to start color to our favorite robot.
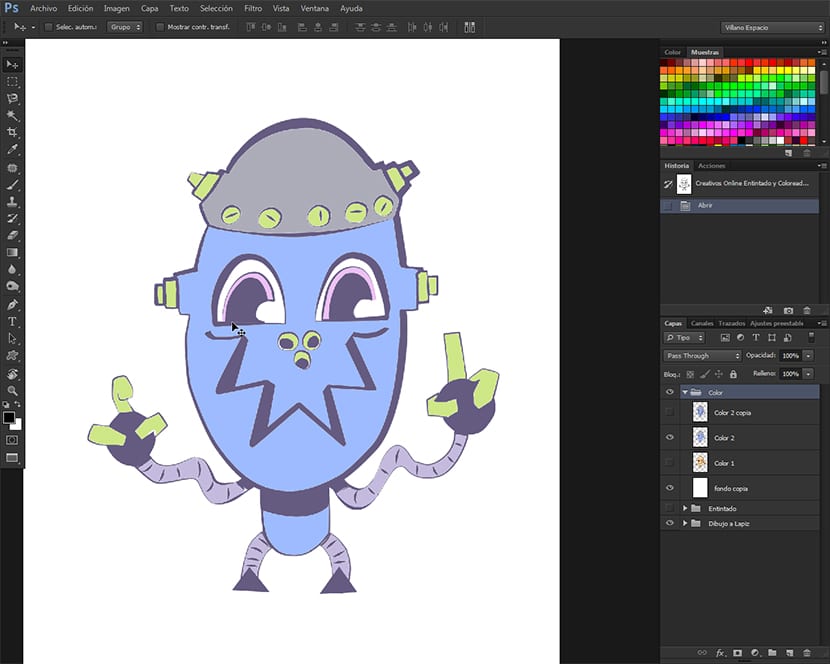
Starting to give color
To begin with, we have to do Ctrl + Left click in any of the thumbnails of the channels of the Channel palette that contain the different selections we made of the elements to be color. I have chosen the whole body and I am willing to use it to color it a range of reds and browns, with a touch of orange. I will color and then shadeHowever, it can also be colored first and then shaded, it does not matter in this part of the process.
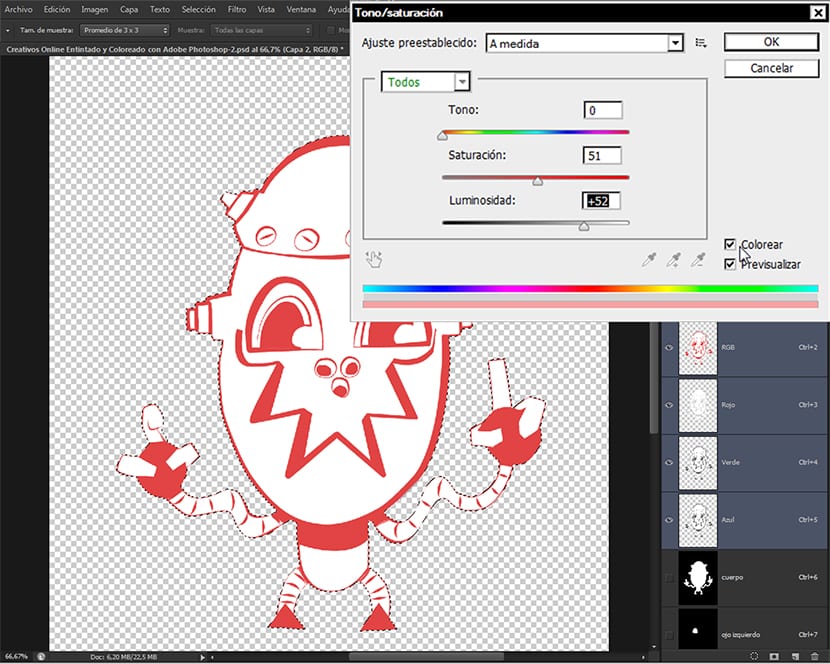
Hue / Saturation
We enter the route Image-Adjustments-Hue / Saturation, with the channel The Body which is the one that contains the selection that we are going to treat, and we begin to add the color and the amount of color that we want. I recommend that we play around with the different values offered by the Tool menu, until we more or less control it.

To give color you have to leave the box pressed Color. Then we are choosing the colors for the different selections, channel by channel, until we have managed to apply the desired color and tone to all the elements of the drawing, which we have previously separated by channels.

I recommend for this technique, trying different colors, with different ranges, until we find the one we like. To do this, when we have the drawing inked, filled with white and ready to be colored, we just have to duplicate that layer several times so we can rehearse at will.
Coloring filling
Another way to color with Adobe Photoshop, is using the tool Fill, which is on the route Edit- Fill, or in the keyboard shortcut Shift + F5. This tool fills us with the color that we choose the selection that we have made at that moment, starting from the colors Front and Back. Although the previous coloring option is faster and gives a better finish to my liking, with this technique we will have a greater interaction with the Layers Palette. Both with one or another technique, we can work with ranges of colors downloaded directly from Adobe Kuler, which is the online application of Adobe that generates ranges of color, and that is the perfect way that all our design fits. To start coloring, we just have to create an empty layer in the color folder, in such a way that the first is left and then start choosing the channel selections and coloring it, in such a way that we work first the ones that are more in the background and then let's go up. We just have to load the colors that we want to use in the swatches palette and then choose them as we use them. To start filling, press Shift + F5 and enter the tool's dialog box. Work on the colors little by little from here.
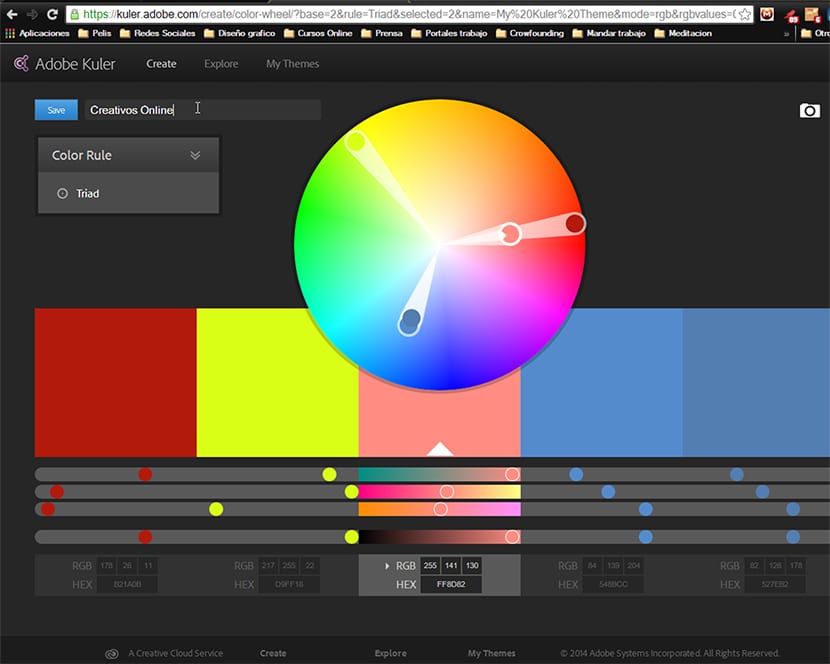
Adobe Kuler Colors
To use the app Adobe Kuler, we just have to enter the page of Adobe Kuler and create a profile for us. Then we will choose a color scheme and save it by giving Save, and then download it from the actions menu in ASE format. Once we have downloaded it, to use it we only have to go to the options menu of the Samples Palette and give the option to load samples.
When uploading, make sure that the type of file we are looking for from the dialog box is that of ASE, which is the one we downloaded. Once loaded, the end of the color list of the Samples Palette. From here we will choose the colors that we will give to our drawing.
In the next and last part of this tutorial, I will explain how to shade your drawing with the channel selections, which will come in handy to give light effects to the drawing by controlling each aspect of each shadow, in addition to leaving you the downloadable file at the end, where apart from Brushes, Color swatch ranges or PSD, I will leave you the images of the tutorial. Do not miss it.