Photoshop is one of the most useful graphic design programs for making realistic photomontages. With some tricks and using different techniques you can create incredible compositions. In this post I am going to reveal some of them. From an example, I'm going to teach you how to make a simple photomontage in Photoshop step by step Do not miss it!
Open photos and select subject

The first thing we are going to do is open the two photographs that will form the photomontage, each in a separate document. You will need a photograph of a crystal glass and picture of a sitting person. Let's go first to the photograph of the girl, we are going to prepare it to add it to the photomontage.
The first thing we have to do is duplicate background layer. You can unlock it and type on your computer command + c and when + v (if you work with Mac) or control + c and control + v (if you work with Window). In this new layer we have created let's select the girl. In this case I have used the select subject tool. Now by clicking on the symbol that appears marked in the upper image, create a layer mask. Check that there are no imperfections, if you see any, remember that you can correct it by going to the layer mask and painting over it with the black brush to cover and with the white brush to discover. You will already have a layer with the girl separated from the background, but in this process we will have lost the shadows. Luckily we can get them back.
How to recover Photoshop shadow
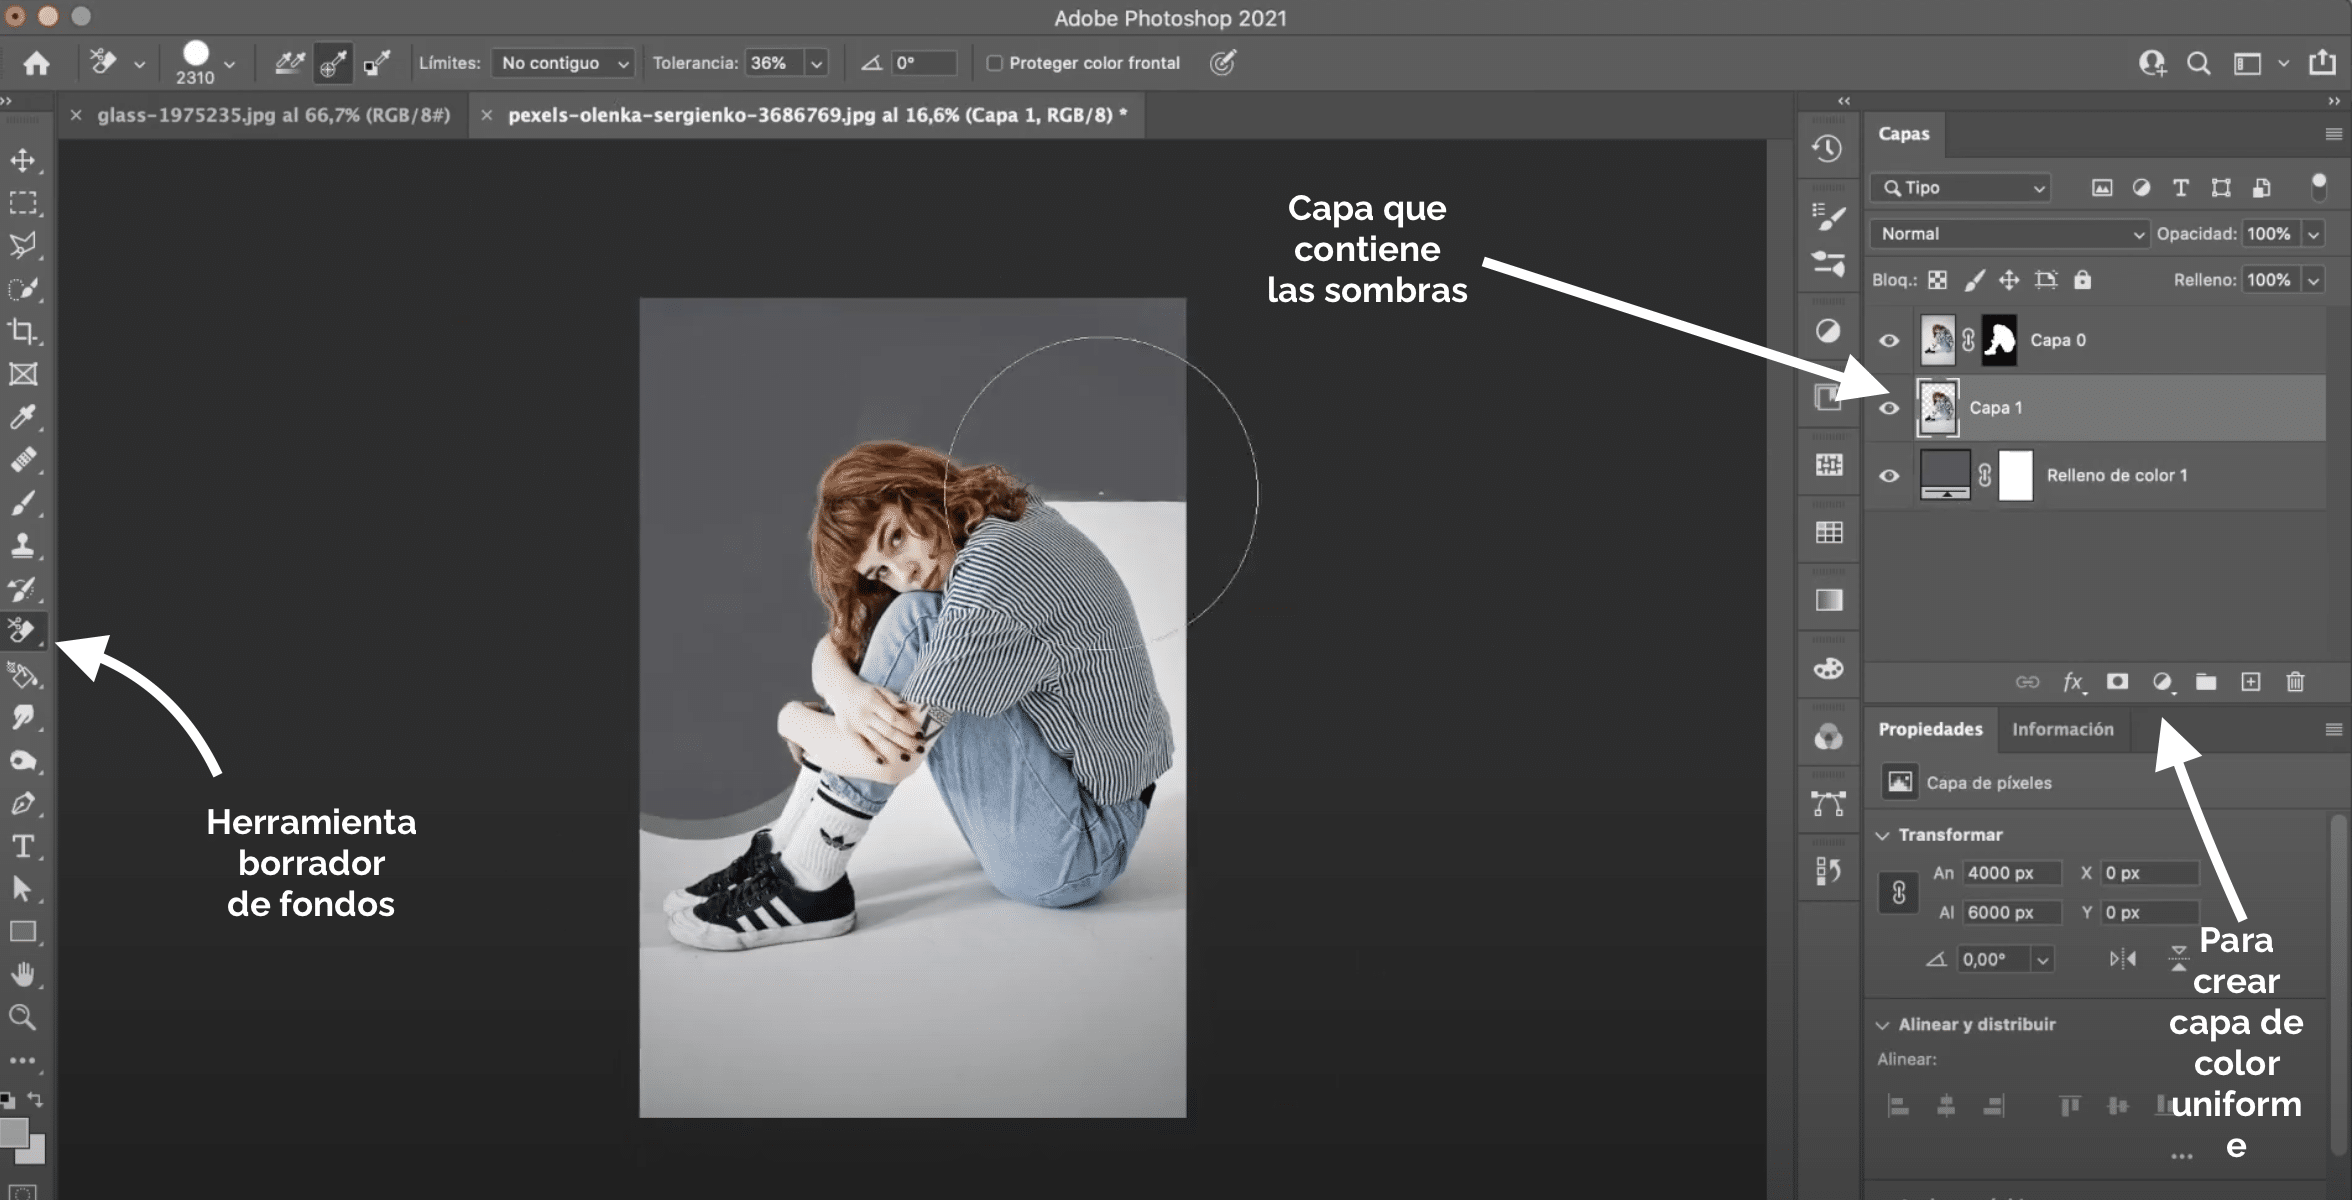
The layer below retains the shadows, so let's get them back from there. Hide the top layer, and create a layer of gray uniform color neutral, place it all the way down.
Now, we will use the fund eraser tool, you can find it in the toolbar if you hold down on the normal eraser tool, and on the layer of the girl that we have not yet edited we will erase the white background image, being very careful not to erase the shadow.
Finally, use the normal eraser, and a diffuse circular tip and playing with opacity further delimits the space near the shading. Finally, go to "image", "settings", "desaturate". You will only have to change blending mode from layer to "Multiply" y erase gray layer With this simple trick we will have recovered the shadows!
Bring the two layers of the subject to the document of the glass
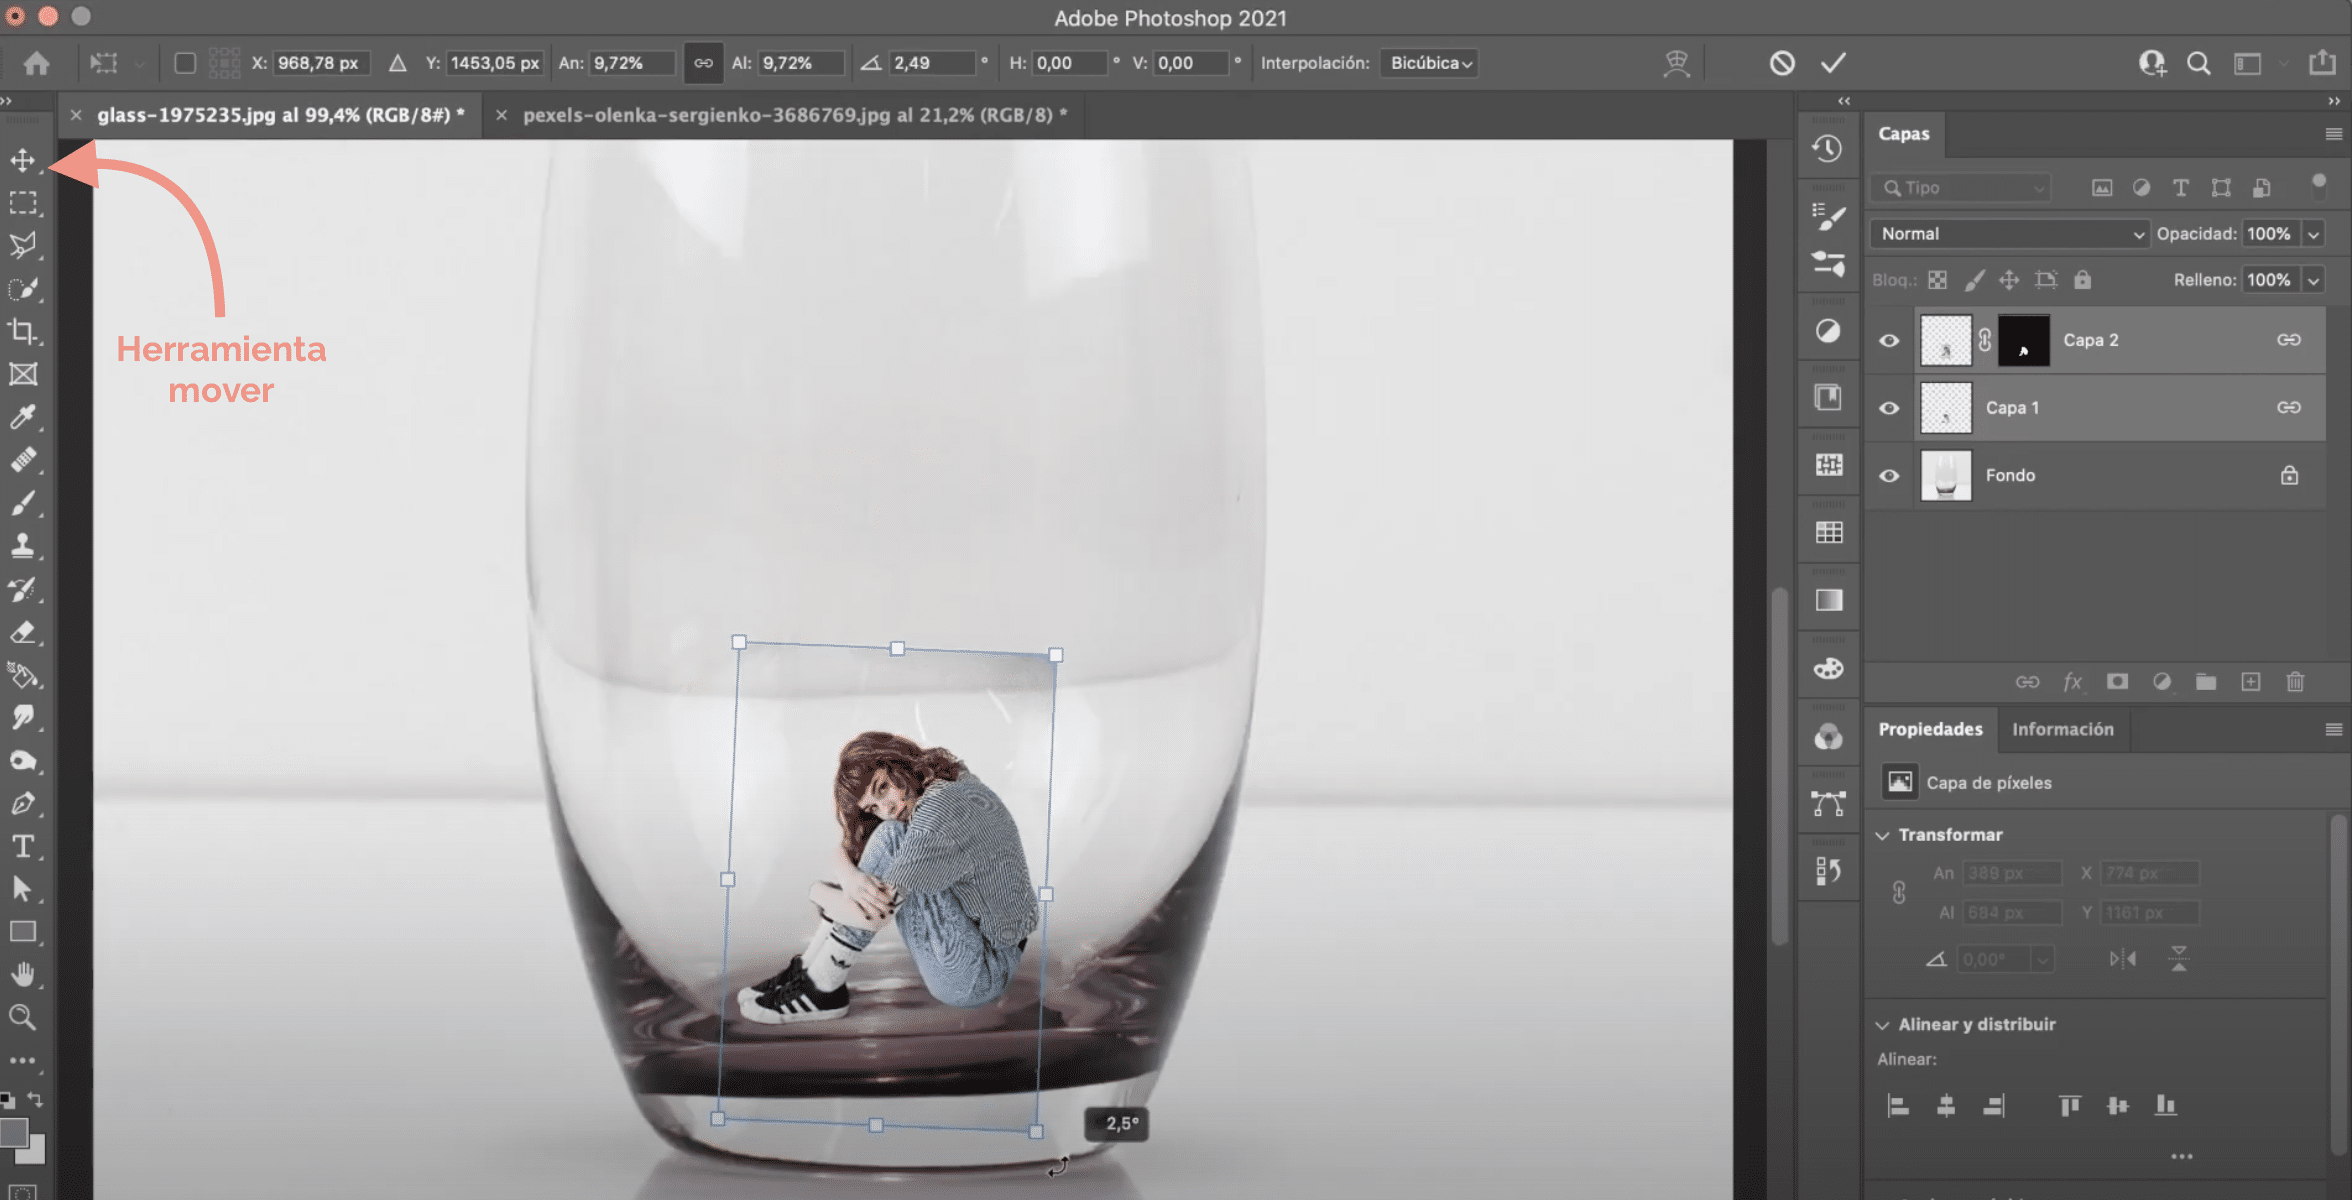
We will select both layers y We will stick them on the document of the glass. You can just select both layers and drag them with the move tool to the other document We are ready to start with the photomontage!
Link the two layers of the girl to be able to handle them more easily. Type on your computer command + t (if you work with Mac) or control + t (if you work with Window) and adapts the size to the space of the glass. Rotate the image a bit so the perspective also matches. Remember to press the option (Mac) or alt (Windows) key so that it does not deform. With eraser removes any edges that may have been visible of the background that we removed in the previous step.
Generate the glass effect in Photoshop

Now we are going to generate that glass effect that makes it appear that the girl is inside the glass. First, ocult the layers of the girl. Now go to the glass layer and select it. You can use the selection tool that you prefer, I recommend that you use the object selection tool or the quick selection tool. If you see that the selection has not been very exact, you can use the quick mask mode to correct the flaws.
Double the selection of the glass
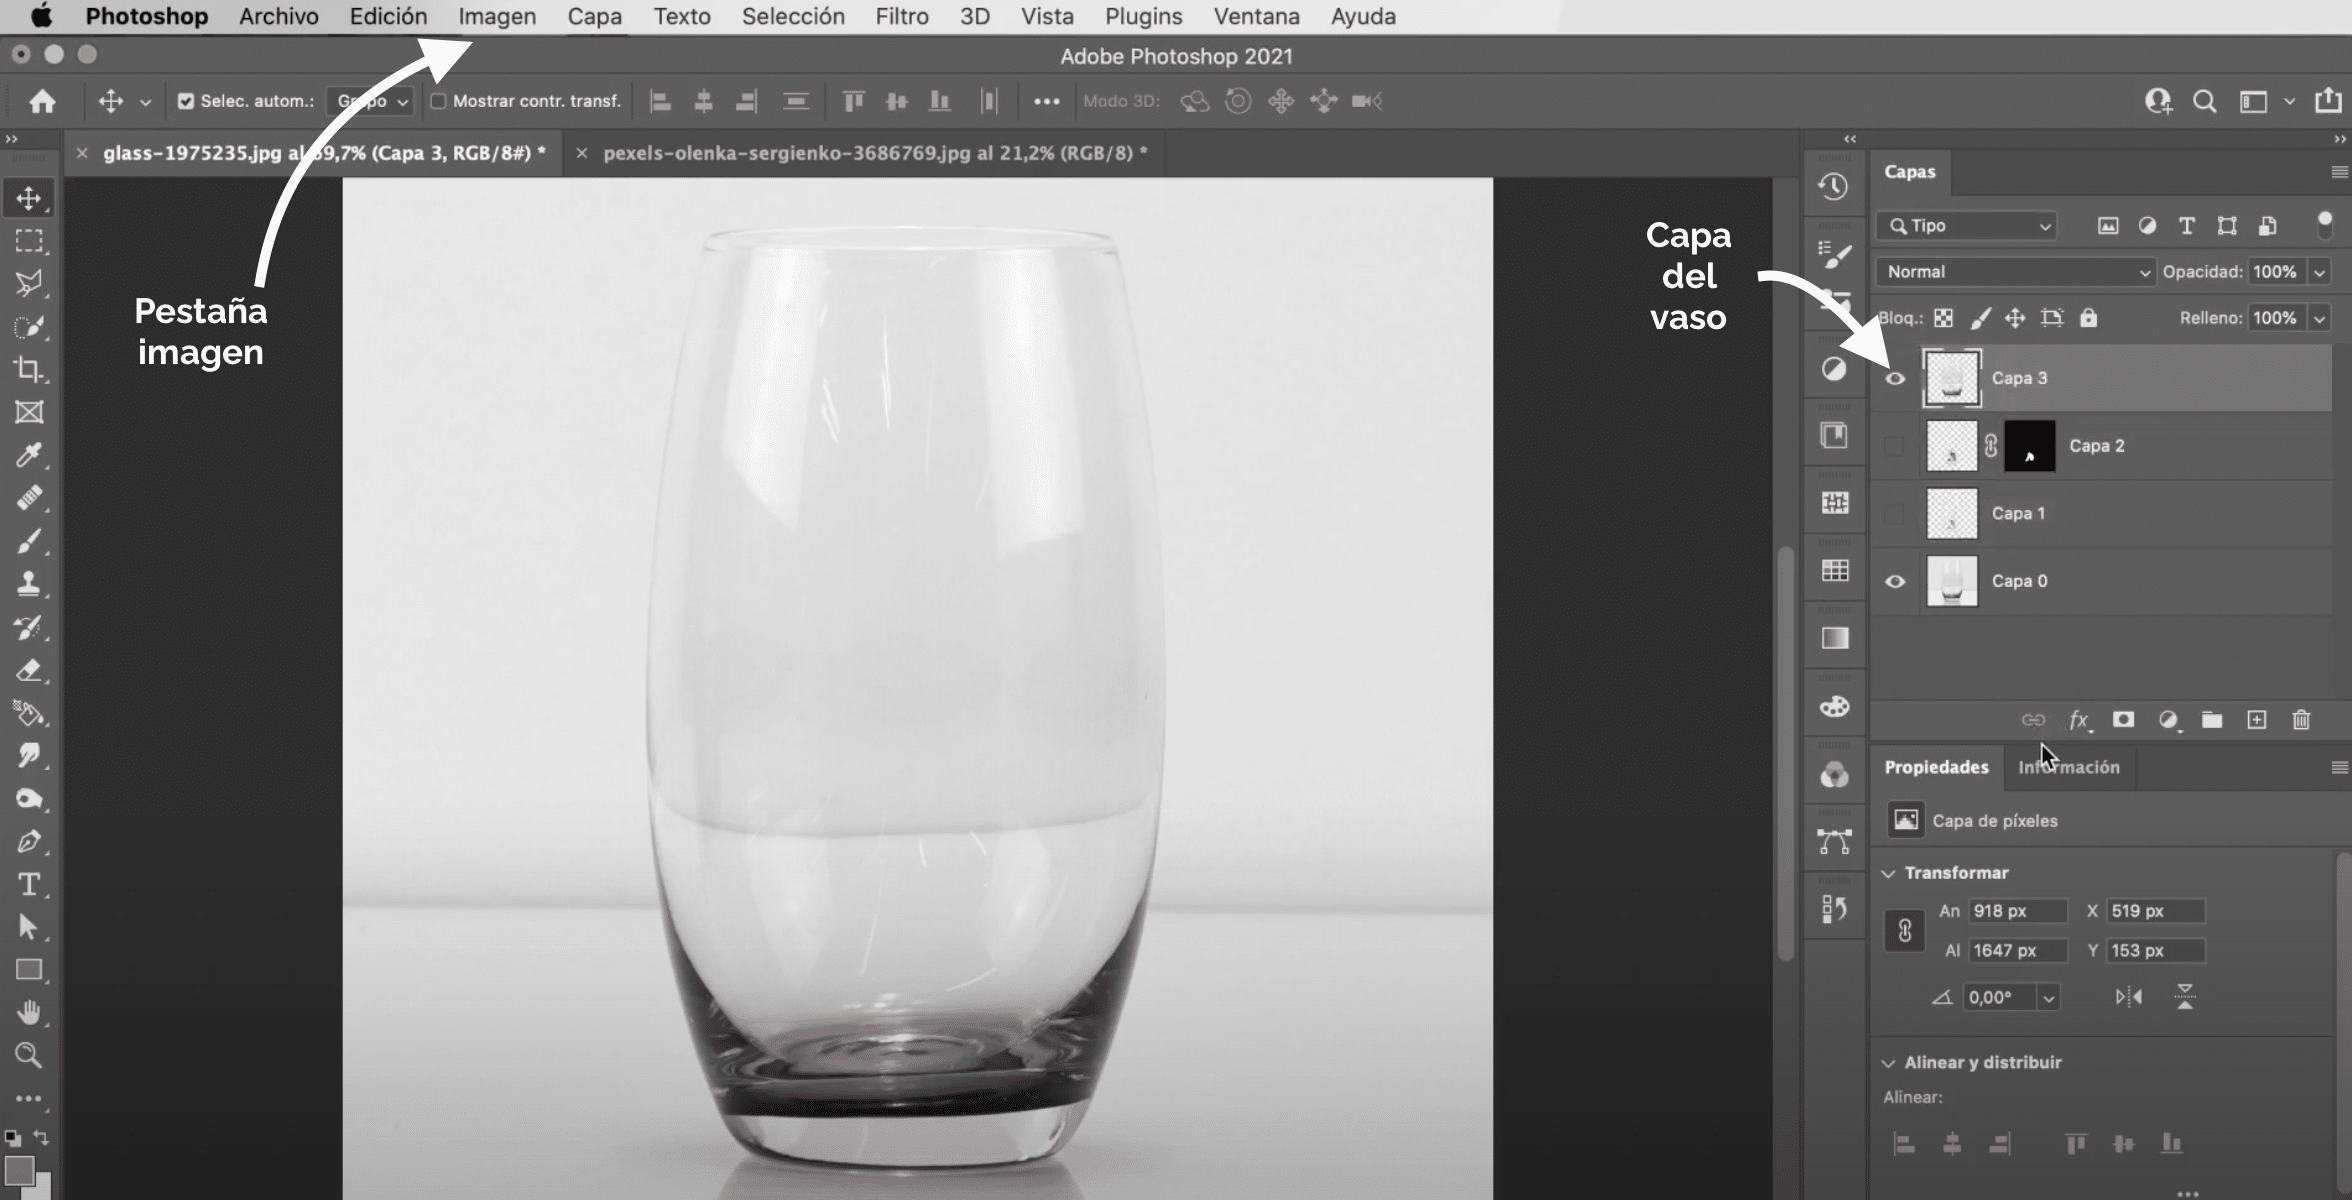
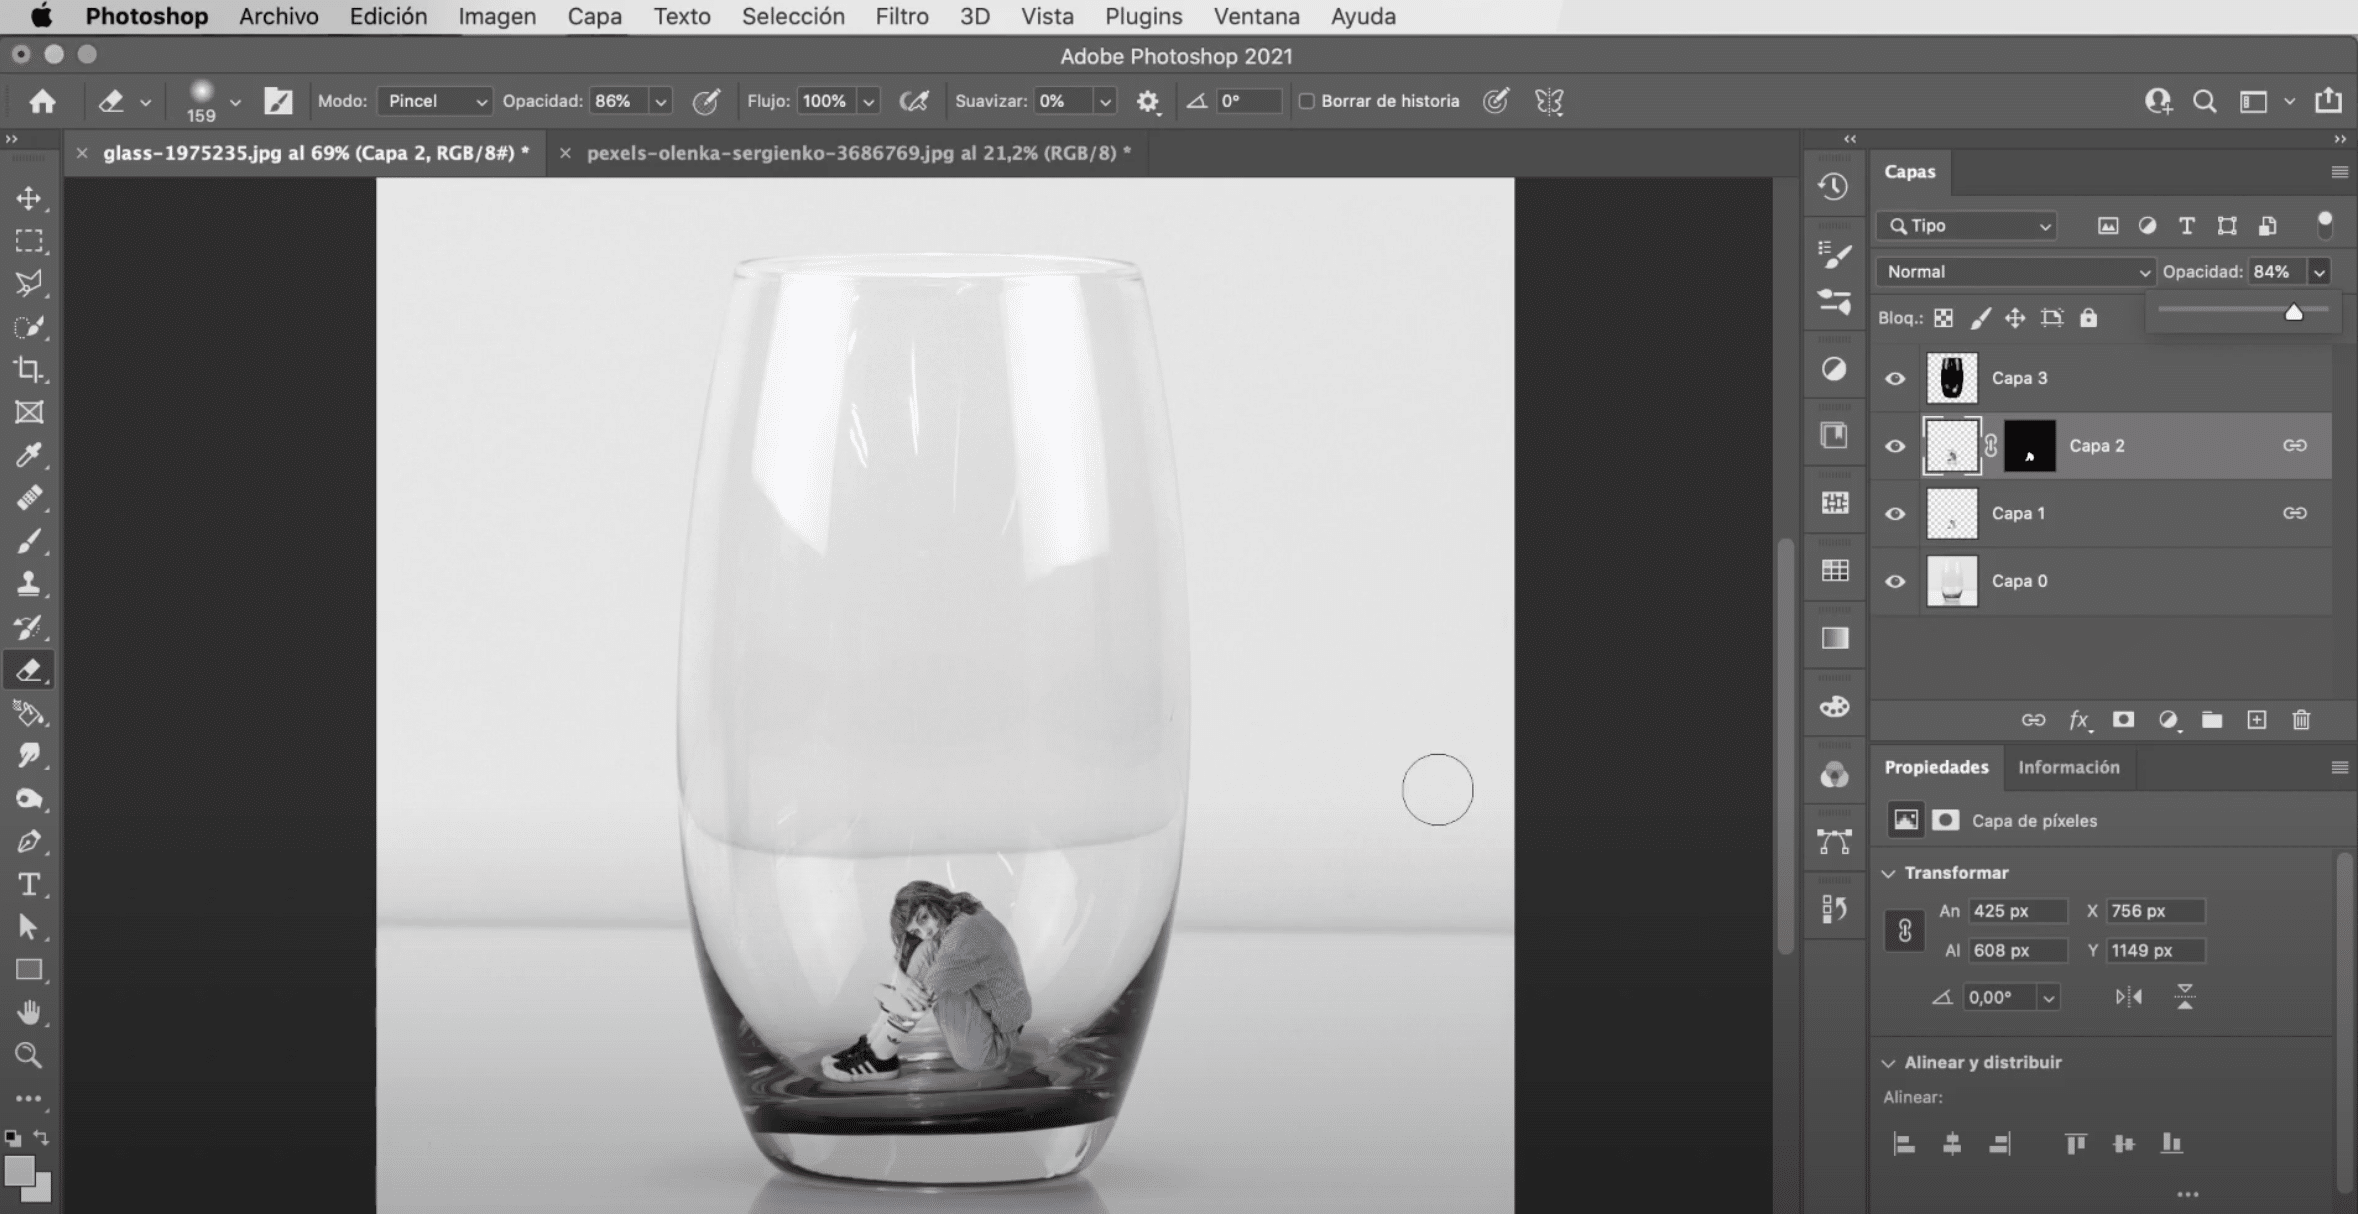
You have to duplicate the selection. To do this, you just have to type command + c and command + v (Mac) or control + c and control + v (Windows) on your computer. Now, place on top the new layer to be generated and leaves all layers visible. Playing with the opacity of this new layer we could start to simulate that glass effect, but I'm going to show you a much more professional way to do it!
Go to "image"> "settings"> "desaturate”. And then go to "Image"> "settings"> "levels”, With the black dropper, you are going to click until you get only the black and white colors left. TOhour change blending mode to "raster" You will have already managed to create that effect! How about?
Latest tricks
Before I finish, let me show you some more tricks that will make your photo montage even more realistic. The glass tends to deform everything that is inside or behind, we can simulate that effect. On the girl's cape go to the tab "filter", "blur", "gaussian blur". In the effect settings window that opens automatically, set a blur to about 0,3 or 0,4, that will suffice.
Now go to the tab «filter», «distort», «zig Zag", and we are going to move the parameters that appear in the effect settings window to slightly deform the girl.
Another interesting option is to lower the opacity of the girl's layer a bit. so it doesn't have those intense colors. If there is a very drastic change in tone between the two photos, you can fix it. I leave you here linked a tutorial in which I explain a very simple trick to match the tone of two photos.
spectacular
Thank you