
At tutorial Previously, we began to organize the folder of photos with which we were working (a folder of photos of a job for a client, of photos of her dog Lenny), and we had renamed, straightened the ones that needed to be straightened, and tagged the ones we like the most or the ones we think need a touch up to be perfect.
In this part of the tutorial, we are going to begin to develop the part of working with the Photoshop In addition to Bridge, where we will edit the photos to deliver them to my client so that all the photos have a certain retouch, in order to impress my client. Now I leave you with him Tutorial: Workflow with Adobe Bridge and Adobe Photoshop (2rd Part).
Today's tutorial aims to finish sorting the photos into Adobe Bridge by folders, after evaluating the treatment that is going to be given in the editing program according to your needs and placing the photos in different folders, differentiating them from each other according to the treatment that we are going to give to each group of photos, and then create one or some actions en Photoshop to help us edit several groups of photos in order to speed up the work. In the previous part, in Tutorial: Workflow with Adobe Bridge and Adobe Photoshop (1nd Part), you will find the previous steps to execute this tutorial.
All ordered
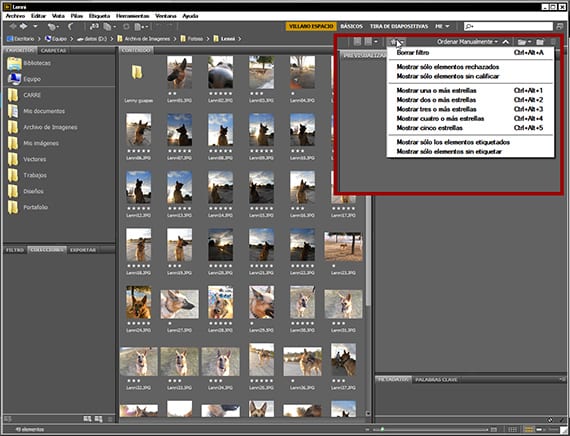
Once everything is ordered and to our liking, we will begin to group photos according to the treatment that we are going to give them. For this we will use the star rating system of Adobe Bridge, and we will make 3 groups, one that we will score with 1 star, another with 3 and a final one with 5. Once scored, we go to the star that is located in the toolbar that is more or less to the right of your interface and we chop. We will get a dialog box with which we can select which photos we want to see according to their score. This is where we will begin to visualize as a whole, what is the treatment that we are going to give to our photos.
Selection of graphic material
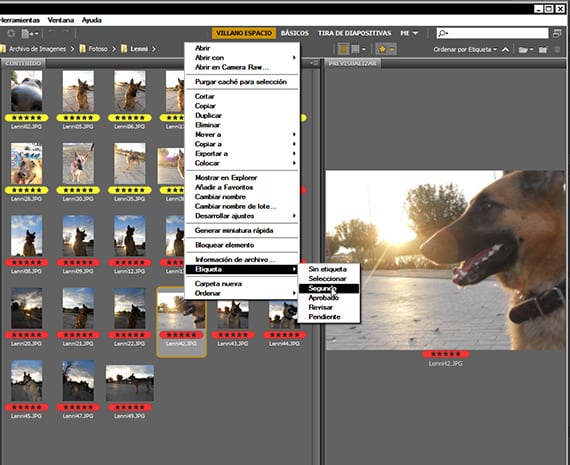
In the end looking at the photos, I have decided to only stick with the ones that have a 5 star rating. It is a fairly heterogeneous group of photos, and I think I will be able to treat them in a couple of different groups. I choose to divide them into a couple of groups, one of photos with a mid-afternoon light and another that has photos that I took against the light of Lenny. I divide them into two groups, one that labels with the red approved label and the other with the yellow second. To enter the tagging options, click on one of the photos once you have selected the ones that belong to the tagging you are going to execute. Once the photos have been differentiated by labels, we create two new folders in the work folder and introduce the labeled photos, each one in its folder according to its label, which indicates the different treatment that we are going to give it. Now looking at the groups of photos, I see that the light is very good, even the backlight, so I have decided that the group of photos with the mid-afternoon light, I will improve the color and the balance of light and shadow somewhat little more, and I will edit the photos against light so that the contrast is more visible.
Editing in Photoshop
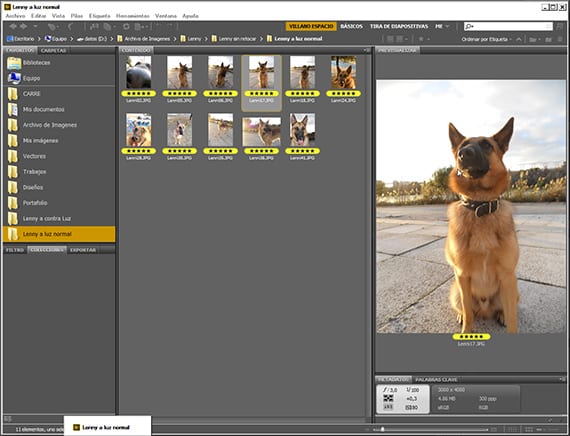
I focus on one of the two groups and start editing by taking one of the photos, usually one of the most normal within the group, and by this I mean one that we can take as an example of the same group. I explain it. As we are going to develop an action to edit all the photos at once, we are going to choose a photo that is one of the most normal within the group, neither the darkest nor the lightest, if not the one with the highest values. intermediate. Once we have chosen the photo, just double clicking on it will open it in Photoshop.
testing bench
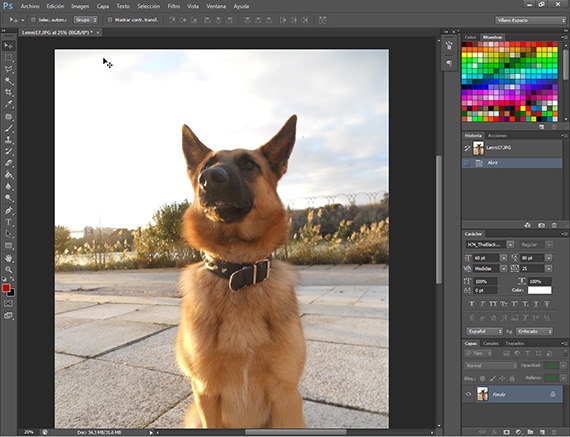
Now is the time to play with him Photoshop, to improvise, to choose the treatments that we are going to give to the photo. I recommend that you have imagination and yet know how to control yourself, since an over-treated photo is worse than a photo that is somewhat weak in color and light. In the previous step, I chose the group of mid-afternoon photos to start with. I chose one of the photos and I have started applying treatments in order to see what is the result I want to obtain within the determination before taken of only improving the light, contrast and colors.
In the next chapter of this tutorial, we will enter fully into the editing of the images and the programming of the images. actions.
More information - Tutorial: Workflow with Adobe Bridge and Adobe Photoshop (1nd Part)
The link to part 1 does not work.
Fixed up. Thanks for the help JoseMart. a greeting