
Design an advertising graphic in Photoshop It is something that today is done continuously due to the great advantages offered by this program of photo retouching par excellence that allows us to do everything as if we were digital magicians. The graphic quality that we achieve will depend on our level with the program and our objective in that graphic. Many times we will look for a simpler design and other times a complex and more elaborate one.
In this post we create a small fictional graphic for Netflix, this chart was previously created as part of a post on how to create effective advertising, in this first post we focus on the theoretical part and now we will focus on the practical part.
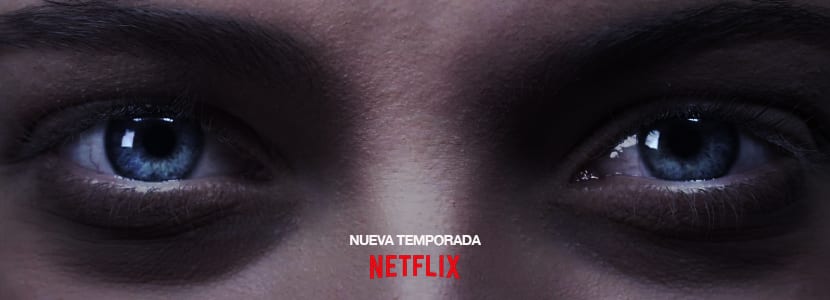
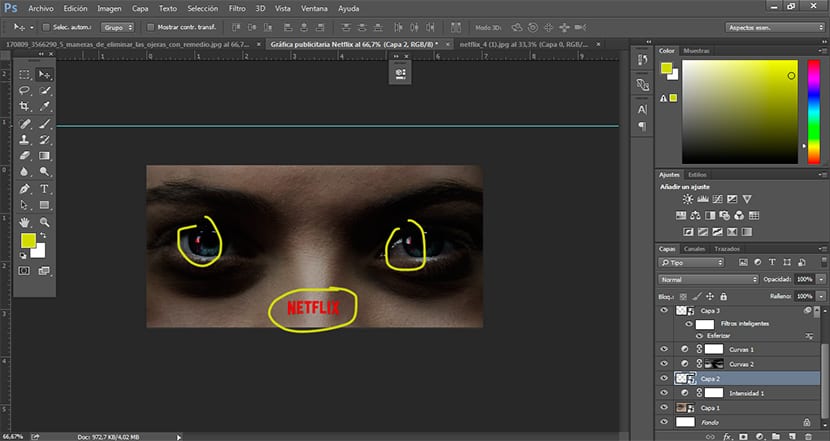
Let create the graph that we can see at the top, as we see the graphic language that we have used for our advertising graphic is the photograph, a close-up (PP) of about eyes with dark circles and a muted aesthetic that simulates a gloomy feeling. Although it seems complicated to do, it is quite easy.
The first thing we have to do is get a picture, we can use one of Internet or directly take the photos ourselves. The ideal in these cases is to use a Internet to make a little digital sketch of what we want to do and how we can do it, with this sketch we will see a approximation for our final idea. A photo shoot always must be planned to do it correctly, the use of sketches by hand or digital material it is always a great help.
- We seekit's a photograph
- We prepare a photographic session (if we want our own material)
- We open our image in Photoshop
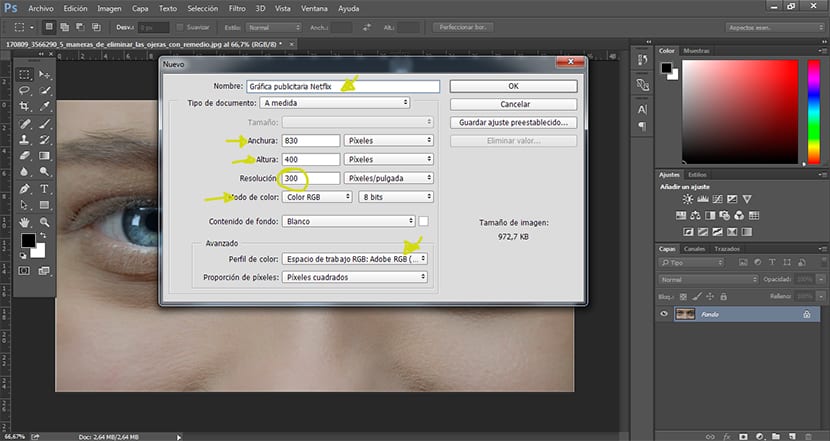
The first thing we have to do in Photoshop es create a new document. In this case we have created a document with certain dimensions but you can put the measurements by other measurements adapted to your idea. The ideal is respect the resolution, color mode (RGB if it is for digital CMYK if it is for printing) and the color profile. We create the document with a name to work in the most orderly way possible and go to the next step.
Before changing the dimensions of our image it is highly advisable turn it into Inteligent object, in this way we avoid that our image lose quality with future adjustments we make to it.
![]()
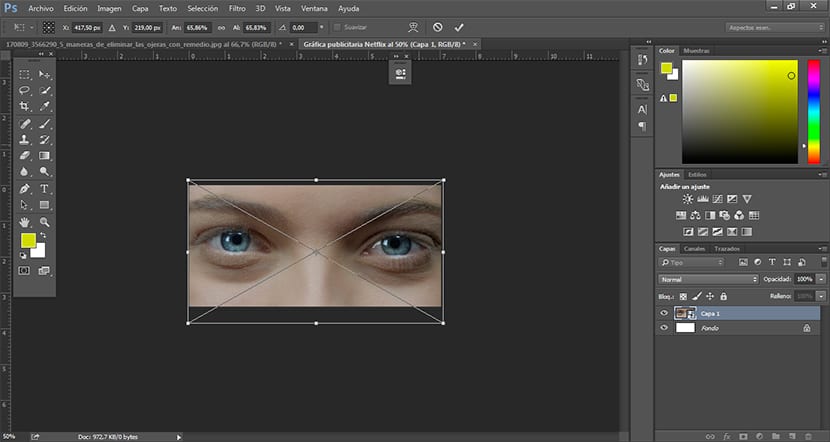
The next thing we have to do is open our image and pass it to the new document. Many times our image does not adapt to the dimensions of the document so we have to size our image with Photoshop. For change dimensions from our image we press the shortcut control + T or go to the upper tab of Photoshop edit + free transformation. Little by little we adjust our image and leave it to our liking.
After having the image adjusted, the next thing we have to do is start with the Photo retouching.
We will play with the following Photoshop tools:
- Curves adjustment layer
- Intensity adjustment layer
- Curves adjustment layer / multiply layer mode
We will learn the following concepts:
- Darken an image modified curves
- Work with adjustment layers
- Apply specific point shadows
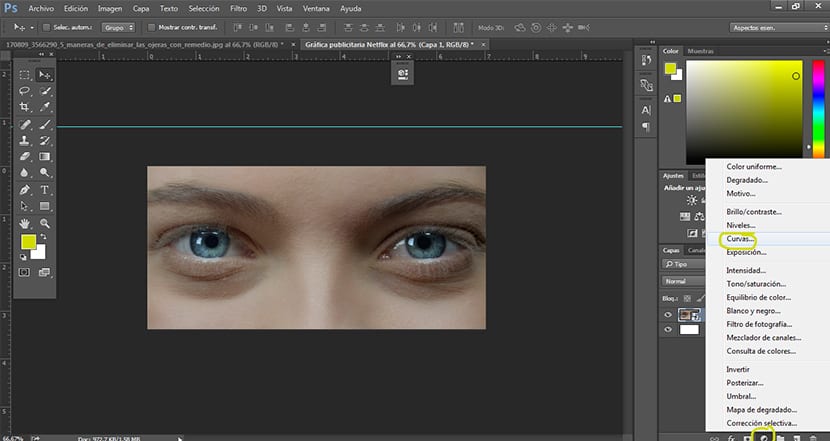
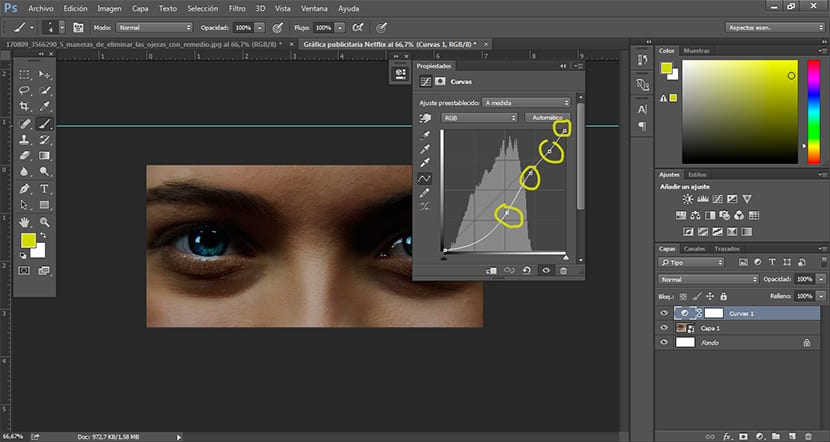
The first thing we will do is create a curves adjustment layer to start darkening our image.
1. Create curves adjustment layer
We press the bottom icon from the layer area and choose the curves option, a new layer will automatically be created on top of our original photo.
We modify the points in the layer adjustment curves while viewing the image to get the touch we are looking for.
2.Intensity adjustment layer
We create a adjustment layer Intensity To lower the color saturation of our image, in this design we are looking to create an image with a duller tone to make it something more gloomy.
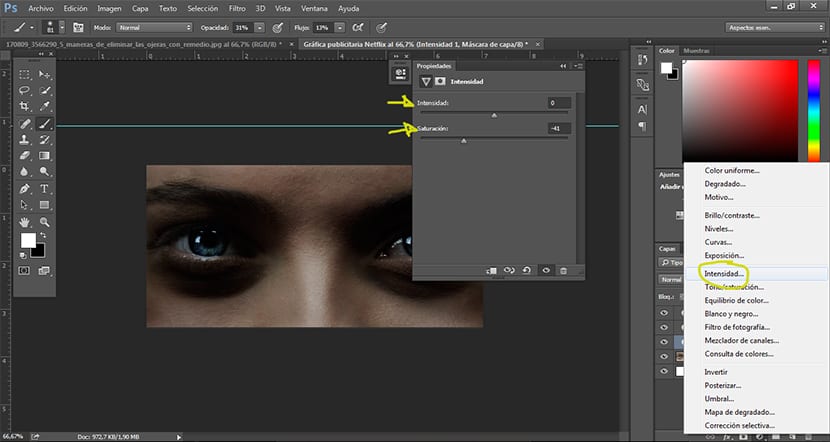
We change the color percentage to our liking, seeking to reflect that objective that we have previously planned. Once we have this we will apply specific shadows.
3-Apply point shadows with a curve adjustment layer multiply mode
We create a normal curves adjustment layer and then in the area of cape style we put the option multiply mode, when we do this our image will become much darker, to avoid this we press the shortcut control + I.
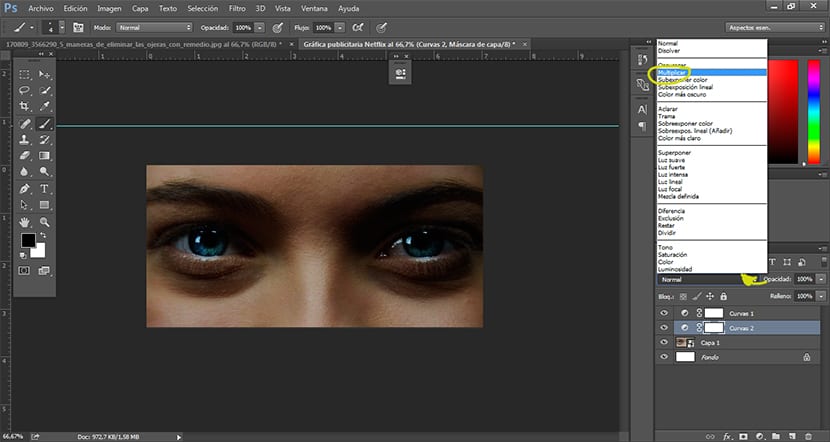
After pressing this shortcut our image will be as it was in the beginning, which has done Photoshop is to leave the invisible effect for later us decide in which areas we want to make the changes.
Now that we have our adjustment layer prepared, the next thing we must do is modify the parameters of our brush to be able to create shadows (dark circles) in the image as realistically as possible. To do this we can see images dark circles in Internet so we can get an idea of what they really are like.
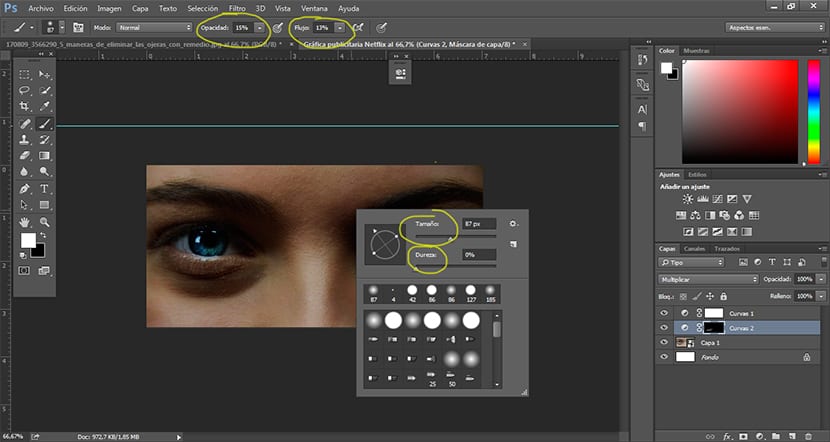
The normal thing is to lower the brush hardness, intensity and strength as much as possible to gradually shade the image and make the result as realistic as possible. If we press the X key CAN invert brush thus getting to erase instead of applying shadows.
Once we have this ready we can move on to the last point of our advertising graphic: apply logo and text. This part is optional depending on what we are looking for, in this case what we did was apply the logo of Netflix next a little his design line.
In this last step we have used the same tools than in the previous steps: transformation, opacity and fill.
More or less quickly but without losing quality and creativity We have created an advertising graphic that meets very well the objectives previously set in the brainstorming phase. Photoshop It is an excellent tool that allows you to do a lot of touch-ups amazing photographic, the secret to controlling it is to use it continuously.
Sorry for the typo in the title of the post, I put advertising instead of advertising. Small error when uploading one of the images.
I hope you like the post!