Would you like to apply your designs to a multitude of products? Do you need to print them and create decorations to promote them but you have a low budget? You are in the right place.
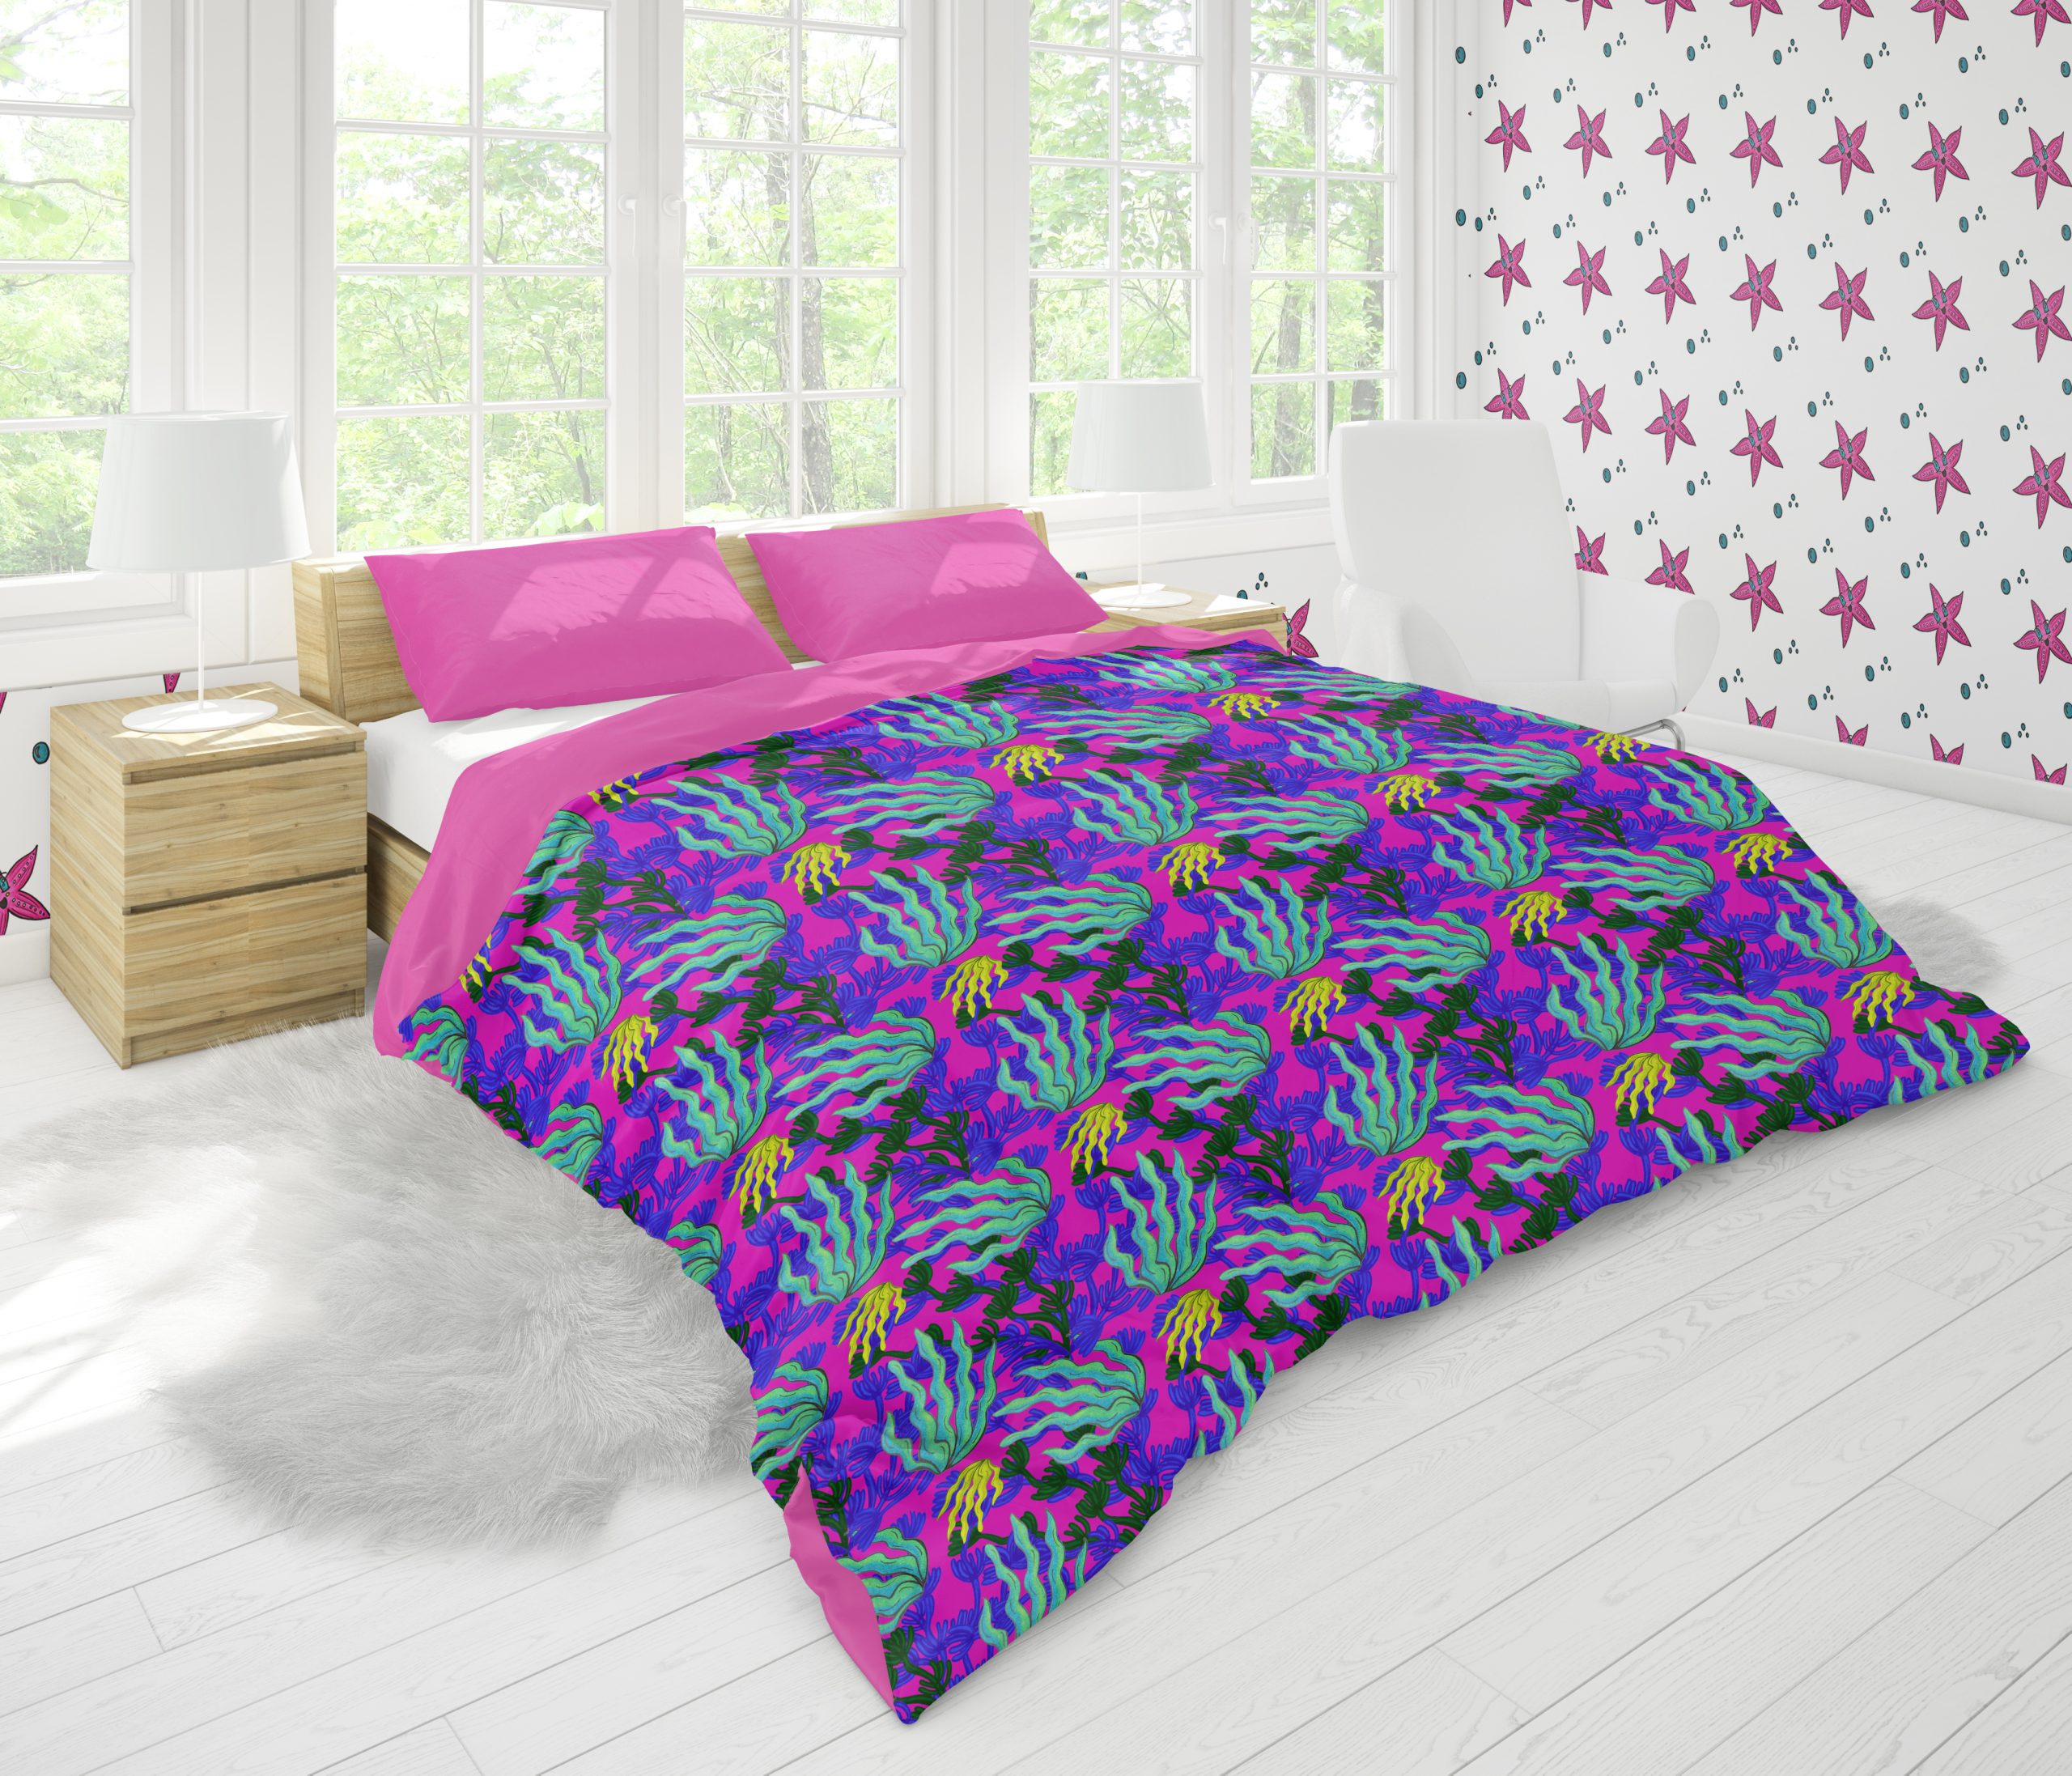
Mockups are photomontages that will allow us to see how our products will be using the design that we want, as well as showing potential clients different options they can count on.
We can use a multitude of types of designs to create a Mockup, from simple drawings to prints or patterns, which will encompass more surface area of the product. So that your design looks good and does not get pixelated when enlarged in the case of a large surface product, I recommend you take a look at my post: How to create a pattern with Photoshop.
There are many mockups on the market that will allow us to make thousands of creations with a single design. From house decorations (being able to change the design of the furniture, the wallpaper, the bedspreads, the carpets, the cushions and a long etcetera), clothing (t-shirts, pants, skirts ...), accessories (backpacks, purses, bags ...), stationery (notebooks, cases ...) and everything we can imagine.
We can also find hundreds of pages with free mockups. In this case it is important that, as we are going to work with Photoshop, we download the appropriate files, which will be those with the .PSD extension. Also, never forget to mention the source of your Mockup, not only to refer to the artist who created it, but to save yourself legal problems when using your Mockup commercially.
First of all, it is recommended that you have your design saved as a Photoshop Smart Object, in order to modify it, as I explained in my previous post.
Steps to follow to use a Mockup
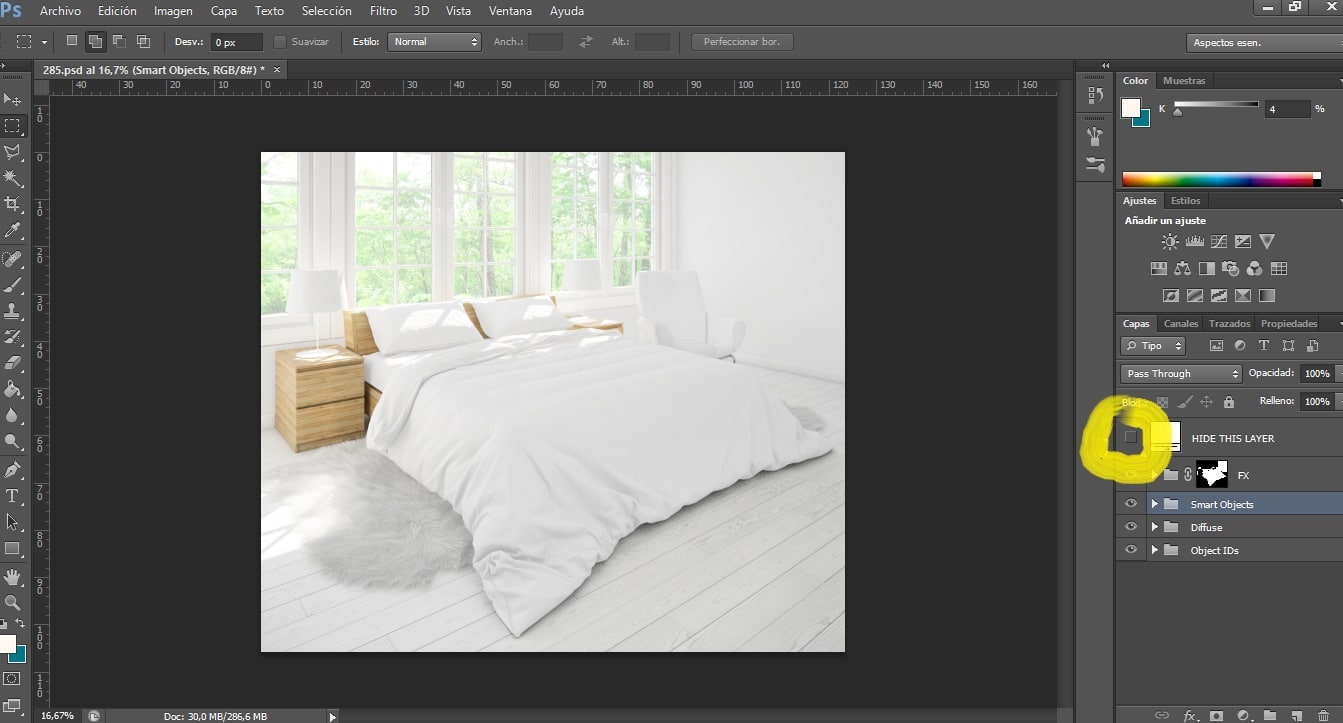
- To start we open the Mockup in Photoshop. We will get a blank image. So that the decoration that we are going to use comes out we have to hide a cape, generally we will be told which one it is with its own title. So we press the eye of the layer and hide it.
- We can see how this document consists of various smart objects, as many as elements can be modified in the decoration. We click on the one we want to modify, opening another window where a blank image will appear.
- It is in this image where we must put our design. Then we press File> Open to open our design. The we will select and we will give Copy and paste on the blank document.
- We adjust our document as we prefer. It is important to see how large the element of the decoration in question is going to be, it is not the same to design a quilt than a cushion. If you use patterns make sure they are the right size. We give to File> Save.
- Now we return to the set. Our design will be placed on your site automatically. If it doesn't look good, we just have to go back to the previous document, modify it and click Save again, and so on until it fits what we want.
- We can also paint areas of our Mockup in color to better match our designs. To do this, instead of putting a design on the blank image, we select a color, the tool of Paint pot and we click on the layer without a background (not on the other, because the tool will not work, we may have to hide it so that the color appears).
- With our design ready, let's File> Save As. If we save it with the Photoshop extension we can modify it later. To use it in social networks, on your website or send it to a potential client, it is recommended that you save it in .JPEG format.

In this easy way we have saved a large budget on photography, decoration, printing, etc.
In the event that you have an order, you must take your design to the printer following their instructions. Keep in mind that they usually use CMYK mode when printing, as I explained in this previous post. You should also take into account the type of file they ask for, generally .PNG or .JPEG, as well as its size.
What are you waiting for to start designing?