
Several items to be repeated throughout a post, no matter how small. An example of this would be, for example, page numbers. Figures located in a very specific place on each sheet, which are repeated uniformly throughout the publication. The skeleton that guides the composition of the text is also repeated, as a template.
One of the main advantages of using InDesign for layout text, is the management of this type of repetitive elements. Thanks to correct use of the master pages, we will save ourselves the task to copy-paste across the pages: we will automate the creation of everything that will be repeated. That's what you'll learn to do by reading this basic tutorial on using master pages in InDesign.
Master Pages in InDesign
We access the Pages panel (Window> Pages).
We double click on the icons of the master page A-Master page. In this way, we can now edit the master page that we have by default empty.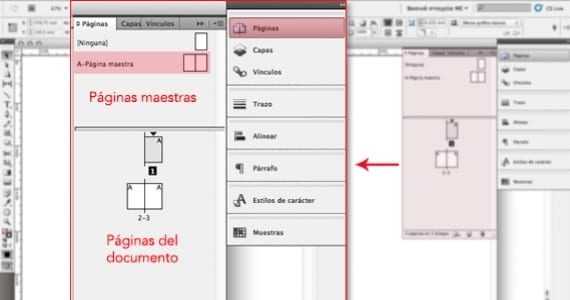
Page numbers
Let's enter the page numbers. To do this, we created a text box in either of the two sheets. Inside the box, we right click and go to Insert special character> Bookmarks> Current page number.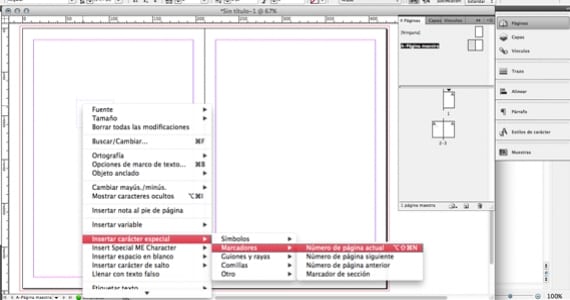
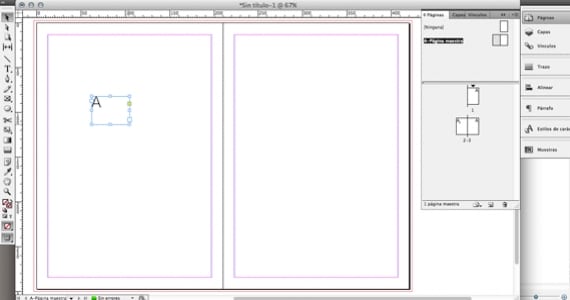
In our text box we will see a letter A. This letter, when push comes to shove, will become the number that corresponds to each sheet.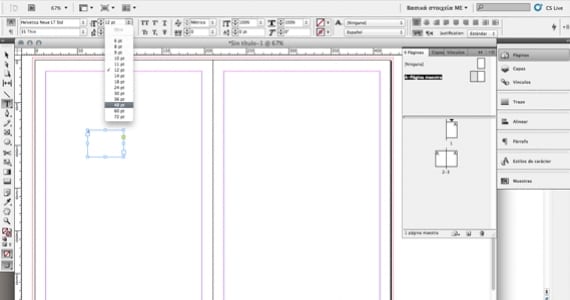
There is something very important that we must not forget: everything is not ready yet. We can (and we must) modify the look of our page number. As if it were any other text, we can choose its font, size, color ... And of course, its position. Once we have adjusted these parameters by which we want, we can see how the page numbers are.
To do this, we double click on the actual pages of our document.
The reticle
The grid is the structure that will ensure the balance and harmony of our design. To create it in InDesign, just go to the Layout> Create guides menu. 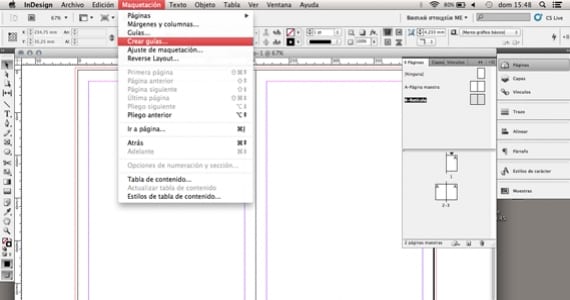
A small dialog box will open that asks us for the desired number of rows and columns of our future grid. In addition, it incorporates the notion of gutter, which is nothing more than the space between each row (or column). We enter the values we want and InDesign, mathematically, calculates the sizes of the sections so that they all keep the same proportion. 
How the master pages work
As you can see, we have two master pages: the A-Master Page and the B-Grid.
A sheet can only be assigned a single master page. What does this mean, in our example? That the sheets that have the master page A assigned (with the page numbers), will not be able to use the grid of the master page B. If we are sure that, in all the sheets that have page numbers, we will also want to have the grid, it is best that we use a single master page for these two elements.
And how can we merge them?
Let's go to the primitive: copy-paste. We select, for example, the grid of master page B; copy it, go to master page A and paste. Next, we delete the master page that has been left empty (B), since we are not going to use it.
How can we apply a master page to an entire spread?
Click on the icon A-Master page: do not release it until you are with your pointer over the edge of the sheet. At that moment, the pages of the sheet will be colored gray, since you will have selected it: now you just have to release. Ready!
And how do we apply a master page to multiple spreads / pages?
First of all, we will select them: we click on an icon and continue repeating this, keeping the Shift key pressed. Now, we take the master page and drop it on our selection of sheets.
How do we remove a master page already applied to a page?
Click on the page icon, drag and drop it in the gray area that surrounds it. Ready!
If you want to continue learning (and in depth) the concept of master pages in InDesign, I recommend you see help guide of the program itself (visible online).
More information - Tips for using color in InDesign, 8 InDesign Tricks That Will Speed Up Your Workflow
What brings you great information, and most interesting, thanks
Hello, sorry, but I have a question when reading your article. How can a master be applied to all odd pages at once in indesign?
It's possible?
Thank you!
Thank you. I can't find a way to make a master page where only some elements change, for example: in a storybook, where the title of each story goes above, but the rest remains.
PS: Harmony is without h, otherwise they are referring to the Greek goddess.